Pages

Sunday, April 30, 2017

Hands2Help Tutorial

I'm thrilled to be a guest blogger over at Sarah's blog Confessions of a Fabric Addict today. In case you don't know, Sarah is the organizer and wizard behind the awesome Hands2Help Charity Quilt Challenge.  

Confessions Of A Fabric Addict

I'm proud to say that this is my fourth year participating and the third time for guest blogging. This is such a wonderful project and know that so many people are helped by this program. For more detailed information on the Challenge and this year's charities, click HERE.

Today, I'm sharing a tutorial (actually two tutorials!) and my system for multi-task sewing. It's kind of like getting two for the price of one today! 😃


So head on over to Sarah's blog to check out how you can be super productive with your quilting.

If you've been to Sarah's blog and are visiting here for the first time, Welcome! I'd love for you to grab your favorite beverage, sit back, relax, and enjoy my blog. I always try to respond to comments, so please be sure to leave an e-mail address.

Have a great week and thanks for all YOU do!

Monday, April 24, 2017

Design Wall Monday

I am still working on a couple of things, Stars Over Texas in particular, but I put them on the back burner to finish up a few other projects. In reality, this is what I'm saying is on my design wall:


I need to get these two quilts trimmed and bound this week! I don't mind binding. I actually like it; but there have been deadlines to meet, places to go, grandkids to entertain, etc. and these have just gotten pushed to the side.

Do you see the round quilt in the background? That's my Modern Quilt Guild Fabric Challenge project. I submitted it yesterday and am very happy with it.

I blogged about this yesterday, and you can read about it HERE. In the meantime, here are a few pictures.


What's on your design wall today?

Check out Judy L's Patchwork Times

and

Sunday, April 23, 2017

Thank you Elias Howe!

I finished my Modern Quilt Guild 2017 Fabric Challenge quilt!

I am proud to show you:


Thank you Elias Howe!


The challenge requirements were to use the Riley Blake Creative Rockstar collection and confetti solids. I loved the fabrics as soon as I saw them and started sketching ideas right away. After I had three or four sketches, I set everything aside and let them sink in.

After a couple of weeks, I looked at the sketches and decided that I didn't love any of them and realized that I needed to go back to square one. It was actually a relief to do that because I felt like I was trying to force myself to use one of the sketches and get started. I've finally learned that when I put off starting a project, I need to understand that has happened for a reason and I need to take a step back and relax. I set it aside for a while and and revisit it with a clear and open mind. I may end up doing exactly what I had planned, but more often than not, I start from scratch and make something completely different. That's what happened with this project.

I decided to think about the fabric line in a new light - it's name. What constitutes a rockstar - MY creative rockstar?

It didn't take long for me to realize that a sewing machine is my tool to creativity and artistry. I quickly sketched a sewing machine and then created radiating lines from it. Yep! That's what I wanted/needed to do.

This may not be modern in the true sense of the word, but it works for me and I didn't want to force anything else into the quilt. In my mind, the 66 simple and colorful radials come together in the center of the quilt and showcase the center of my creative world - my sewing machine.  And because of that, I have Elias Howe to thank. 

Jack usually helps name my quilts and this one was no different. Even with just the sketch, he began thinking of names for me to consider. We tossed around a few and none of them really wowed us, but since the quilt hadn't even been constructed yet, we weren't too concerned.

The day that I started putting wedges on the board to determine placement, we started with the name discussion again. Again, nothing was popping out at us so I went to make lunch. Right after we sat down, I laughed and said, "Thanks Elias Howe!" Jack looked at me and said that he was thinking the exact same thing. How could we not use that name or some derivative of it?!?


Can you see the thread tail going off to the left in the picture below? It's just hanging loose from the needle. Perhaps I should have taken a picture of all the threads hanging off of me. 😄 


In this picture, the thread is hanging straight down. If you look closely, you can see how I have it going through the needle.


Gee, this picture made me realize that I didn't quilt the center circle! DUHHHH I wasn't sure if I wanted to and then I completely forgot about doing it.

Here's a picture of the back. I even like that.


Check out the bottom left edge - in the aqua. Can you see the little bit of painter's tape sticking out? hahahah  I guess I should have been more careful.

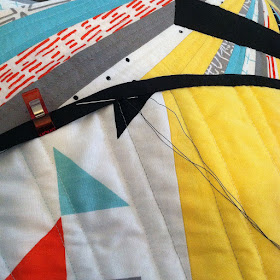
Here are some close ups of the quilting - front and then back. I basically just echo quilted 1/4" away from the wedge seam lines and then outlined the sewing machine applique.


I changed thread color in both the top and bobbin to match the wedge color I was quilting. I like how that looks on the back.

When I was getting ready to take pictures, I really thought I wanted to hang the quilt on the doors of the back building. It was a good plan, but I think the white cross bars of the doors are distracting. Even if I cropped them more, it just didn't look right. I guess I'll try it with another quilt. Of course I'll probably want to clean the stain on the bottom left before I do that though.


Here are some quilt stats:

Size: 42" diameter

Wedges: 66 - 20" long, 2" at widest part down to 1/2" in center

Fabric: Riley Blake Creative Rockstar Fat Quarter Collection and Confetti Solids (Black, Gray, Yellow, and Aqua)

Thread: Superior Threads Sew Fine! #50 - Black (#411 - Black), White (#451 - Blizzard), Gray (#408 - Silver), Yellow (#420 - Daffodil), Aqua (#470 - Sky), and Red (#413 - Scarlet) 

Batting: Hobbs 80/20 cotton/poly blend

Saturday, April 22, 2017

Weekend Progress

I try to set quilting goals, but that doesn't always work for me. For a long time, and still so today, my goals are often too lofty and then I find myself disappointed and frustrated that I didn't get everything accomplished. So, I've worked really hard this year in setting realistic goals; and so far, I'm having pretty good success with that.

On Monday, I posted this picture of my Modern Quilt Guild Fabric Challenge piece.


I am thrilled that I had time yesterday to complete the applique and get it all quilted. I didn't get a picture of the applique, but I did get one while I was quilting.


I even got the binding started.


I like this quilt and am looking forward to getting it finished. I have to find a fun place to take some pictures, but doubt that will happen for a few days. In the mean time, I'll just take some boring pictures here and share them.

I hope your weekend is productive; but even if it's not, I hope you have fun doing whatever you do. 😍 

Monday, April 17, 2017

Freedom Rings is a Finalist!

The finalists have been announced and Freedom Rings was chosen as one of the top ten finalist for the American Honor Challenge by Blank Quilting! Yippee!


It's packed up and on it's way for the final voting.


The winner of the American Honor Popular Vote is Paul Fortenberry, who has only been quilting for a year and a half. WOW! Congratulations Paul and all the other finalists.

Design Wall Monday

I'm working on another challenge quilt, this time for the Modern Quilt Guild 2017 Fabric Challenge. We are using Riley Blake's Creative Rockstar Collection and you can add any Riley Blake Confetti Cotton Solids. 

The challenge rules are easy:

1) Make something fantastic that is quilted.

2) Use Riley Blake "Creative Rockstar" Collection and any Riley Blake Confetti Cotton Solids.

Easy, Peasy, Lemon Squeezy! (That's what my grand kids like to say. 😊)

Well, I don't know about fantastic, but this will be quilted (after I put on some applique), and I used the required fabrics so I guess I'm good to go.


This is quite different from how I normally work, but it was fun. I first had to determine how many fabrics I was going to use, decide how many times I wanted to use each one, and how large I wanted the wedges. 

Armed with that information, I sketched out my circle and did some math. Jack and I worked together on this because he had some ideas to share and since I really wasn't sure what I wanted to do, it was nice to bounce ideas off of him. Plus, he REALLY likes math, and it is always good to have someone double check my math.


Once the math was done, I cut my wedges. Using the scraps from cutting, I started playing with possible layouts.


When I was happy with the scrap version, I started putting the wedges on the design wall. I let this sit for a day and checked it off and on to see if I wanted to change anything. At first, the extra yellow at the top bothered me, but I decided to leave it because it would screw up the rest of the circle if I tried to change it. Plus, I'm adding applique to the center area and think that extra yellow will work perfectly with it.


I forgot to take a picture of the circle before I added the center. I did however make a test circle before I started so I'll show that. It's amazing how small the center hole was when I was done. Do you see that little yellow dot in the center? That's the size of the center after sewing all the wedges together. It's tiny compared to how it starts out, isn't it?


So here we are, the final circle. I had to play with the size of the center yellow circle because I didn't want it to get lost, but I also didn't want it to overwhelm the applique or lose too much of the radial lines coming to the center. This works perfectly!


I'd love to get the applique cut and started today, but we'll see. I have a bunch of other stuff to get done before I can work on this. Tomorrow is a sub day for me and I have a meeting in the evening, so if I don't get to it tonight, it will be at least Wednesday before I work on this again.

On another note, I forgot to show the back of the Bundle Buster quilt I posted yesterday. I think this backing is fun! It looks like rick rack and for some reason, I had a bunch of it. I was glad to be able to use it for this quilt. 


Check out what other quilters are working on today.

Go to Judy L's Patchwork Times

and

Sunday, April 16, 2017

Hands 2 Help Quilt

I am hand stitching the last of the binding on my first Hands2Help (H2H) quilt. If you look closely, you can see my wonder clips on the right side of the quilt.  

The pattern is Bundle Buster, by Yvonne Fuchs @ Quilting Jetgirl. The pattern is designed to use fat quarters and my finished quilt measures 60" x 80."


The pattern includes instructions for three sizes - 40" x 40",
40" x 60," and 60" x 80", but it could easily be made larger simply by adding more blocks. I figured that this size quilt would be perfect for a QOV, but I wanted to try it out with a variety of fat quarters I had in my stash first. The quilt is very quick to construct and I like the end result, even though these fabrics really were just 16 misc. fat quarters in my stash.

There is one thing that I think you may need to be careful with when making this quilt. In order to be very efficient, you use 21" of the 22" that most fat quarters measure.

Unfortunately, there are a couple fat quarters in my stash that only have 20 1/2" of usable fabric, and although I really wanted to use them, I had already cut the other fabrics and was too lazy to go back and adjust them down. So...be sure to measure your fat quarters before you begin. You may have to swap out a few or make minor adjustments when cutting.

Either way, I like this quilt and know that I will use the pattern again. 

I asked Lynn and Ty to hold the quilt so I could get a picture, and Peyton photo bombed me.  😂


How could I be upset when she looked at me and said, "Nice quilt, Grandma!"

She can photo bomb anytime, as long as she says that. Not bad for a two-year old, right? This makes me think that we've done a good job of starting her quilt appreciation early.


She then turned around to Ty and asked if she could take this home.  When Ty told her I was making this for someone who really needs it, she said, "Peyton needs it too." Oh, how the grandkids make me laugh.


Although I have another quilt started, I may decide to make another one of these for my second H2H donation quilt because it really is fast and easy. I guess I'll make that decision as the deadline approaches.

Check out the other H2H quilts at Sarah's blog - Confessions of a Fabric Addict. I am certain that you will find some wonderful eye candy.

Speaking of candy, don't eat too much today.  😉

I love this sign that Lynn and Ty put up at their house.


Happy Easter!

Friday, April 14, 2017

Umbrellas!

I'm finally getting around to posting pictures of the last umbrella class Annie and I taught at Lake Farmpark. We had a wonderful time and all of the umbrellas look great!

If I remember, I can usually take pictures for about the first half hour of class. After that we are all busy and I don't think to pull out the camera until the first umbrella is finished. 

Everyone is busy cutting and pressing their panels in this picture. This is the most time consuming part of the entire umbrella-making process and it just seems to take forever.  


Fortunately, the umbrella starts to take shape quickly and when the first one is done, EVERYONE gets excited!

These two fabrics look wonderful together. 😊 I always love greens and blues together for umbrellas, especially batiks.


Ruth had some specialty fabric that she wanted to use, but she didn't have enough. She knows where to get more and plans on making a second umbrella. This one is made with rose fabric and it is beautiful! 


She even took some time right after lunch to embroider her name on the umbrella. What a great idea! I think I'm going to start embroidering my strap.


This looks like a single fabric, doesn't it?


Nope! It's actually two fabrics - dogs and cats. She was so excited to make her own umbrella for when it's raining cats and dogs!


This picture does not do this fabric justice. It is a gorgeous  dark blue/green batik that is just stunning!


I love these two fabrics. If I was carrying this umbrella, I don't think I'd care if it was raining. As a matter of fact, I think I would look forward to the rain. 😄 


Andrea's umbrella is stunning! I love this fabric.


This umbrella is just plain fun! I love her alternating fabrics.


 These two fabrics played so nicely together! This umbrella is one of my all-time favorites.


Isn't this pretty? I love the softness of these two fabrics and they are perfect together.


This green polka dot is perfect with the multi-colored golashes fabric. I wish I had taken a close-up picture of that adorable fabric. Whenever I look at this picture, I think of Gene Kelly and Singin' in the Rain!


Annie and I have three (possibly four) more classes scheduled within the next six weeks, so be prepared for more gorgeous umbrellas!  

Monday, April 3, 2017

Design Wall Monday

I had the flu most of the weekend, so I didn't get much sewing done at all. I did sew a little on my Stars Over Texas quilt yesterday and got five diagonal rows sewn totally together and the sixth one sewn, but it's not attached to the first five. I also laid out a few more rows (sloppily!) so I could check out how the fabrics will look next to each other.


I'm really looking forward to getting this top done so I can take it outside to get a good picture. This photo does it NO justice!

As you can see, I roughly laid out the four big stars across the bottom, and then I pinned the set of triangles for the other stars close to where they will be placed. This allows me to make changes if I desire. So far, I'm ok with the fabric choices and think the others will be ok too.

I seriously doubt that I will work on this for at least two or maybe even three days. I have to play catch up from the weekend. :-)

On another note...Over the past month or so, I've been showing snippets of patriotic fabric that I used in a couple of projects. The quilts are done and submitted to the Blank Fabric American Honor Quilt Challenge, so I can show them now.

The rules were pretty straight forward. Make something using the American Honor fabric line by Tana Mueller for Blank Fabric and submit photos by March 31st.

Voting for the winner of the popular web favorite is taking place now, until April 15th. You can vote HERE.

Here are my three submissions:

In Your Debt - 66" x 75"


Heart and Soul - 82" x 82"


Freedom Rings - 37" x 37"


There are some really wonderful projects to see, so take a few minutes and check them out. While you're there, why note vote?

What are you working on today?


and


Saturday, April 1, 2017

Stars Over Texas Quilt

The last time I posted, I showed the beginning of my Stars Over Texas quilt.


Since this quilt is going to be large (90" x 108") and I don't have enough to space to layout the entire quilt and then play, I just wanted to get comfortable with the lay out process.

Now that's been done, I made a black and white copy of the pattern and used snippets of fabric to decide my layout.


After making a final decision, I glued the snippets in place and even added the binding. This will be right next to me when I start sewing the triangles together. Hopefully that will prevent me from making mistakes.


I really hope to sew today, but I just spent the last 36 hours fighting the flu. YUCK! I finally feel like I'm among the living again, but I'm still weak, so I'm thinking it would be a good idea to wait until tomorrow to start sewing.

Have a great weekend!