Tuesday, January 28, 2014

Tip Tuesday! - A Spray Starch Alternative

Tip Tuesday! - Quilters' Moonshine!

Welcome to
"Tip Tuesday!"

I love learning new things and then sharing that knowledge with my quilting friends. So, every Tuesday I'll provide some tips, hints, tricks, tutorials, shortcuts, etc. that I've learned over the years and share them here on the blog. 

"Tip Tuesday" will be a collection of information about a wide variety of subjects garnered from a large variety of sources.  I am not an expert by any means and do not take credit for being the great wizard behind all of these hints and tips. I will gladly give credit where credit is due whenever possible.
These tips will be archived and accessible to you just by clicking on the "Tip Tuesday" tab above. 

Read, enjoy, and be inspired! 

Quilters' Moonshine 

No, It's Tip Tuesday!, Not Tipsy Tuesday!

Have you ever tried to press out that annoying center fold line that most fabrics have when it comes right off the bolt? It's a real pain, isn't it?

Ok, maybe we should have had the pre-washing discussion first, but since we didn't, just follow along and pretend that we did. :-)

As I was saying, that fold is a real pain and no matter how hard I tried, it just didn't press out. I tried using various heat settings on my iron, various spray starches, etc., but I just wasn't satisfied with the results. 

Well, for the past year and a half or so, I've been making and using my own homemade spray starch alternative.  I call it Quilters' Moonshine. (After reading the ingredients list, you'll understand the name.) I've been very happy with the results, and I use it on my clothing as well as my fabric.

Since I've had some recent requests for the recipe, I decided that this would make a great Tip Tuesday! post. So, here we go. 


Quilters' Moonshine

 This recipe makes a little over a gallon so be prepared to make it in a bucket or large bowl and then transfer to other containers.

Mix well: 
1 gallon of distilled water
1/2 - 3/4 cup liquid starch (I used Sta-Flo)**see note below
1 cup vodka (cheap is fine - and now you know why we call it Moonshine!)

You can add up to 4 teaspoons of your favorite essential oil for a scent, if you'd like. I did not do that. I don't particularly care for scented items because I never know if it will set off my allergies. 

**I like to use 3/4 cup of liquid starch because I think it works much better, but many people have told me that they only use 1/2 cup and are happy with the results. The choice is yours. Try it with 1/2 cup first and if you don't feel it's working at the optimal level for you, add the other 1/4 cup. 

That's it! 

Mix it well and pour into other containers. Since this makes a bunch, you can give it as gifts to your quilting buddies, or keep it all for yourself. Of course you could also cut the recipe in half and just make less, but what fun is that? 

Tuesday, January 21, 2014

Tip Tuesday! - It's a Pressing Matter!

Welcome to
"Tip Tuesday!"

I love learning new things and then sharing that knowledge with my quilting friends. So, every Tuesday I'll provide some tips, hints, tricks, tutorials, shortcuts, etc. that I've learned over the years and share them here on the blog. 

"Tip Tuesday" will be a collection of information about a wide variety of subjects garnered from a large variety of sources.  I am not an expert by any means and do not take credit for being the great wizard behind all of these hints and tips. I will gladly give credit where credit is due whenever possible.
These tips will be archived and accessible to you just by clicking on the "Tip Tuesday" tab above. 

Read, enjoy, and be inspired! 

Press vs. Iron

a steamy and hot discussion! :-)

I was recently asked why I was obsessed with ironing while I quilt. Well, first of all, I'm NOT obsessed and secondly, I don't iron. I press (usually). There is a difference!

Pressing is using the weight of the iron and its heat to remove wrinkles and flatten seams. Pressing is lifting the iron up and down, while ironing is moving the iron back and forth. Generally, quilters press, not iron; especially when working with pieced units of blocks.

Proper pressing techniques can help you achieve seams that lay flat, are accurate and square. Your blocks will look sharp/crisp and putting them together will be easy peasy!

I tend to press my seams to one side, although I've recently found some blocks that just work better when they are pressed open. (That is a Tip Tuesday topic in it's own right, and one that can create some heated discussions.  :-\ )

Here's my pressing routine (although it's not the only way to press, it's my usual way.)

Before pressing a seam allowance to one side, I place the sewn unit on an ironing board -- unfolded, just the way it looked after being fed through the sewing machine.
I place a hot (not scalding!) iron on the unit. I do not move the iron back and forth much, it at all. I simply allow the weight of the iron and its and heat do the work. This step sets the seam. 
What does setting the seam do? 
It sinks (or sets) my stitches into the fabric and really allows the seam to be pressed flat. It flattens puckers or wrinkles that might have occurred when patches were sewn together, which can be caused by tension issues or uneven stitches.
I also set my seams before I press them open. This helps ’set’ the threads into the fabric and will ensure that extra fabric doesn't get caught up in the seam.
Check out the link below for a number of responses to the "Why should I set my seams?" question. This was a discussion on The Quilting Board, to which I am a member.
Setting the Seam...Why?
Jo wrote: 
Setting the seam from the back, then pressing it to one side from the front accomplishes two things that I've experienced: 1) It seems to "nestle" the thread into the layers of fabrics, and 2) The seam is now warmed and very pliable to send that seam to one side or the other when ironing from the right side . . . no overlaps or little tucks at the seam. 

You'll find that your measurements stay very true as well.

Jan wrote: 
You know how sometimes you run your fingernail down a seam to ease the sense of 'gathering' or along a fold of a piece of paper because it makes it "sharper"? That's why I "set the seam" before pressing the block/strip open. Just makes it look a bit neater and easier to abut the seams when joining to another section or clock


PaperPrincess wrote: 
You can try this. Sew 2 patches together, now just unsew them by clipping the stitches from one side or the other. Should be pretty easy to grab the stitches with your seam ripper. Now sew them together again, and this time set the seam. If you try and unpick the seam it will be more difficult because the thread has embedded itself into the fabric a bit.

Now my fellow quilters, go press on and create those masterpieces!

Tuesday, January 14, 2014

Tip Tuesday! - Basic Sewing Machine Home Maintenance

Oops! If you are going to schedule a post so that it uploads in the middle of the night, you should double check that you picked PM instead of AM. DUHHHHH!  Sorry for the delay!

Welcome to
"Tip Tuesday!"


I love learning new things and then sharing that knowledge with my quilting friends. So, every Tuesday I'll provide some tips, hints, tricks, tutorials, shortcuts, etc. that I've learned over the years and share them here on the blog. 

"Tip Tuesday" will be a collection of information about a wide variety of subjects garnered from a large variety of sources.  I am not an expert by any means and do not take credit for being the great wizard behind all of these hints and tips. I will gladly give credit where credit is due whenever possible.
These tips will be archived and accessible to you just by clicking on the "Tip Tuesday" tab above. 

Read, enjoy, and be inspired! 


Basic Sewing Machine Home Maintenance Suggestions

Saying that our sewing machines are very important to us quilters is truly an understatement; yet I continue to be amazed at how little we know about these machines or in some cases, how little we take care of them. I firmly believe that we should all send our machines to a Sewing Machine Spa for some TLC by an expert every so often, but there are some things we can all do at home to prevent or delay some serious issues. 

Some of these are maintenance suggestions, while others are simply good habits that we should consider adopting.Your machine will thank you!

Read the manual - ALWAYS read the manual first!
           
Keep It Covered
            1. Cover the machine when not in use, even if for just a few hours or 
                overnight

    2. Avoid placing your machine near open windows because of what 
        the draft can bring in

Thread Direction
            1. Thread is meant to move from the spool to the needle, not vice 
                versa

            2. When finishing a seam, pull the thread to the back to snip, not to 
                the front or side

Needles and Thread Compatibility
            1. Use the correct needles and thread for the project
                        A. The most common cause of thread breakage is using a 
                                 needle that is too small for the thread

            2. Change the needle often
                        A. Needles pass through the fabrics thousands of times per 
                            minute, so if the needle is dull or bent, you may get 
                            skipped stitches, broken or looped threads, runs or pulls 
                            in the fabric, or even damage to the machine

Bobbin
            1. Contrary to popular belief, there really is no such thing as a 
        universal bobbin! Just because it fits, doesn't mean that it 
         will perform at an optimal level.

    2. Be sure there are no thread tails from the bobbin when inserted 
        into the bobbin case (they can jam the machine and cause upper 
        thread breakage)

Regular cleaning is essential
            1. Controversial topics-ask your machine dealer what he/she suggest
                        A. Canned air
                        B. Blowing into the machine
                        C. Q-tips

            2. Clean after each project, especially if you are using different types 
                and colors of thread

            3. Start at the top of the machine and work your way down
                        A. Use a soft cloth to dust off the machine

                        B. Use a folded piece of fine muslin and clean the tension 
                            disks
                            1. Have presser foot up so the tension springs are loose 
                                and the muslin can move easily between the disks, 
                                dislodging any lint or fuzz

                        C. Remove the needle and clean that entire area

                        D. Clean the feed dogs
                            1. Remove the throat plate (you may need a 
                                screwdriver to do that)

                            2. Using a lint brush or small paint brush to thoroughly 
                                lean the area, including under the feed dogs and 
                                around the bobbin are

                           3. Check for jammed or entangled pieces of thread, but 
                               do not use sharp instruments to remove them which can 
                               nick or burr machine parts; use tweezers instead    

                           4. If the hook mechanism is removable, take it out and         
                               wipe it clean with a dot of oil on a piece of muslin, 
                               and give it an additional small drop of oil before 
                              returning it to the machine    

                           5. Following the manual’s instructions, use only a small 
                               drop of oil for each spot it says to lubricate
                               (It’s always better to oil too little more often 
                               than too much once.)

Take care of your machine, and it will take care of you!

Monday, January 13, 2014

Design Wall Monday

I'm kind of cheating here because these aren't my quilts. I helped with them, but they aren't mine. Nevertheless, I'm proud to say that the design wall has been home to these quilts during their construction.

These quilts are creations of my brother Gerald. He is a new quilter, but he sure has made up for lost time. He has made probably 6 or 7 quilts in the past year or so. I was excited that he asked me let me quilt these on my domestic machine.

This started as a jelly roll race/1600-type quilt, but with some minor tweaking. He cut his own 2 1/2" strips, added some 4 1/2" strips and just a touch of red. He wanted it wider but not longer so he added the large black border to the left. I love this!


Here's the back of the above quilt. It's basically just straight lines, mimicking the lines of the piecing. Do you see the little bit of red here? That's his label. Click on the picture to enlarge it and you should be able to see it better. Again, I love this! I guess I love everything about this quilt. :-)


Here's a slash type quilt. This was fun to see as it progressed and Jerry learned a lot about what he will do the next time he works with bias.  :-)


Here's the back of this quilt and it's really cool. I used a variegated thread on both the top and bottom and the rainbow color looks exceptionally great on this backing fabric. Check out his label again. How creative! 


And finally, here's the last quilt he worked on at my house and this is pretty cool. He wanted it longer but not any wider so he adjusted the size of the top and bottom borders.This is a cool quilt. Again, I used a variegated thread and I love how it looks!


I wish you could see this great backing fabric. I love it! Again, look at his label.


Don't forget that the Wake Up To Kona! Blog Hop is continuing. Here are today's contributors. Enjoy!! 
(My day was Thursday and in cased you missed it, you can see that HERE)


And don't forget to stop by tomorrow for Tip Tuesday! 

Check out what other quilters have on their design walls today.
Go to Judy L's Patchwork Times and be inspired!

Thursday, January 9, 2014

Wake Up To Kona! Blog Hop

It's my day!

Sew we quilt
Thank you Madame Samm - Sew We Quilt 
and
for this fabulous blog hop. You two are awesome!

Of course we can't forget the sponsors:

Amanda Murphy, author of Color Essentials

Robert Kaufman for those fabulous fabrics 

and

Aurfil, whose threads keeps us stitching

Thank you!!

Be sure to check out the rest of today's contributors. 
I think you'll be amazed!

Everyone Deserves A Quilt (You are here!)


I was so excited for this hop! I knew exactly what I was going to make. Then reality set in and I knew that completing that BIG project (117" x 99") would be virtually impossible for me with my other commitments. So, on to Plan B I went.

Plan B was very realistic considering the time frame in which I would be working. I knew that a full quilt would be quite challenging so I decided to make a pillow to coordinate with a project I had started a while back. If there was still time, I would work on finishing that quilt. 

That was the plan...Here's what happened.

The pillow - I love how it turned out and the fact that it's big - 20"! All of these fabrics were leftovers from the original quilt. That means I used stash, which is ALWAYS a good thing.


I used the pattern Twinkle Twinkle by Me and My Sister Designs. If you've never made a quilt using one of their patterns, you really should try it. They are easy to follow, have great illustrations and are wonderfully set up in terms of graphics. I really love teaching from their patterns because my students like using them. I promise you that it'll be worth your while to browse their site.  :-)

And look. It fits the rocking chair perfectly!


After finishing the pillow, I pulled out the quilt that was my inspiration and got to work on that. All it needed was to be quilted and bound. I completed this quilt top way back in February of 2012, but never got around to quilting it. (Click HERE to see the original post about this quilt.) 

My quilt is patterned after Jodie Davis' quilt Strip-a-Dee-Doo-Dah which was featured in Fons and Porters' Easy Quilts. If I'm not mistaken, this is the first quilt I made using exclusively solids. I loved it and was hooked!

I don't know why it took so long to finish this. It quilted up very nicely and in not much time at all. No matter the reason, it's done now and has been used the last few days in these sub-zero temperatures.


It measures 62" x 70" and is perfect for snuggling


Don't they go well together? I love them!!


Well, since Plan B was done and it was only January 2nd, I decided to pull out the pattern from Plan A and start working on that. So what if I didn't finish it? I have another project that was made just for this hop AND I finished a UFO. I could still start this and show my progress. Besides the original plan was to use this hop as the swift kick in the "you know what" to get started on this project. 

So I took the plunge and got busy. Really, the worst case scenario is that I would have another UFO. It wouldn't be my first and I'm sure it wouldn't be my last. :-)

Well, I finished the top on January 4th! Click HERE, HERE, and HERE to see my progress as it was happening. 

The quilt is called Groove and it's by Emily Cier of Carolina Patchworks


This quilt looks daunting, but it really isn't difficult to make. The pattern is very well organized with great cutting charts and assembly diagrams. Also, it has really good instructions and diagrams on how to construct curves. Plus, the pattern includes the instructions for five (5) sizes! Yep, FIVE sizes!!


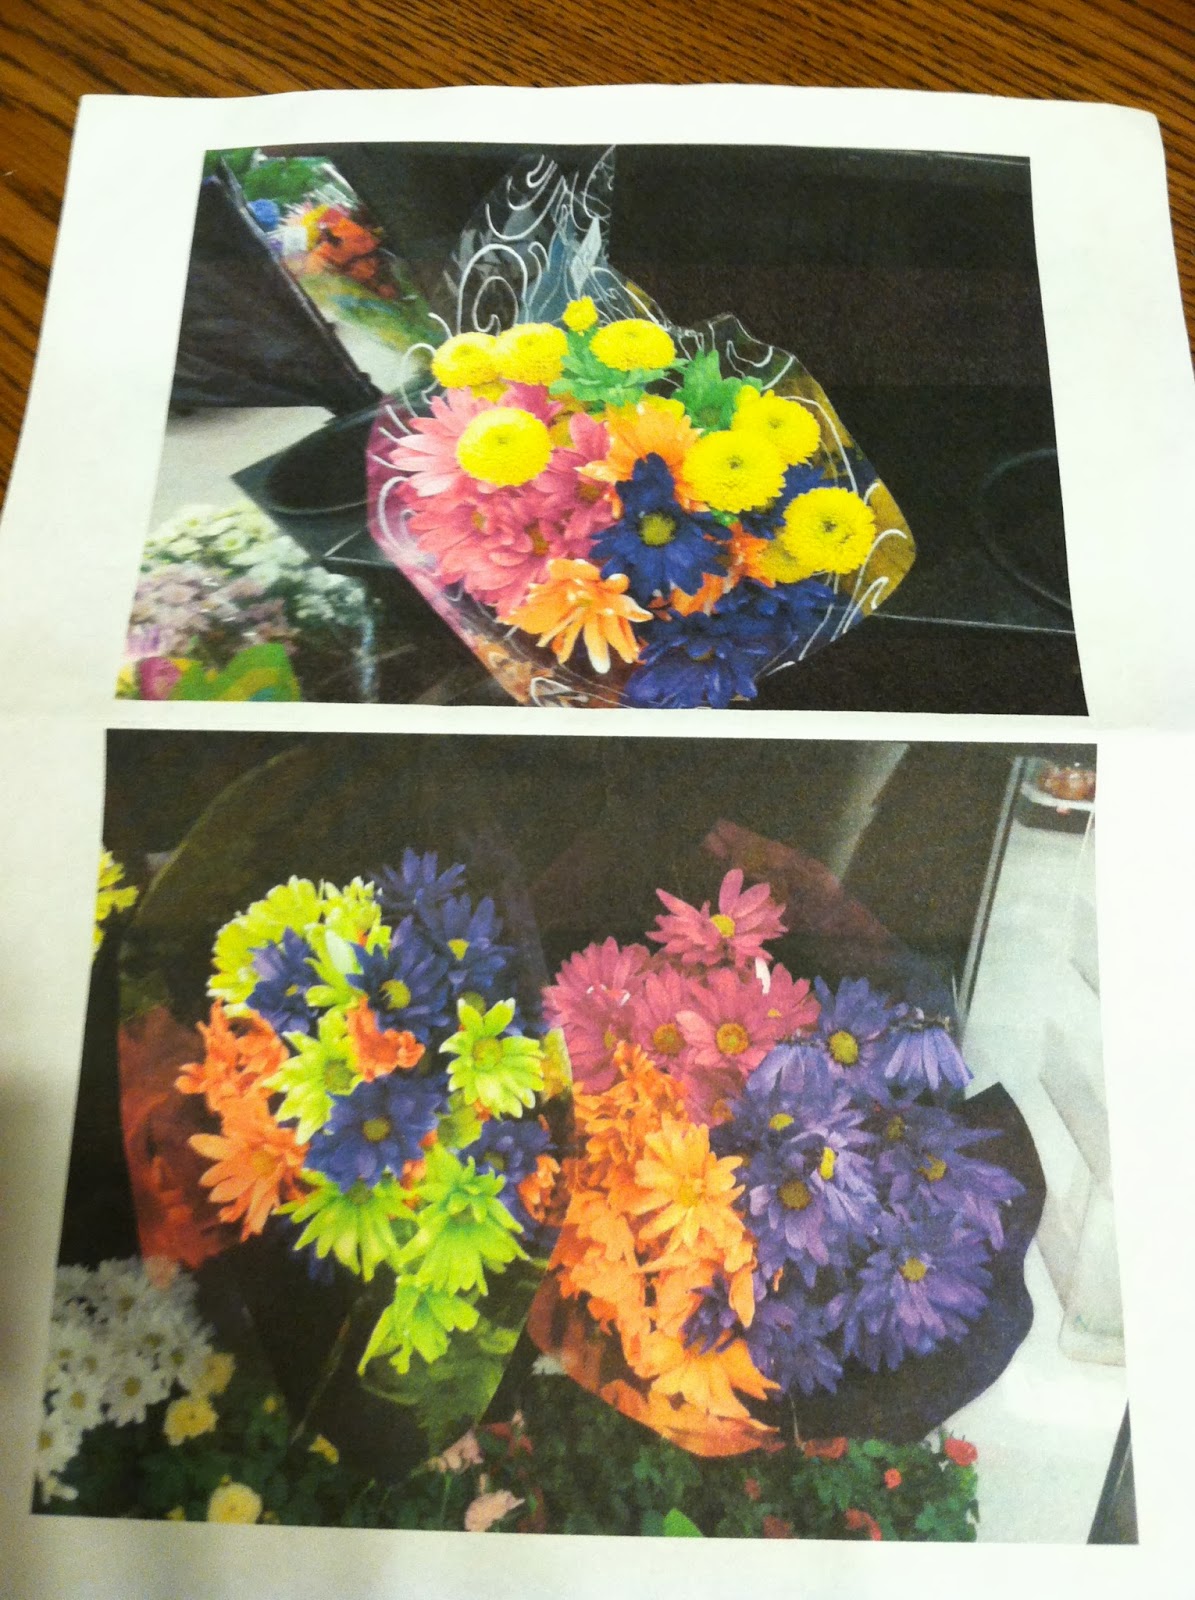
When I was choosing colors for this quilt, I saw a couple of flower bouquets that had colors that I loved. I took a picture and went on the search for just the right fabrics. Here's a picture of the original two pictures. (I think I deleted the original in my camera.) 


I'm very happy with my fabrics and my husband LOVES this quilt. Now I just have to figure out how to quilt it.

Speaking of my husband. He is such a great guy! On Sunday when I asked him if he thought it would be possible to get a picture of this quilt so I could show it for the hop, he knew exactly what I was asking and quickly translated that into: "Dear, would you please stand on the balcony while it's cold and snowy so I can take a picture of this quilt?" 

It's a good thing we didn't wait a day or this picture would not have happened. We ended up with even more snow, sub-zero temperatures and 30 mph winds.  :-)


I love the coffee can holding down the right side of the quilt and the weeds almost smack dab in the middle of the lower edge of the quilt. But hey, we have the picture! :-)

Thanks for stopping by. 
Enjoy the eye candy you'll see today and the rest of the hop.

Thanks again Madame Samm and Carol. 
This has been so much fun.

Wednesday, January 8, 2014

Wake Up To Kona! Day 2

The Wake Up To Kona! blog hop has started and I forgot to post the daily participants. Here are yesterday and today's very talented creators! 


January 8 (today)


Tuesday, January 7, 2014

A Quilter Can Change Her Mind, Right?

If you're looking for the "Tip Tuesday" post, scroll down to the end of this post, click HERE or click on the "Tip Tuesday" tab above.


I was working on the Quilt As You Go Braid yesterday and decided that although I like the method, I was having a few issues that I needed to change if I wanted this quilt to look decent. (Perhaps being able to find the original post with information would have helped me avoid some of the issues I had.)

I decided that I should use 100% cotton batting instead of the 80/20 blend that I did. The batting was stretching a bit and I think that would happen less with the cotton. Also, I need to be much more careful and accurate when I cut the batting. I cut the batting 8" wide, but found a few spots that were as small as 7.75" plus, one piece was 72" and another was 73". The length wasn't a big deal, but the width could be. (I have to admit that I have some 100% cotton here, but I was trying to be frugal and use up some of the scraps of batting that I have. You know you get long pieces when you trim up the sides of quilts before adding binding and I've been saving those for a rag quilt or something similar.)

Also, I need to be very careful accurate with the angle when I place the first few strips and check it every so often. I got a bit off and that error really became visible quite a few strips later. I was just so excited to try this and I really didn't think it through. :-(  Slow down and quilt with purpose to avoid spending some quality time with your seam ripper.

And one other thing that I really need to do is check that the strips are actually 2.5" wide. It really wouldn't matter if I was using lots of strips of different sizes, but when they are all mostly 2.5" or close and then a 2.25" strip gets sewn in, it really throws off the matching points and it is a real challenge to get back on track. I'm beginning to think that some of these strips were set aside and not used on other project because they weren't 2.5". If you've ever used jelly rolls, Bali pops, etc., you know that can sometimes happen. It's not a big deal, but I didn't like how it looked because it was so random.

So, what's a quilter to do when she's working on a project that isn't "working" for her? Well, she has a few options. She can pack it up and save it for another day. (Yea, like I'll get back to it in this lifetime!) Or she can get out the rotary cutter and make two doll quilts for the grand kids!! Guess which option I chose.

In case you missed it before, this is what the braid looked like yesterday.


Here's what I have now. Looks more like a chevron than a braid, but I like them. After trimming and cleaning up the "issues," these measure about 30" x 36" and I'm OK with that.


And, I had two pieces of fabric that I think make perfect baking for these. I even had enough extra backing fabric to I could make binding strips, but I'm swapping the binding so that the blue/pink binding will be on the other quilt. 


If you click on the above picture, it should enlarge the picture so you can see the simple quilting lines I did. I used a variegated thread on the top and bobbin (King Tut #918) and am really pleased how it turned out. 

Based on the backing alone, I think I know which quilt Sadie will choose. She LOVES purple, while Quinn is more partial to pink.

This was a fun and productive learn experience. Now I really need to get busy working on some projects that have been sitting around here for a while. That, or start cutting out my papers for the Prairie Star quilt that I'll be working on when I'm with Judy Niemeyer at Tennessee Quilts in February.

Check out what other quilters are doing today. Go to i have to say... for show and tell Tuesday.

Tip Tuesday! - Fabric Selection

Welcome to
"Tip Tuesday!"


I love learning new things and then sharing that knowledge with my quilting friends. So, every Tuesday I'll provide some tips, hints, tricks, tutorials, shortcuts, etc. that I've learned over the years and share them here on the blog. 

"Tip Tuesday" will be a collection of information about a wide variety of subjects garnered from a large variety of sources.  I am not an expert by any means and do not take credit for being the great wizard behind all of these hints and tips. I will gladly give credit where credit is due whenever possible.
These tips will be archived and accessible to you just by clicking on the "Tip Tuesday" tab above. 

Read, enjoy, and be inspired! 


Fabric Selection

Even though I said there would be no real order to these posts, I decided to start with the question I am most asked by students. "How do I chose fabric for quilts?"

I used to stress about picking fabrics for my quilts and quite honestly, I sometimes still struggle with this; but I've come up with a couple of different ways to look at choosing fabrics and maybe one will work for you. Trust me, once you quit worrying about it, fondling picking fabric is fun! (This post might be a bit long. Sorry, but I think the information is very valuable!)

Choosing fabric really is no different then getting dressed in the morning.
We decide on a main article of clothing (focus fabric) and then start adding accessories (coordinating/supporting fabrics).

Maybe a pair of pants is where we begin and them we chose a blouse or sweater. That's pretty easy. In terms of quilting, you've just picked your focus fabric and main coordinating/supporting fabric.

Ok, now do we want to add a scarf? What about your jewelry? Maybe earrings for that touch of sparkle, or a necklace to help blend or tie all the pieces together. These are all coordinating/supporting fabrics also, but there is just less of them. They are important and can take your quilt from just ok to spectacular!

Now, for the finale. What about your shoes ? How do we wrap up this outfit to have a great, yet stunning ending? Your shoes do the same thing for your outfit that binding can do for your quilts. Pick something stunning and daring!

Easy Peasy!!

Ok, if the outfit thing doesn't work for you, how about an analogy to food? Food is always good, right? Especially if chocolate is involved!

So, let's make choosing great fabrics like fixing a great meal. You need ingredients for a meal and your fabrics are the ingredients for your quilts.

Main Dish or Entree' = Focus Fabric
Choose a print or fabric that you love! Consider the scale of the print when making these chooses. Quilts look great when there is a mixture of small, medium and large scale prints. Large scale prints look great as borders, but they can be cut up and pieced into blocks as well. What is that the Life Cereal commercial used to say? "Try it Mikey! You'll like it!"

Side Dishes =  Coordinating/Supporting Fabrics
Remember that when you're fixing a meal, you should try to have a good mixture of color and texture on your plate for a more healthy and balanced meal. (That healthy option often includes those surprisingly tasty green and yellow veggies. Who would have thought they would be so good?) Just like adding side dishes to compliment your main dish, use your focus fabric to help pick the coordinating/supporting fabrics. Remember, you get to choose how many, what colors, what prints, etc. Don't be afraid! Pick a couple of color families and start pulling fabrics from them to use. For a more scrappy look, vary the color values within each family (pale lavender to deep purple, for example), or mix and match the prints and textures of your selections.  

Condiments = "Touch of Spice" Fabrics
Sometimes you just need to add a touch of salt, pepper, vinegar, etc. to flavor your food. Well, adding just a dash of an unexpected color or print can do wonders to your quilt. Think about adding a narrow plaid border, or a red piping. What about those dreaded stripes? They just might be the answer to the question of how to "fix" a boring quilt. Just try it! Audition the fabrics. Be sure to remember that just like salt, less is actually more. You may decide that although you love that orange print, a little goes a long way - just like spinach.

Dessert = Backing/Binding/Quilting
There isn't much better than capping off a great meal with a fabulous dessert. Think of your backing, binding and quilting in the same way. Piecing your backing can add a whimsical or dramatic touch to your quilt. It may even look like you have a reversible quilt - two quilts in one!

Variegated or metallic thread can really add a wow factor to a project. While you're at it, why not choose an unusual quilt design. Although stitch in the ditch is really cool, quilting meandering stars would really make your red, white and blue quilt light up the sky like the fourth of July! 

Explore how prairie points or cording might look to finish off your quilt. Why not choose that plaid fabric and cut it on the bias to bind the quilt? You know it'll look fabulous and trust me, it really isn't that hard to do!

See? I told you picking fabric can be fun.
What's the worst thing that could happen?
The fabric you chose isn't exactly what you wanted. 
Look at it this way, you've just had a Stash Enhancing eXperience (quilters' sex)!