"Tip Tuesday!" - Off-Set Seams
I love learning new things and then sharing that knowledge with my quilting friends. So, every Tuesday (or most Tuesdays!) I'll provide some tips, hints, tricks, tutorials, shortcuts, etc. that I've learned over the years and share them here on the blog.
"Tip Tuesday" will be a collection of information about a wide variety of subjects garnered from a large variety of sources. I am not an expert by any means and do not take credit for being the great wizard behind all of these hints and tips. I will gladly give due credit whenever possible.
These tips will be archived and accessible to you just by clicking on the "Tip Tuesday!" tab above.
Read, enjoy, and be inspired!
*****************************************
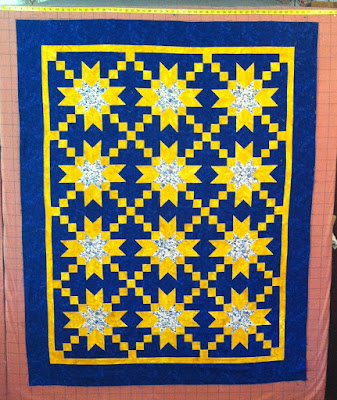
While working on this quilt...
I found that when I was sewing the triangles together I was encountering some issues because the diagonal seams were off-set and not always accurate. I was having to take out stitches and re-sew them because I was not happy with how they looked. After a couple of seams, I decided that I really needed to figure out a way to be accurate and avoid ripping.
Here is a picture of the two triangles laid out next to each other. Looks innocent and easy enough, right?
Well, when you flip the right one over to sew the seam, the horizontal lines do not match up if you've matched up the top and bottom ends.
This is what I want it to look like. I have accounted for the 1/4" seam allowance here, but found that I was not always accurate in keeping that seam allowance when I pinned and sewed. Mmmmmm, what to do?
I noticed that then I was seam ripping, I could always see where the 1/4" seam allowance was because I had the needle holes left from the seam I just ripped out. I got to thinking and decided to "sew" the 1/4" seam without thread so I had the needle markings to make pinning and sewing more accurate. Notice that there is no thread in my needle in the picture below.
Can you see the pin holes in the picture below? They are very faint in the picture, but you can easily see them when you are working with the fabric.
The first thing I do is to stick a pin in the hole right at the intersection where I want the seam to match up with the piece underneath.
Again, it's challenging to see, but the holes are in the bottom piece also.
I simply match up the pin in the first piece with the corresponding and correct hole in the second piece. When I do this, I know that is the point I need to sew in order to end up with perfect points.
There is a trick here. I don't just line up and pin this intersection, call it a day and go sew. (Of course not! That would be too easy.)
Instead, I keep the pin at the intersection and add a pin on both sides of that point. Notice how I keep the intersection pin horizontal through the to pieces of fabric? I do that so I can be certain that I don't move anything and lose that perfect placement.
Before sewing the seam, I remove the center pin because I know that intersection is now secure. I found that if I keep the pin at the intersecting point and simply secure it, I tend to have the fabrics slips a little and I lose accuracy. If it works you for, great! You don't have to add the two pins and you can be get to sewing faster than me. :-)
Here's the seam before pressing. Looks pretty good!
And it looks even better after pressing!
I'm a happy girl with a quilt that I really like!
Yes, I know this is an extra step and takes extra time, but I think it's a lot faster then me having to take time to rip out seams.
I know that I am not the only quilter who has encountered this issue; and I'd love to hear how you handle challenges like this.


