Wednesday, March 10, 2021

Trimmings, etc.

 What does your trash bin look like? Here's mine from the other day...


That's a lot of purple and orange! 

I am almost (notice I said almost!) embarrassed by this stack of purple fabric that is from my stash. Why do have I have so much purple?  Who knows?


I am making two versions of the Sassafras Lane Designs Atlantic Avenue. One of the quilts will be much like the cover quilt, and I have all of my black/white, purple and orange blocks made. I have all of the fabrics pulled for the other colors and I am sewing those as leader/ender projects.


My second version of the quilt is a two color version, which is why you see so much purple and orange in my trash bin. Jack chose the colors and while I was a bit apprehensive, I decided to just dive right in and get to work. 

I have the top complete, but have not had an opportunity to get a picture of the whole quilt. Instead, I'll share a few "in progress" pictures. Here's the center...


And here's 2/3 of it laid out. (I really struggle with getting good pictures of purple fabric! One day I'll have to learn to how do that.)


As you can see, this quilt uses a lot of purple, so I guess it's a good thing I have that stash. I didn't have to buy a single purple or orange fabric! 

While I was working on this, I decided to make the purple and orange blocks that are needed for the rainbow version before putting that fabric away. I am glad I did and will make the red blocks next since I just completed a black and red quilt. I'll share pictures of that tomorrow.

What does your trash bin look like today?

Monday, March 1, 2021

March Color Challenge

It's March 1st, so we have a new Color Challenge Block


This month we are using 

Red/Orange

and featuring

Yams!


Big question here...
Are we dealing with yams or sweet potatoes? 


The skin of a "real" yam kind of looks like tree bark, while the sweet potato skin is more reddish/orange. Plus, the "meat" of a yam is more starchy and often compared to a russet potato in flavor. 

I'm not going to get into a debate about the differences, because there is sooooo much info out there that it would make your head spin; but this chart from the Mississippi Extension Office provides a quick, down and dirty glance at the differences.


There are botanical differences between the two, with sweet potatoes belonging to the morning glory family of plants. The edible parts of the sweet potato are called roots, while yam edible parts are called tubers. Sweet potatoes are more prolific than yams, producing 4-10 roots per plant, compared to 1-5 for yams.  Generally, I don't see yams in my grocery stores. And, most of the time, the sweet potatoes are labeled "Sweet Potatoes/Yams." 

Both plants are nutritious and provide a variety of vitamins and minerals. Many medical professionals believe that sweet potatoes can help protect again cancer and cardiovascular disease. And, because of its low glycemic index numbers, sweet potatoes can be enjoyed by diabetics. I will give fair warning here though, many people who enjoy a baked sweet potato often slather it with a brown sugar, cinnamon, butter mixture that completely changes that glycemic index number. I also have memories of sweet potato casserole that included lots of sugar, eggs, pecans and mini marshmallows. I was never a fan of that, until I became and adult and found a recipe that made it less sweet. If and when I do make it, which isn't often because I am the only one in the family that likes it, I have adjusted the recipe to be much less sweet and serve it as a dessert - and there are NO marshmallows! 

***********************************
I had fun finding the fabric for this month. Who knew that there was sweet potato fabric available? 


As you can see, I used the same green that I've been using the past two months. I love how those pieces just seem to float in this block!


I had the perfect reddish/orange fabric in my stash for my 6" blocks and think it looks great with the light-bright mosaic fabric. 
Again, I love how these pieces just float in the block.

To get your copy of the block instructions, be sure to visit Jen's blog. 

I think I've mentioned that I have a vision in my head for finished projects, but that I have yet to finalize that vision. I will say that with each month, the vision is becoming more solidified and I am getting quite excited about it. I am not going to spill the beans, but I can tell you that I will not be making two large quilts as I have done in the past. 

***********************************

Thank you to the First Quarter Sponsors!
Let's show them our appreciation and check out their products.
Jen has a complete list of the sponsors HERE. 


***********************************

It's recipe time and this one is a bit different. It is best if it can be grilled, but when that's not an option, it can be made in the oven. 

Yam and Pear Kabobs


Ingredients

1 large yam (sweet potato), chopped into 1 - 1 1/2" cubes
2 zucchini, cut into 1" chunks
2 firm pears, chopped into 1 - 1 1/2" cubes (if the pears are too ripe, they will fall apart and not work well)
1 cup white wine
1/4 cup teriyaki sauce

Instructions

1. Mix the wine and teriyaki sauce in a 1 gallon resealable plastic bag. Add the yams, zucchini, and pears.
2. Refrigerate for at least 2 hours to marinate (longer is better)
3. If grilling - fire up the grill to medium high and let it get hot. If cooking in the oven, pre-heat oven to 300 degrees 
4. Put yams, zucchini, and pears on metal skewers (flat is best, but not necessary).
**If you are making this in the oven and do not want to place on skewers, you don't have to. Just place the yams, zucchini, and pears in a metal cooking sheet, keeping them in a single layer.
5. Grill 30-40 minutes, basting with the marinade as they are cooking. Turn the skewers often until they are crispy on the outside and tender on the inside. If not using skewers, gently turn the food frequently with a spoon and marinate as they cook.
6. If cooking in the oven rather than grilling, once the yams, zucchini, and pears are tender, broil for one minute to make them crispy.
7. Remove from grill or oven, transfer to serving plate and enjoy!

***********************************

Here are my two blocks together. I really enjoy the pictures with both blocks. It is amazing how different they look. 


Check out these other bloggers to see their interpretation of this month's block. 
I'm not going to lie; I'm also looking forward to some new recipes.  :-) 

Monday, February 1, 2021

February Color Challenge

 It's February and it's beautiful! 


Life really is all about how you choose to look at things. 
This month's fruit is lemon.
You can choose to think about how sour it is...


or you can choose to think of all the wonderfully sweet foods that start with lemons.

Me? 
I'm going to choose to look at the good things about lemons... 

The delicious sweetness of lemon desserts
(lemon tarts, lemon cookies, lemon meringue pie, etc.)

The refreshing taste of lemon chicken
(see recipe below)

The wonderful health benefits of lemon 
(source of vitamin C, helps prevent kidney stones, good for digestive health, etc.)

And of course, its beautifully vibrant color - yellow!


How can one not love working with this color in the middle of the winter? 
It is so bright and cheery and reminds me that the sun WILL shine again soon. 

I am not alone in how I think about working with yellow. 
Check out what internationally color expert Kate Smith has to say about 
this beautiful color.


Now I know why I felt so good while making this month's block! 

   
I love this block and all the yellow in it. I chose to use the same green in this block as I did in last month's. It just worked so well with it, that I couldn't resist. 


I didn't have a yellow mosaic fabric that I liked for this month, so I chose a yellow from my stash and paired it with the light-bright mosaic background. I am very satisfied with my choice and like how it looks. 
 

I have decided that any month for which I do not have the proper mosaic color fabric, I will use this light-bright mosaic as the background. It goes with just about any color and will work beautifully in the finished quilt that is in my head. :-)

***********************************

Thank you to the First Quarter Sponsors!
Let's show them our appreciation and check out their products.


Jen has a complete list of the sponsors HERE. 

**************************
It's recipe time!
We love this quick-to-make meal and hope you do to. 

Lemon Garlic Chicken
Serves 4 - Ready in 30 mins.


Ingredients
4 - chicken breast, pounded to a 1/3" thickness
salt and pepper
1/3 cup flour
1 Tablespoon olive oil
4 Tablespoons unsalted butter
1 1/2 - 2 teaspoons minced garlic (more if desired)
1/2 cup chicken broth
3 Tablespoons fresh lemon juice
1/2 teaspoon lemon zest
1 1/2 Tablespoons fresh minced parsley
lemon slices, optional for garnish

Instructions
1) Season pounded chicken with salt and pepper
2) Place flour in a shallow dish and dredge both sides of chicken breasts
3) Heat large skillet over medium-high heat
4) Add olive oil and 1 Tablespoon butter
5) Let butter melt, then add in chicken breast, in a single layer
6) Sear until golden brown on both sides (4-5 minutes each side) 
7) Remove chicken from skillet and sew aside (Do not clean skillet)
8) Reduce heat to medium, add garlic and saute for 30 seconds, or until lightly browned
9) Pour in chicken broth, scraping the bottom of the skillet
10) Reduce heat to simmer and pour in lemon juice. Simmer until liquid had reduced by about half (about 2 minutes)
11) Add remaining 3 Tablespoons butter and lemon zest. Stir until butter is melted
12) Return chicken to skillet, spoon sauce over chicken. 
13) Place on plate and sprinkle with parsley
14) Serve with rice and a green vegetable
Enjoy!

To keep in the lemon theme, it would be wonderful to serve a refreshing lemon dessert with this - say maybe lemon tarts or lemon squares   


Check out Tasting Table to learn how to 
get the most juice when cutting a lemon. 

Image from Food.com


This block was fun to make!
Why not grab a glass of lemon water and check out the other featured bloggers this month. Who knows? You may find the perfect dessert recipe to 
pair with the lemon chicken...

Thursday, January 14, 2021

Quilt Reveal - 2020 Color Challenge

 I love when it's time to reveal quilts!

I enjoyed making the blocks each month and learning about the birds that 
Jen - of Patterns by Jen used to introduce each month's color. 
I think that is such a fun way to choose colors!  


These fabrics...


have turned into these two quilts.


If you followed along each month of 2020, you know that I used a group of batiks that I purchased from Once Upon a Quilt in Ft. Lauderdale 
while I was there for a workshop in Dec. of 2019.
Like I had done the previous year, I decided to make two sets of blocks. This time one set would be made with a white background and one with black. 

After making the first couple of blocks, I started thinking about the quilt layout. I have to admit that when I work with batiks, I typically use either a black or white for the background. I think those two colors just make the batiks pop and look awesome. Here are a couple of examples of quilts that I've made that demonstrate what I mean.

Compass Points - Tamarinis

Bloom - Cut Loose Press pattern

Mandalynn - Busy Hands Quilts

Prairie Star - Judy Niemeyer

See what I mean? How could I go wrong with using black and white background fabric?

I was considering making one very large quilt (these two each measure 63" x 81") and incorporate both sets of blocks into one quilt. It didn't take long before I changed my mind and decided that I was going to go a different route.

Look closely at the two quilts and you will see that they are exactly the same, except for the background fabrics. 


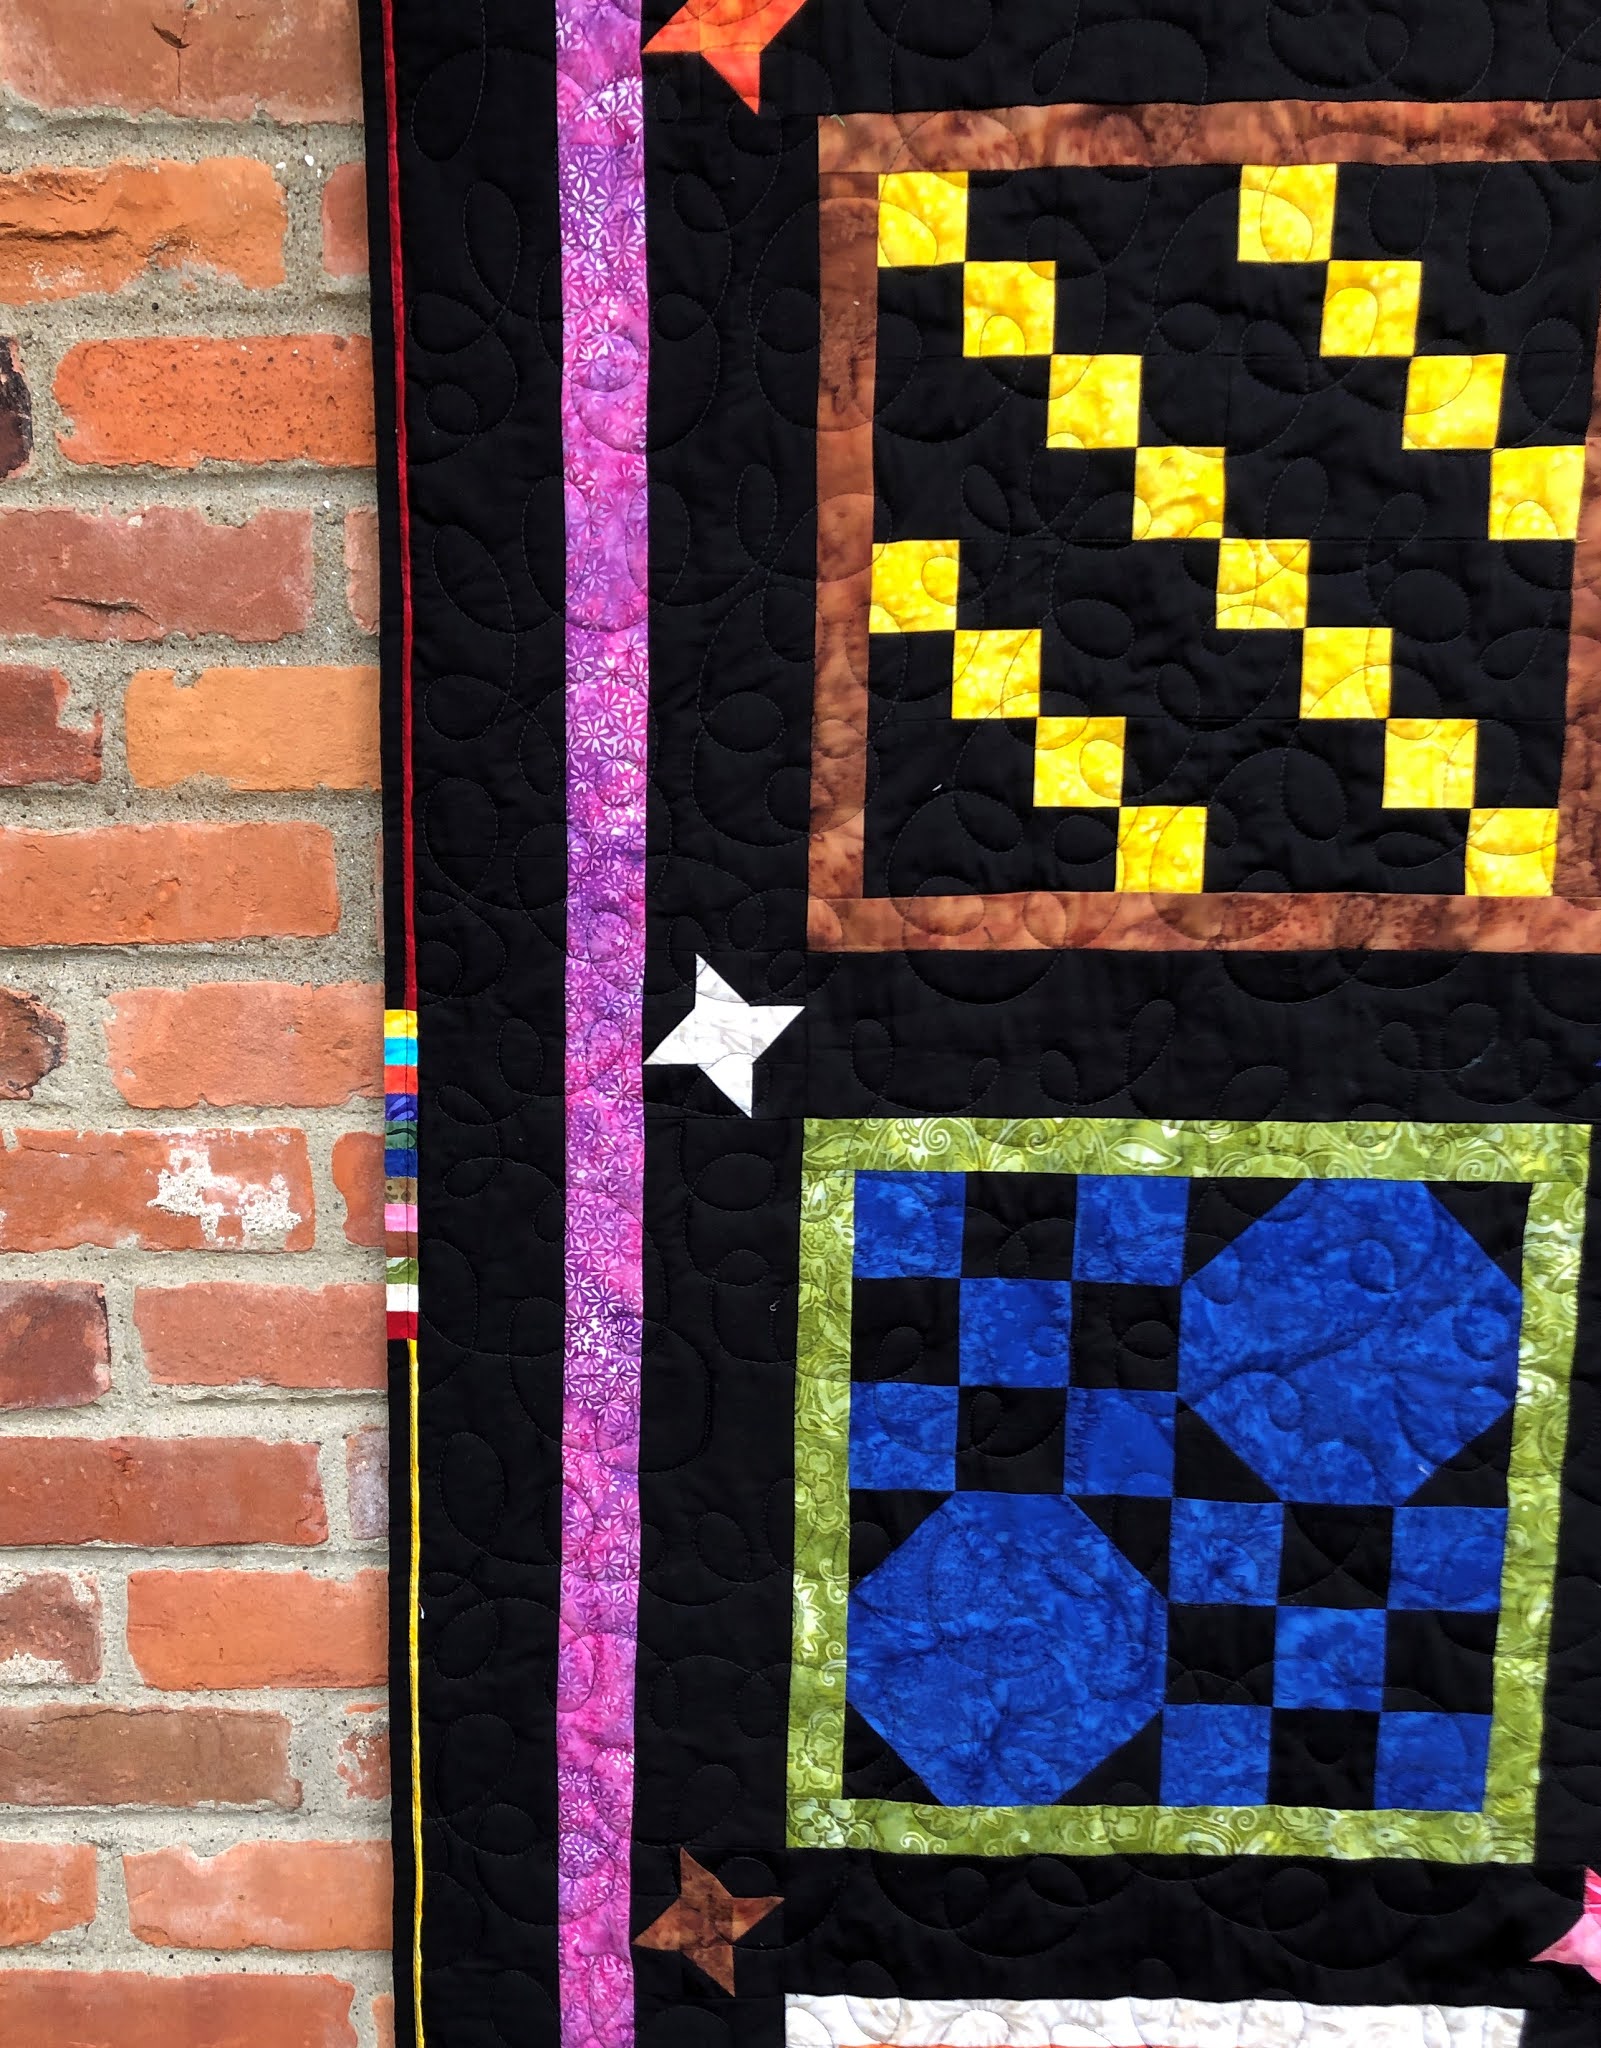
Every block is in the same place, framed by the same fabric, sashing stars are identical, and even the scrappy flanged binding fabrics are placed in identical order. 
(Yep! I may be a little OCD.) 

I even made the backings identical, just changing the color/fabric. 


It's hard to see, but I quilted both of these the same way as well - with a free motion loopy design. You can really see it on the white quilt, but not so much on the black one.


Because the blocks were placed randomly and not according to the month they were completed, I decided to place the scrappy flange binding in the order the fabric was used. Realizing that didn't really tell me which fabric was used first, I decided to add a little reference guide in the binding. 


Since it's on top, I know that yellow was the January color and red was December. All the other months/fabric fall in the correct order in between those two. Just to be sure that I have it correct, the flange fabrics follow the same order as the fabrics in the guide. I think this is just plain fun and adds a bit of interest.  :-) 

I like this addition to the binding and have done it on some other quilts. 


On this one, I took the opportunity to add my label at the same place 
as the binding addition.


Even though I had lots of time to get pictures of this quilt, of course I waited until it was a windy day. It's always so much fun trying to take pictures when it's windy. Jack is feeling better, which is a good thing because and he and Lynn were pretty darn quick at stopping the rack from being blown over. 


I had a couple of other great helpers too! Whenever a big gust of wind would start, these two would run over and stand in front of the quilt, trying to hold it in place. 


Peyton even got down on the ground and held the bottom of the quilt so I could get a picture of the binding from the back.  :-) 


I am one lucky woman to have this much help. 
Not a single one of them mentioned the fact that I could have taken 
these pictures a month ago.  :-)

Let's see some other finished 2020 Monthly Challenge quilts!

This is just a handful of the many other quilters who met the challenge and created some amazing projects. 

(Our amazing hostess for the challenge!)


rainbows. bunnies. cupcakes


I had a lot of fun making these blocks and quilts, and 
I'm already enjoying the 2021 blocks. 

There's still time to participate in for the 2021 Challenge. 
Simply go to Jen's blog and get the free pattern.
I hope you join the fun!
 
I already know how I'm going to finish my 2021 projects. 
Hopefully I won't wait until a windy, rainy, or snowy day to take pictures.  :-)