Showing posts with label Color Challenge. Show all posts

Monday, January 1, 2024

2024 Color Challenge

It's time for the 2024 
Monthly Color Challenge. 


Jen over at Patterns by Jen, always a great way to start a new year and 2024 is no different! 
Jen is the "hostess with the mostest" of the Monthly Color Challenge, and I'm thrilled to join her again for my 6th year. 

Each month, Jen will pick a color and a quilt block featuring that color. Not only does she choose a block, she provides instruction on how to make that block. The instructions are FREE during the featured month, but can be purchased for $1 after that. 

Jen always finds a fun way to introduce each month's color and she's done it again for 2024. Each month will be introduced via a fish, and I don't mean a simple, basic fish. Just take a look at this list! What fun!!    

January - Green Tiger Barb (Green)
February - Discus (Orange)
March - Cherry Barb (Red)
April - Electric Blue Hap (Blue)
May - Electric Yellow Lab (Yellow)
June - Harlequin Rasboras (Raspberry)
July - Duboisi Cichlid (Silver)
August - Purple Dottyback (Purple)
September - Kuhli Loach (Brown)
October - Wrought Iron Butterfly (Black)
November - Gourami (Teal)
December - Marigold Wag Swordtail (Gold) 

Jen's has lots more information on her blog, so why not jump over and read more about. 


Let's get started! 
January - The Green Tiger Barb


I have to be honest and say that I have never heard of the Green Tiger Barb. I did a quick internet search and found some lovely pictures; and I must say, this is quite a pretty fish. 


Thanks to its fluorescent green body, this fish will not be overlooked in any tank! While there are variations, the green body, with silver and gold blotches are topped off with really cool orange fins, making these fish a beautiful sight.

The Green Tiger Barb is know for being quite active and they like to have lots of plants in their aquariums. 
They also like their friends! Like most quilters I know, the Green Tiger Barbs don't particularly like being alone and should be put in schools of six or more.   


While Jen has made her blocks with two different greens, I chose to make mine with a single green and a white/silver dot background. The general rule is a fat quarter of light and a fat quarter of dark will be enough for each block.
The finished size of each month's block will be 12".

I will be keeping my background consistent all year. If you would like to do the same, Jen has all the information on how to do that, and even has information on how to cut the background for all 12 months most efficiently. WooHoo!

Use this link and scroll down the page a bit to find where to get the pdf for that. 

Here are the fabrics I've chosen. Don't you think the green texture kind of looks like fish scales? I do and am going to attempt to have each month's color print have a similar texture. 


This month's block is one of my all-time favorite blocks - Square in a Square.


Jen's instructions are very well written and one of the things I like is that block units are oversized and will be trimmed to the actual size needed. Doing this also helps keep all those beautiful points. No cut off tips here. I LOVE that!

This unit looks a bit untidy and rough... 


but once it's trimmed, it looks great! 


You will be making some flying geese units and those are oversized as well. 
Click HERE for my tutorial on how I like to trim those unit and get perfect flying geese every time. 


Jen provides pressing instructions for all of her blocks. While she likes to press seams to one side; lately, I've found that I am more successful with accurate points when I press my seams open. 
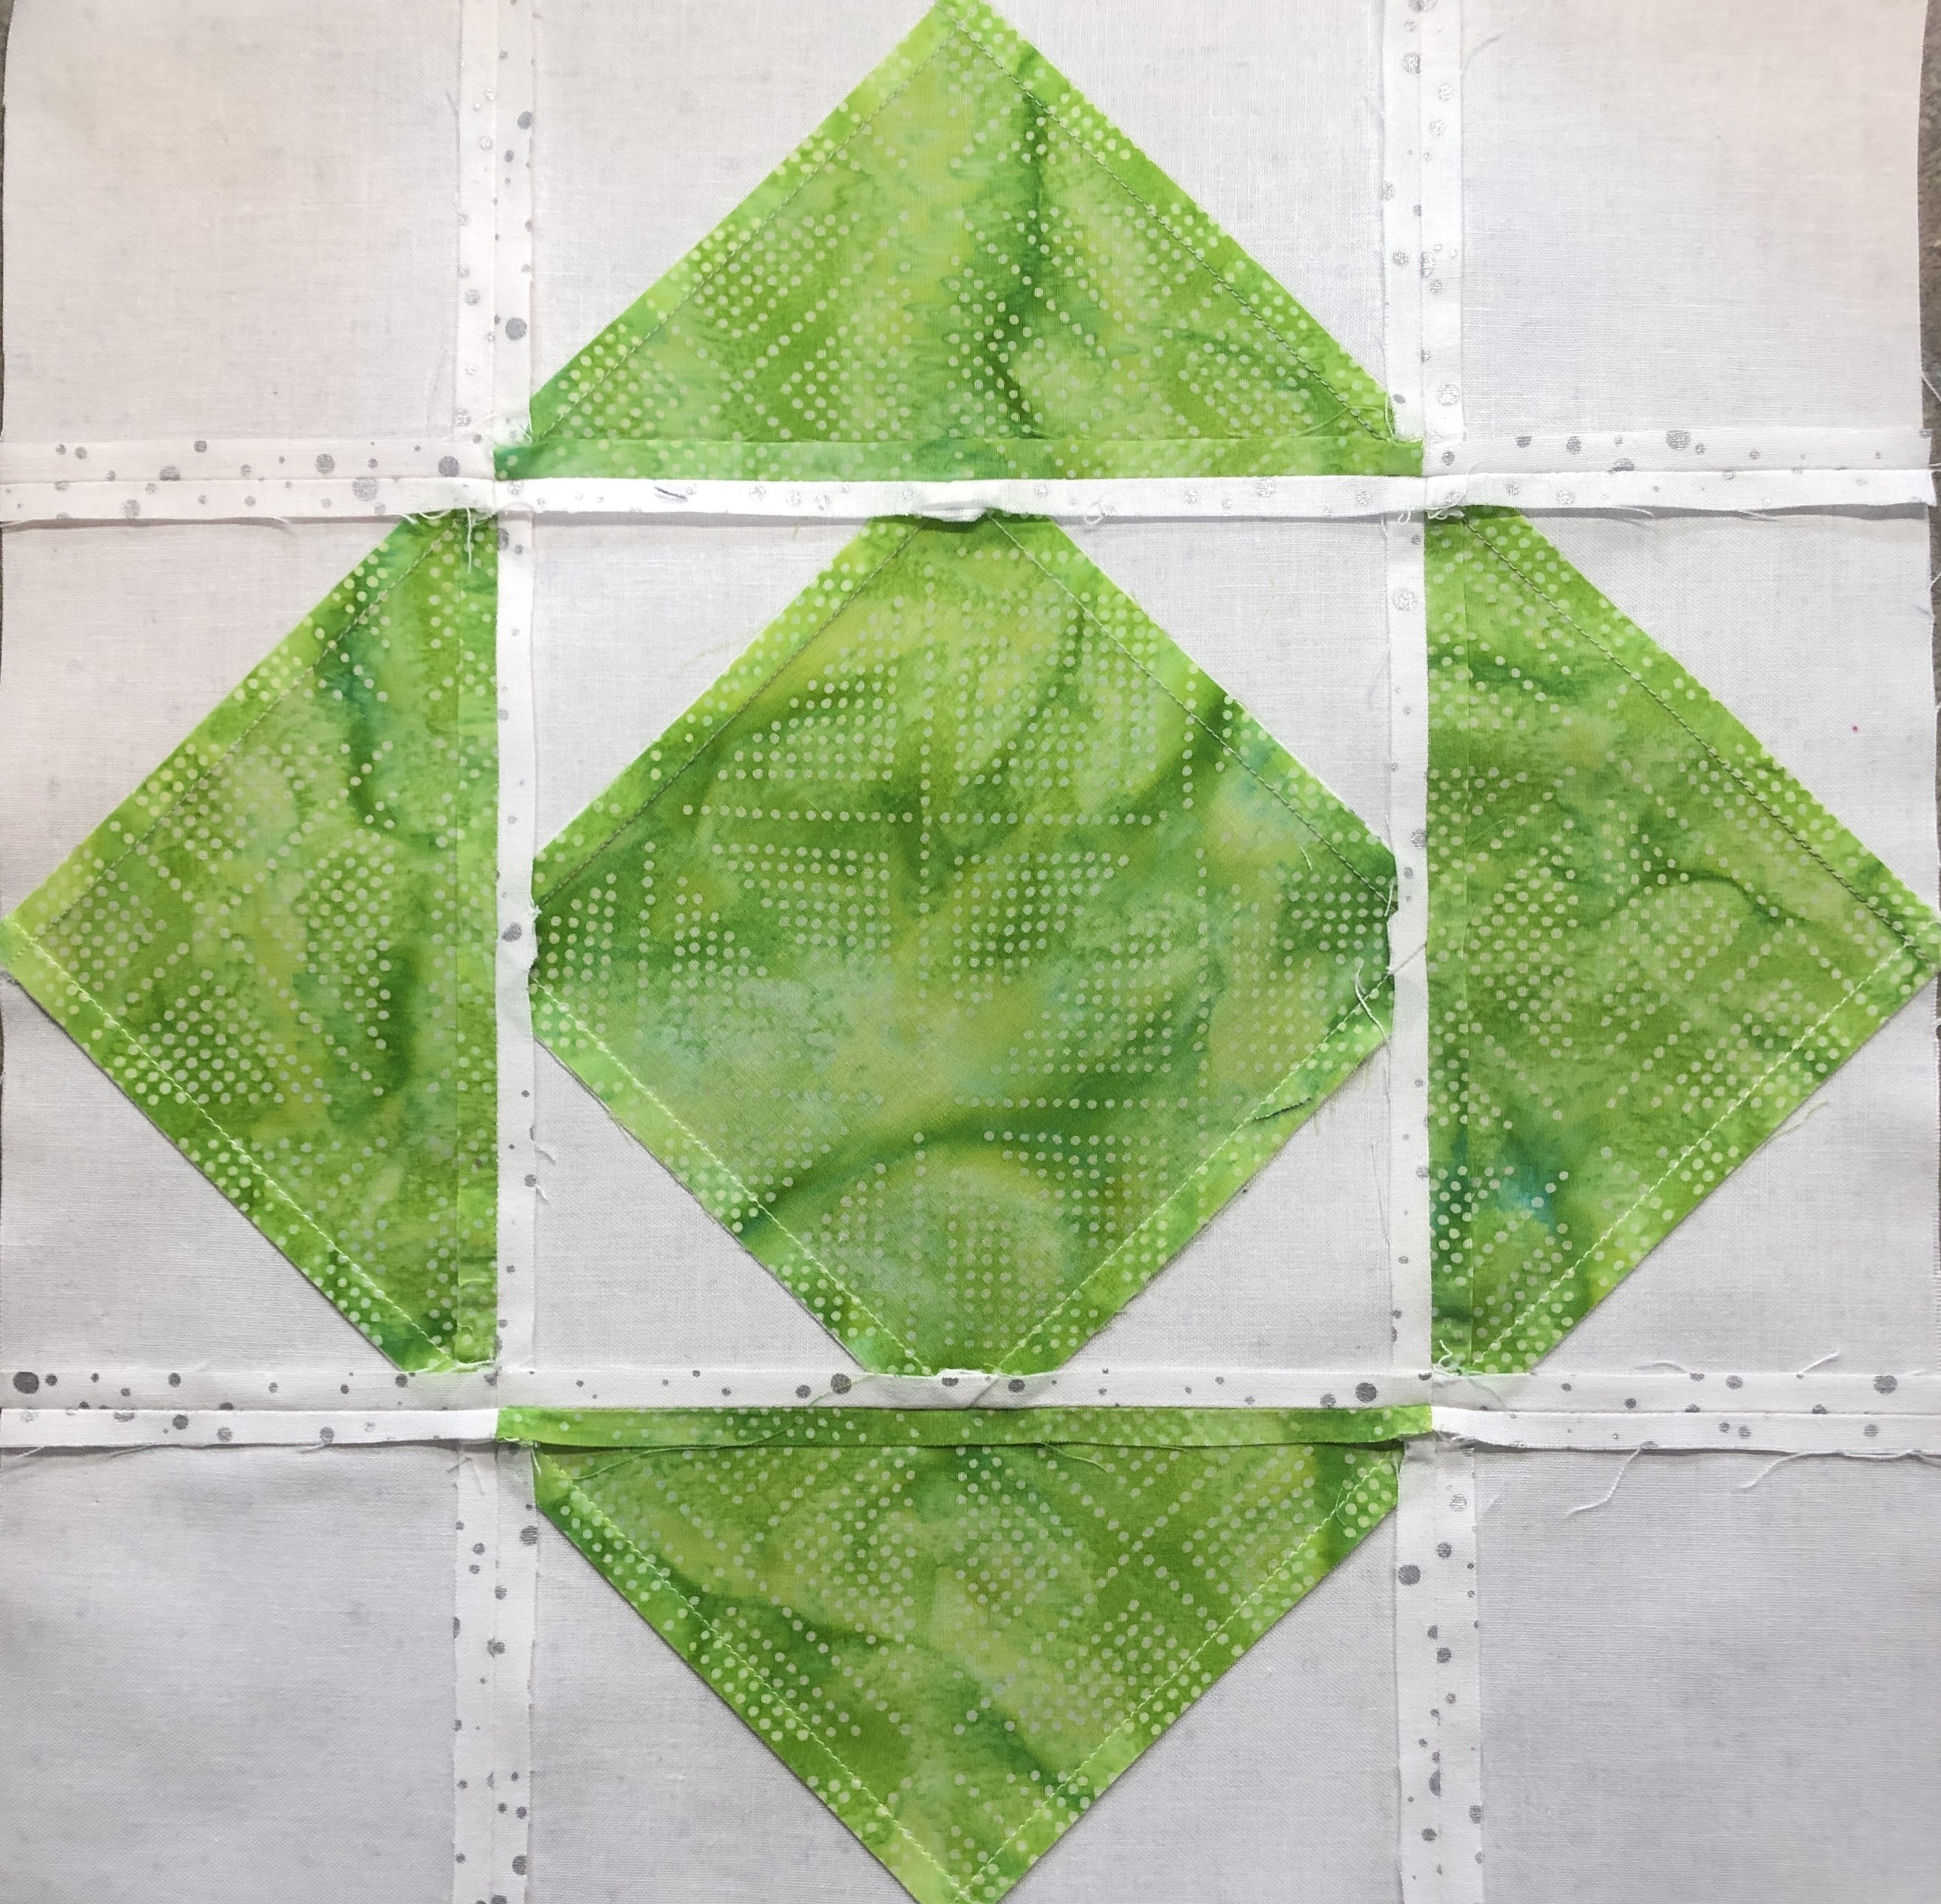

But...honestly, I don't think there really is a right or wrong way to press seams or do most of anything sewing-related. Generally, I say that as long as it's safe, whatever method is easiest for you and provides you with the results that make you happy, then that's the method you should follow. :-) 

I had a lot of fun making this block and I'm looking forward to making the remaining eleven. Who's going to join me?


Don't you think that my background in this picture looks like the bottom of a stream? I think so. It's actually our back patio, but I like it and plan to take pictures of each of my finished blocks there. We'll see if that happens, especially if there is snow when I finish the block.  LOL

Wednesday, February 1, 2023

Color Challenge Block

             I love a good challenge and when it involves fabric and color, you can count me in the game. 

Jen, from Patterns by Jen, has hosted monthly color challenges for quite a few years now and I've participated in three of them. I took a break last year but am participating in a limited way this year. I couldn't resist joining again in 2023 because the colors are awesome, and how she introduces each color is so darn fun. This year she is using classic cars! 


************

2023 Monthly Colors

February - Aqua
March - Red
April - Olive Green
May - Baby Blue
June - Grey
July - Purple
August - Brown
September - Mustard Yellow
October - Blue
November - Green
December - Orange

************
I chose to participate in February for a couple of reasons. I love pretty much any color that is related to blue, so aqua is perfect. I also fell in love with the block when I saw it. And finally, to be totally honest, I wanted to have a month early in the year so I didn't get bogged down with work and end up being rushed to make my block. 

************
Sew...lets get to some specifics and the questions I know you are all asking. Jen has all the information on her blog, but here's the quick version

How much fabric do I need?

The general rule is that each month, a fat quarter of light and a fat quarter of dark of will be enough. This year we will be making just one size block. The finished size of each month's block will be 12" (12 1/2" unfinished).  

There is also the option to have all of the same background, instead of using the color for that month. If you are using the same background throughout the year you can download the cutting instructions for the background on Jen's blog.

You do not have to use stash fabric for this challenge, unless you want to do so. Jen has some great information and wonderful links to help you choose just the right fabrics for this challenge.  

Block Patterns

Blocks are available for free during the month on Jen's blog. After the month has passed blocks are available for $1. 

To make it even more wonderful, Jen will share a video each month to help you with the block construction. They are amazing! 

************
February Block

I fell in love with this block as soon as I saw it! 
I think it is so darn fun!


But first, let's discuss the color AQUA.

According to Wikipedia: 

In Latin, the word aqua means water. Aqua is a variation of the color cyan, which is located between green and blue on the color wheel. Because the colors are regarded so closely, cyan and aqua are often used interchangeably in areas like web design. 

Aqua is one of the three secondary colors of the RGB color model used on computer and television displays. In the HSV color wheel aqua is precisely halfway between blue and green.

So, what exactly does that mean to me? Honestly, it means that I often confuse the colors aqua, blue, teal, and turquoise. 😅 

Here is an awesome site that will help you learn all about the various shades of aqua. It is worth taking a look just to see all the beautiful pictures. 

So what are the meanings and symbolisms associate with Aqua

Aqua evokes feelings of reinvigoration, youth, and dreaminess.
Because of it's water roots, aqua has an energy and striking tone that makes it a wonderful accent for many other colors. 

When aqua is in your aura (An aura is a quality or feeling that seems to surround a person.), you are mostly calm and know how to chill. Because of that, your understanding and compassion is a gift to the people you meet.  Basically, you live your life with a focus on joy and innocence. Gee, I want to be like that!

************
Let's take a closer look at the February/Aqua Block


This block is fun and easy to make and Jen's instructions are perfect. Don't you just love how the light fabric seems to peak out from the corners of the dark center? I think the somewhat wonky flying geese units are perfect and fit right in with the aqua aura explanation, don't you? Because there are no outside 1/4" points to worry about, it made me relax and be carefree when constructing the block, which is exactly what I wanted. 

Speaking of being carefree and relaxed, I don't always find it easy to choose fabrics for my projects. I believe choosing fabric is like a journey. Sometimes you know the way by heart and everything is simple. Other times you hit road blocks and there is nothing easy or fun and the whole thing becomes a task. Here was my journey for this block/project. 
(I looked for an aqua car, but this was as close as I could get.)


I really wanted to use that stripe, but it just wouldn't work. As you can tell, I included fabric that was more teal than aqua; but it looks good and as I said early, I often confuse aqua, blue, teal, and turquoise so I'm right on course.

In keeping with the carefree spirit, I played around and turned the block to see what it would look like if placed on point. Oh my goodness! How fun is this?!?


This looks like some kind of animal and I think it is really cute. I am feeling the desire to make more blocks and create a quilt from this layout. 

Speaking of quilts, I made four of these blocks and put them into a darling little wall hanging. I love it!


I love looking at the back of a quilt, and this one was no different.


Do you want to make your own block? Take a few minutes and jump over to Jen's blog. I know you will love what she's doing!
Thanks Jen for this wonderful block and awesome challenge! 

And yes, I do believe Everyone Deserves a Quilt!

Tuesday, September 1, 2020

September Color Challenge

 It's the first, and that means that it's time for the new 

Monthly Color Challenge Block


It's Color Challenge Time again!

This month's color is Cinnamon,

and the bird is the Cinnamon Teal

head on over to 

Male (left) and Female (right) Cinnamon Teal

The Cinnamon Teal is a species of duck found in western North and South America. It is a small dabbling duck, with bright reddish plumage on the male and duller brown plumage on the female. It lives in marshes and ponds, and feeds mostly on plants. Both the male and female have a pretty sizeable head and a long bill.

As you can see in the picture above, the adult male has a cinnamon-red head and body and a brown back. His bill is long and black, and he has striking red eyes.  

The adult female has a mottled brown body, pale brown head, brown eyes, and a grey bill. Interestingly, young and non-breeding males have similar coloring as the female, but their eyes are red. All adults have a sky-blue patch visible when their wing is open.
 
Cinnamon Teal dabble on aquatic plants in shallow water areas, especially rush seeds, pondweed seeds and leaves and salt grass seeds. They also feed on animal food, especially aquatic insects and mollusks. So basically, they are vegetarian with an occasional insect or two eaten.

Much like I'd like to do, nearly all Cinnamon Teal winter in Mexico and Central America.

Click HERE to listen the the Cinnamon Teal
Be sure to listen to both the male and female sounds. They are quite different.

What symbolism is associated with the color Cinnamon
That is quite interesting because throughout much of history there has been a bit of a contradiction regarding the color. Because the color is associated with the spice of the same name (a spice that was highly prized in ancient Egypt, Greece, and Rome and often given as a gift for monarchs), the color cinnamon was looked upon with high regard. But if the color was separated from the spice, it was often associated with poverty and humility because of the brown clothing worn by the lower class in ancient Rome and Catholic monks during the Middle Ages. 

In recent years, the various shades of brown have been associated with nature and thus represent strength, stability, sincerity, loyalty, and honesty.  While brown and most of its shades are often listed as a "least favorite color" by many people, it is often considered to be a neutral in the art and decorating work. Cinnamon can be paired with most shades of brown, and looks fresh next to cream or crisp white. It looks amazing when paired with other earthy shades like burnt orange, deep red, maroon, soft blue, and olive green. 


Searching the internet for these colors has made me want to do some redecorating/repainting. I know myself enough to realize that will most likely not happen anytime soon, so I'll do what I do best. I'll use them in a quilt or two. If nothing else, this color challenge has made me become smitten with some new color ideas! :-) 

Speaking of quilts, I have used various shades of brown over the years, including cinnamon.

Prism, pattern my Tammy Silvers made by Joanne Hubbard

Bethlehem, pattern by Doug Leko, made by Joanne Hubbard

Uptown Girl, pattern by Creative Sewlutions, made by Joanne Hubbard


Zen Table Runner, pattern by Jean Ann Wright, made by Joanne Hubbard

Back of Zen Table Runner

The cinnamon that I used this month was purchased at Once Upon a Quilt in Ft. Lauderdale. To be honest, this was the color with which I had the most challenging time picking. I'm sure the staff thought I was crazy when I kept asking their opinions of fabrics based on the names of a bird,and then I threw in a spice! If they did think I was crazy, they certainly didn't show it. For that, I am thankful.. 😘

I liked this fabric, so I bought much more than what I needed for this project. Imagine that! 


The pieces are cut and ready to sew.


These simple blocks look great!


Check out other bloggers who made this block. 
It is always fun to see the different fabrics used.


You will definitely want to check out the 3rd Quarter Sponsors. 
They have provided some awesome prizes. Thank you! 
Winners will be announced October 1st.

Sponsors July thru September

Quilters Chic - PDF Pattern
For The Love of Geese - PDF Pattern
Carole Lyle Shaw - Pattern and Grunge bundle
Quilters Dream Batting - Dream 80/20 - 60" x 60"
The Fat Quarter Shop - Fabric Bundle
Warm Company - Warm 80/20 - 55" x 60"
Warm Company - 1 yard Insul-Bright
Make Modern Magazine - 6 month subscription
Patterns By Jen - Superior Thread S-Fine 50
Patterns By Jen - Magic Wand

Monday, December 30, 2019

Reveal - 2019 Color Challenge Quilts

I've been teasing you lately with pictures of my completed 2019 Color Challenge quilt blocks and bindings (even more so on social media!), but I'm ready to share the quilts today.


As I have said before, I made two full sets of blocks and just reversed the fabric placement. See THIS post to see what I mean. Even though I toyed with the idea of making one large quilt, I ultimately decided to make two separate quilts, and I'm very happy with my choice.  :-)


I used Jen's awesome Checkered Rainbow setting for the original blocks, and I love how it looks. I loved the look of a black and white border, but I also knew that I didn't want to use a solid black and white. What was a girl to do?  I was thrilled when I found this Wilmington Prints fabric - Bubble Up. 


Isn't it perfect? I paired it with this Zen Chic Spotted Black fabric.


Success!


And just because I love a good side view of a quilt...


Do you see what I mean about how beautifully that Bubble Up fabric works?  


I used the Spotted Black for my backing and while it's difficult to see in pictures, I like how the quilting design shows up on it. 

Jen has great instructions on the Checkered Rainbow option on her blog. Be sure to check it out. I did add an additional small black border (1.5" finished) so I could sew a flange binding and not lose any of my points. 

The Checkered Rainbow border and sashing was somewhat time consuming and labor intensive - but so well worth it! I decided that my second quilt was going to have a very simple border and sashing offering. 

I chose two fabrics - the Spotted Black (can you tell that I really liked this fabric and bought a bunch of it? lol) and Grey Rustic Weave by Moda to frame the blocks. The grey looks slightly brown in this picture, but it is grey.


I framed the blocks, alternating the fabrics with a 1.5" finished frame. Technically, that made the finished block size 15". I then laid out the blocks in the same order as the first quilt. I played around with borders and decided that I needed/wanted to use the Bubble Up fabric because it had so many of the block colors in it. After sewing on that 2" finished border, I decided that I couldn't end with that fabric, so I added a 3" finished border of the Spotted Black. I was still a bit underwhelmed when the top was together, but while I was picking up fabrics to put away, I decided that a scrappy binding made from all the Starlet fabrics (Blank Quilting) that I used for the blocks just might solve the "boring" problem. I think I made the right decision.


Of course, here are the obligatory side view pictures. 


Because these quilts are so colorful (I guess the challenge worked!), I thought it would be fun to photograph them in a park or playground. We are fortunate to have one very close to us, so Jack and I took advantage of the surprisingly good weather and headed to the park. 


Jack actually took most of the pictures this time because he is nursing a sore leg and I didn't want him up on a step stool (which you can see in some of the pictures, but I don't care). When he takes pictures, this is some of what you get.  😄  I guess he hasn't figured out how to delete pictures before handing them over to me.  hahahaha


We had a good time and laughed through much of the picture taking. We tried a lot of different shots, trying to be creative like those other quilters out there. We succeeded in some cases, but failed miserably in others.  lol

We really wanted some good pictures of the two quilts together, just haphazardly hanging side by side. We had good intentions...


And then we thought that we should get some pictures of the bindings and maybe some of the quilting...


Like the Spotted Black, I bought a lot of the Grey Rustic Weave, so I used that for the backing of the second quilt. It shows off the random free motion quilting that I did.  


After we got home, I realized that we didn't get any of the flange binding by itself. Oh well... We did however, get these pictures of the binding. I really like the first picture!


 Even though it doesn't look like it, both quilts measure approximately 60" x 70". I just folded them differently when I was trying to show off the binding.

I am very pleased with these quilts and am looking forward to the 2020 Challenge. Check back tomorrow, because Jen is releasing the first block a day early - December 31st, and I'm blogging about it. Yay!