Saturday, May 28, 2016

2 More Hands2Help Quilts

Here are the final two Hands to help quilts that I will be donating. Whew! I am just making it under the wire. You can see the first two in THIS POST.

This first quilt is made from homespuns. I showed another quilt to a man friend of mine and he commented that he liked it but perhaps I could "man it up" some.

I thought about it and realized that most of the quilts I make are on the feminine or child side. I asked him to describe what HE would want and he told me he would love to have one that was like the quilts his grandma made. He said, "I don't know what the fabric was, but it reminds me of burlap." Well, I laughed out loud and said I am sure it wasn't made from burlap. I showed him some homespuns and he said, "Yes! That's it!"

So, I got busy and made a "manly" quilt to donate.

 
I surprised myself and really like this and so does Jack. I think I may have to make him one.  Shhhh. Don't tell him.
 
And the final quilt was a kit I purchased when it was on sale from Craftsy.
It's called Arrow and I think it's a bit manly so I decided that fit the challenge.


My goal was to donate two quilts to each of the US charities and I've made it. Yay!
 
For more quilt eye candy, go to Confessions of a Fabric Addict to see what the other wonderful quilters are donating. I am honored to be a part of this wonderful quilt drive. Thanks Sarah for organizing this!


Tuesday, May 24, 2016

Tip Tuesday! Off-Set Seams

"Tip Tuesday!" - Off-Set Seams

I love learning new things and then sharing that knowledge with my quilting friends. So, every Tuesday (or most Tuesdays!) I'll provide some tips, hints, tricks, tutorials, shortcuts, etc. that I've learned over the years and share them here on the blog.

"Tip Tuesday" will be a collection of information about a wide variety of subjects garnered from a large variety of sources. I am not an expert by any means and do not take credit for being the great wizard behind all of these hints and tips. I will gladly give due credit whenever possible.

These tips will be archived and accessible to you just by clicking on the "Tip Tuesday!" tab above.

Read, enjoy, and be inspired!

***************************************** 

While working on this quilt...


I found that when I was sewing the triangles together I was encountering some issues because the diagonal seams were off-set and not always accurate. I was having to take out stitches and re-sew them because I was not happy with how they looked. After a couple of seams, I decided that I really needed to figure out a way to be accurate and avoid ripping. 

Here is a picture of the two triangles laid out next to each other. Looks innocent and easy enough, right? 


Well, when you flip the right one over to sew the seam, the horizontal lines do not match up if you've matched up the top and bottom ends.


This is what I want it to look like. I have accounted for the 1/4" seam allowance here, but found that I was not always accurate in keeping that seam allowance when I pinned and sewed. Mmmmmm, what to do?


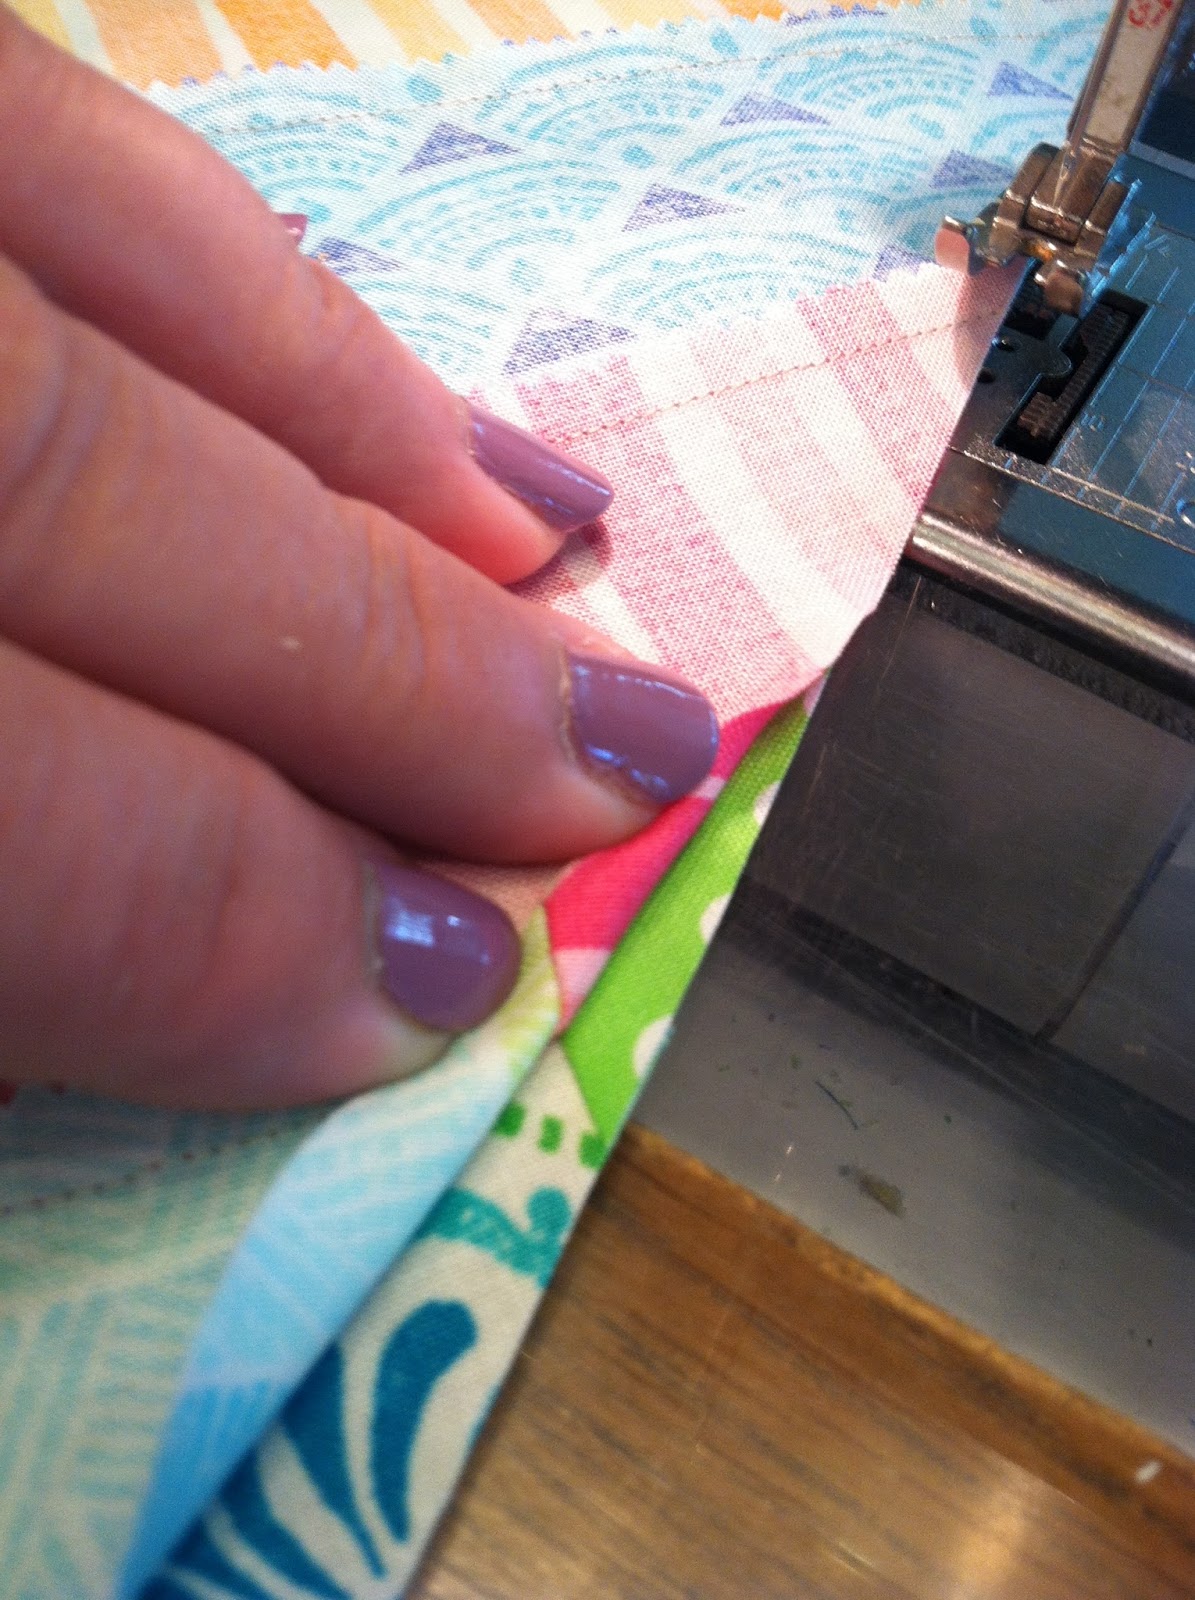
I noticed that then I was seam ripping, I could always see where the 1/4" seam allowance was because I had the needle holes left from the seam I just ripped out. I got to thinking and decided to "sew" the 1/4" seam without thread so I had the needle markings to make pinning and sewing more accurate. Notice that there is no thread in my needle in the picture below.


Can you see the pin holes in the picture below? They are very faint in the picture, but you can easily see them when you are working with the fabric.


The first thing I do is to stick a pin in the hole right at the intersection where I want the seam to match up with the piece underneath.


Again, it's challenging to see, but the holes are in the bottom piece also. 


I simply match up the pin in the first piece with the corresponding and correct hole in the second piece. When I do this, I know that is the point I need to sew in order to end up with perfect points. 

There is a trick here. I don't just line up and pin this intersection, call it a day and go sew.  (Of course not! That would be too easy.)


Instead, I keep the pin at the intersection and add a pin on both sides of that point. Notice how I keep the intersection pin horizontal through the to pieces of fabric? I do that so I can be certain that I don't move anything and lose that perfect placement.


Before sewing the seam, I remove the center pin because I know that intersection is now secure. I found that if I keep the pin at the intersecting point and simply secure it, I tend to have the fabrics slips a little and I lose accuracy. If it works you for, great! You don't have to add the two pins and you can be get to sewing faster than me.  :-) 


Here's the seam before pressing. Looks pretty good!


And it looks even better after pressing!


I'm a happy girl with a quilt that I really like!


Yes, I know this is an extra step and takes extra time, but I think it's a lot faster then me having to take time to rip out seams.

I know that I am not the only quilter who has encountered this issue; and I'd love to hear how you handle challenges like this. 

Monday, May 23, 2016

Design Wall Monday

Do you remember this pile of strip sets from last week's post?


I used two jelly rolls - Horizon and Dot. Dot. Dash! These fabrics are so bright and fun and they went together beautifully.

 
After the ten strip sets were sewn, I cut each one into 2 - 16 1/2" squares and cut them each once on the diagonal, thus creating four "strip triangles" from each of the original strip set. The remaining 10" of the strip sets were put aside for later.
 
I played around with the triangles until I came up with a design I liked.
 
 
This quilt is so bright and cheery! I have to check out my stash to see what I have for backing, but I think I'm going to look for a variety of fabrics and piece it. I kind of envision this being a reversible quilt.  :-) I haven't even thought about binding yet, but I often don't do that until the quilting is done anyway, so I have plenty of time.
 
I had a few issues when I was sewing the triangles together. In order for the horizontal strips to line up correctly, I had to carefully align and pin the triangles and then be sure to sew an accurate 1/4" seam allowance. I found that my pinning wasn't always correct so I used my seam ripper quite a bit when I first started putting blocks together.
 
I finally figured out a system that worked for me and I'll share the process and pictures tomorrow for Tip Tuesday! (Yes, that's right. I'll actually be posting a Tip Tuesday! this week.)
 
Remember that 10" of each of the strip sets that were put aside earlier? I cut each one into 4 1/2" segments and then sewed them together to make this baby quilt.
 
 
I think it is adorable! It measures approximately 32" x 40" which I think is a decent size.
 
What's on your design wall today?
 
Check out what other quilters are working on by going to
 
 
or


Sunday, May 22, 2016

Hand2Help Link Up

I've been busy with donation quilts for Hands2Help and I have a few pictures to share.

This first quilt (a really bad picture!) is a very old UFO. I decided that I needed to get busy and finish it so it could be used by someone instead of sitting in pieces in a tub. It's ready for binding, which will be done tonight.

 
This next quilt is another UFO that I decided needed done and donated. It is the exact same pattern as the quilt above, just much different fabrics. 


I have a one other quilt completed, but don't have pictures yet; and there is a small quilt that is not quite done, but should be completed tomorrow. I'll post pictures ASAP.

Check out other quilts that are being donated by going to...


Monday, May 16, 2016

Design Wall Monday

It's Monday!

I have a wall hanging ready to be quilted and I decided to leave it on the wall until I get it done. It's small, only about 25" square and I'm going to quilt it on my domestic machine but I just have not made the time to do it. Hopefully I'll get to it this week, but since it's senior finals week, I'm not promising anything.


Does it look familiar? It should. It's a three fabric version of the quilt in Quilt Sampler that I posted about last week.


When we were first working with the quilt for the magazine, I decided that I needed to make a smaller version so we could decide if we liked the color placement. Below is my first version of the quilt, and as you can tell the leaves were falling so this was way back in the fall. Although we liked the color placement, I did change to piano key borders.


I still really like the mini version of the quilt and so do Mabel and Ethel. Because of that, they are offering a kit for four sizes - the mini version (25" square), 40" square and 60" square, and the 105" version in the magazine. YIPPEE!!

In other news, Jack and I were in Philadelphia this past weekend for a college graduation and we encountered rain, sleet, and snow on the way home. Really!?!? It's mid-May and we had snow. I decided that when I got home, I NEEDED to relax and listen to the purr of my sewing machine so I decided to piece some strip sets I'll be using later this week when I play with an idea that I have. Here is the stack of ten strip sets, (8 strips in each), ready to be pressed and sub-cut.


I did some math and figured that I need 80 strips of coordinating fabric, cut 2 1/2" x WOF. Instead of buying fabric or spending time trying to pull fabric from my stash, I decided to use two jelly rolls that I had here at home.  I chose the Dot. Dot. Dash-! and Horizon jelly rolls because I feel like they work well together. I like them so far and feel pretty confident that I'll be happy with the end result. But, since this is a test I'm sure I'll make another version of this using yardage. I'll have to spend some time thinking about that fabric choice, but not now.  :-) 


There is some slicing and dicing that will take place with these strip sets, so be sure to come back and check on the progress.
What is on your design wall today?
Check out what other quilters are working on today
and

Sunday, May 8, 2016

Sunday Shenanigans

First of all...

Happy Mothers' Day

It's a beautiful day and I hope to be able to spend some time outside to enjoy the fresh air and sunshine. But first, I have to finish cleaning up my basement from a broken water heater that spewed water all over.  YUCK!! The worst part about all of this is that I wasn't home when it happened. My husband had arrived home a few hours before I did so he spent a good 2 1/2 hours vacuuming by himself. He's such a good man!!

So where was I? I was out celebrating the release of the new Quilt Sampler Magazine that features M & E Quilt Shoppe and one of my patterns. YIPPEE!!


If the magazine is not on the shelves in your area, they will  be soon. There are some awesome shops and quilts featured this time. It is well-worth reading.
 
************************************************
And, today I am the guest blogger over at Confessions of a Fabric Addict. I've provided a tutorial for a very simple and quick to make quilt. If you need a quilt fast, whether it's for a gift or donation, this tutorial may just fit the bill. It's perfect if you have some charm packs sitting around because it just takes 96 - 5" squares and 2 3/4 yards of background fabric.  I call my version After the Rain and you'll see why when you read the post. Here's a picture before quilting.
Hope you enjoy it!