Wednesday, February 19, 2020

Color It Red - My Turn

It's My Turn!


I am excited to be a part of this Hop! Thanks for all the organizing Carol, and for inviting me to join you. 

Be sure to check out all of today's participants and their wonderful creations. The list, with links, is at the bottom of my post. 

I started with these fabrics and had high hopes for a wonderfully fun quilt. The plan was to have at least one square from each of my red stash fabrics in this quilt so I could use the finished project as both my blog hop quilt and my inventory quilt


Sadly, this is the status of that project - packed up and put into time out until I can get it to play nice and look like the quilt that's in my head. 😒


When I packed up this quilt on Feb. 5th, I realized that I had scramble to come up with a project to show for this hop and that I can always figure out what to do for my inventory quilt later. So I went with Plan B - finish a UFO! I had already made this fun top, but had not quilted it.


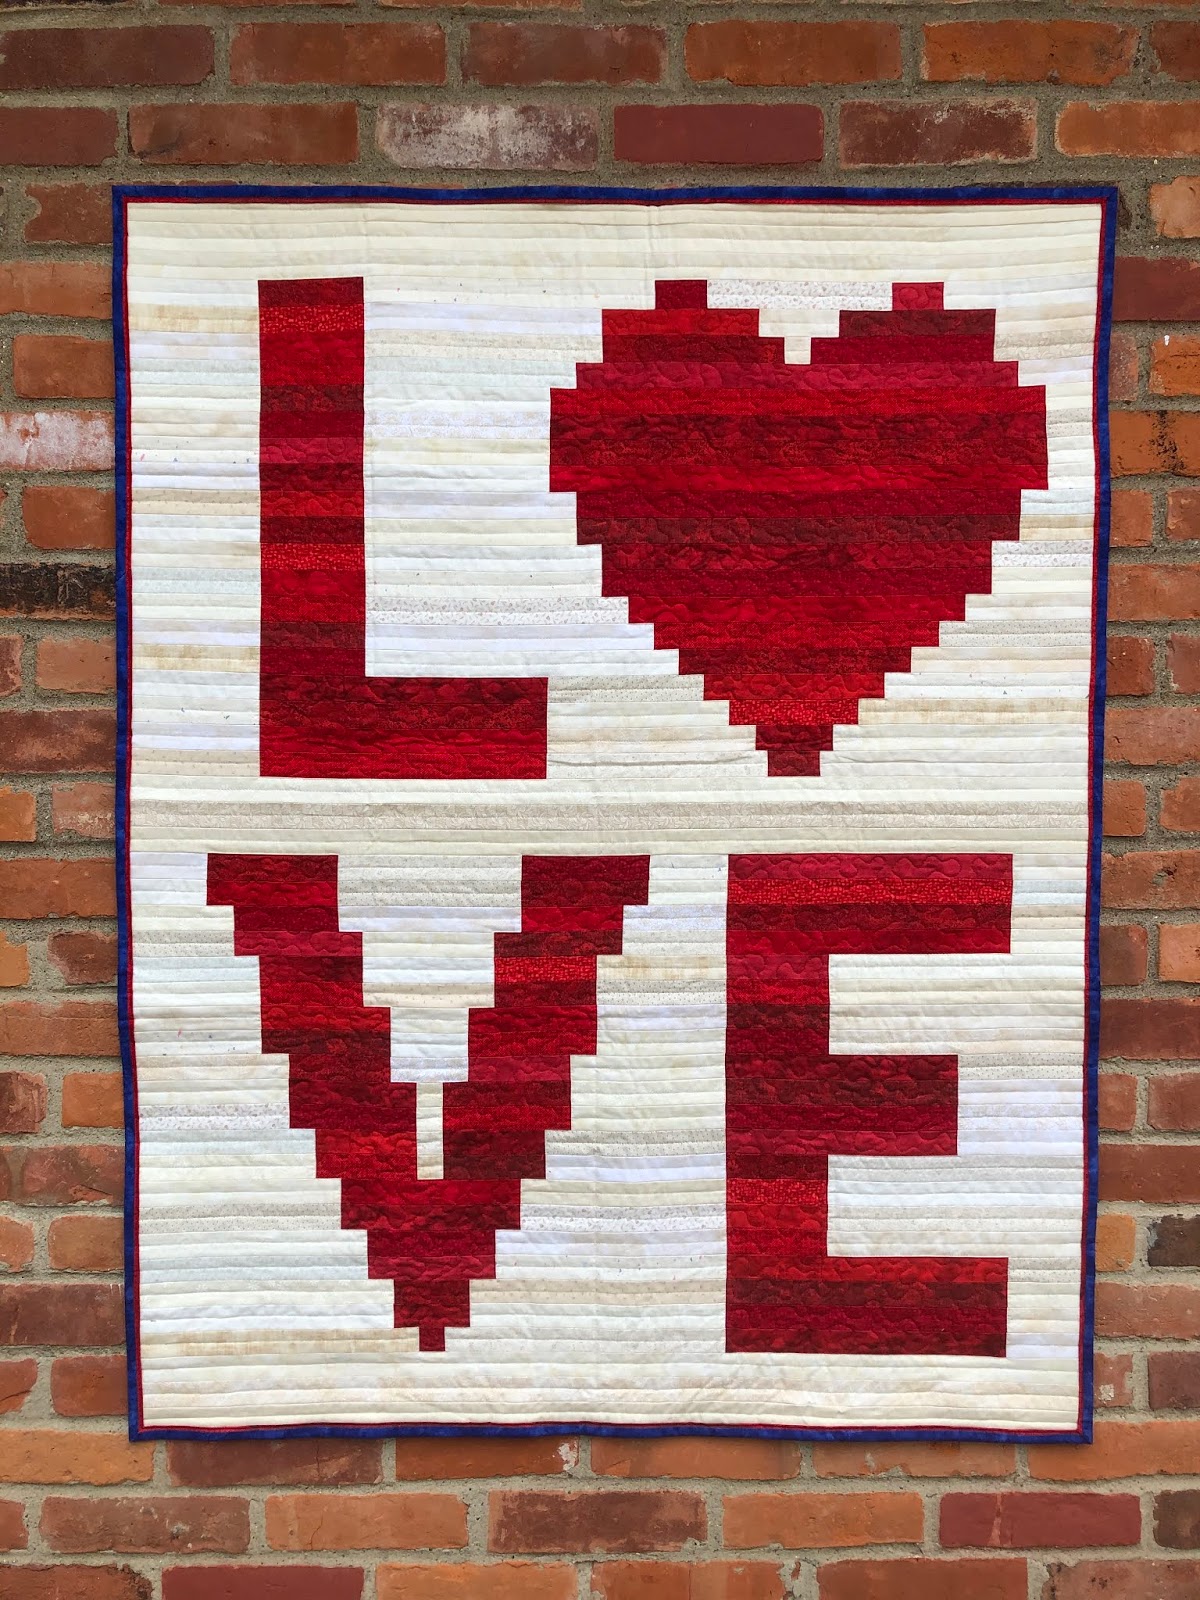
I put it up on the design wall, trying to decide how I wanted to quilt it and it didn't take long to decide that simple straight line quilting was the answer. 


I quilted a line straight through the middle of each the 1" strips and am very happy with that choice. 

The next question was on how to bind this. I was going to go "safe" and simply use scraps of red, but my husband Jack was not thrilled with that idea. He wanted a completely different (and stark) color, so I started pulling fabric. When I pulled out this blue, he said he liked it, but it wasn't quite right. When I suggested the red flange, we knew we had a winner!


If you've read my blog much, you know that I love to take pictures of quilts from an angle. So here they are.  :-)


I hung the quilt on the shop to get pictures and left it up, knowing that Lynn and family would be stopping by. I thought it would be fun for the kids to see it.


It took a little organization, but Ty got the kids ready for a picture.


They like the quilt and I love this picture!


Of course I couldn't just finish the Love quilt and call it done for this hop!

I still wanted to make this project as an inventory quilt, so I got to thinking about what I wanted to do. In the mean time, the clock was ticking. Inspiration struck when I saw a Modern Fans quilt by Suzy Quilts

I went back to my stash and cut a rectangle of each my reds (I had to cut a few duplicates), and started playing around. 


I auditioned quite a few options for the solid colored blocks and was thrilled to find this aqua in my stash. I think it's perfect!

Here are the obligatory side views...


Simple quilting works for me.


And of course I need a picture from the back.


Did you see the little touch of red on the bottom right side?


I wanted to add something special to the binding. I like it!

I put my label on the back, at the same spot. 


Taking quilt pictures is always "interesting" for me, especially in the cold weather. I always struggle to find a place to hang the quilts, especially to change up the background. About a year ago, I stumbled upon a blog post (I can't remember the blog though, which makes me sad!) about taking fun quilt pictures. I was surprised to read that she uses Scotch Rough Surface painters tape. I skeptically tried it and was pleasantly surprised.


It is especially wonderful when it's not too cold; but it works great most of the time. I think it looks kind of funny though. :-)  


Check out the rest of today's bloggers. They have some awesome projects to share.

February 19th
Everyone Deserves a Quilt - This is ME! :-)

Monday, February 17, 2020

Color It Red Blog Hop


It's time for the Color It Red Blog Hop

I am looking forward to the next five days and seeing some wonderful red projects. I'm posting on Wednesday and my projects are ready to go. Woo Hoo!

I posted a sneak peek of my project back on January 29th.


I hit a wall and was not happy with how the quilt was coming together, so it's been folded up nicely and put away for a little while (or a long while, who knows?).


 This meme describes exactly how I feel about this project; only it wasn't a mistake that put it in time-out. It was it was a flaw in my designing.  lol


However, I am very happy with how my first quilt turned as well as the one that I made to "make up" for the trouble quilt. I am looking forward to sharing my creations on Wednesday, the 19th. 

In the meantime, here's the full Hop line up. Enjoy!

February 17th

February 18th

February 19th

February 20th

February 21st

Wednesday, February 5, 2020

Making Progress

I know that it is common for people to come up with a Word of the Year. They do this as a way to stay motivated or on task throughout the year; and for many people, it works. You can even take a quiz to help you come up with the word that may be "your" word. I've never done that, but I had to pick a word for the day (yesterday, actually), I'd have to pick two - Attitude and Ambition

After posting yesterday about my stack of units to trim, I decided that I don't HAVE to trim all those flying geese and HST. Nope! Instead, I GET to trim them so I can make quilts for two very special people. 

Attitude! It's all about attitude.  

So I changed my rotary cutter blade and I got busy trimming. 


All 144 flying geese units are trimmed and put away. Yay! Now I get to work on other projects until the next clue is released. 

Yesterday, I said that I am not totally convinced that I chose the right fabrics for the blue/navy and red/dark red combinations, but after these flying geese were pressed and trimmed, I'm thinking that they aren't so bad. 


Yep! I do like how these flying geese units trim up so nicely. This no waste/four at a time method is easy, efficient and accurate. Here's a sampling of the two different sizes we've made for the mystery. 


I was feeling a bit AMBITIOUS, so after returning home from taking my husband to physical therapy, I decided to tackle trimming the HST I need to make for two other projects. Not only did they get trimmed, but the pinwheel blocks got sewn too. I need to press these, but I'm very happy!


If the picture above doesn't show that I was productive, maybe this one will. 


It was a good day and now I GET to work on other projects without guilt. :-)

Tuesday, February 4, 2020

Quilt Reality Check Time

At the end of last year, I decided to join the Diary of a Patriot Mystery Quilt  


I also decided to make two quilts because one of the size options is perfect for a Quilt of Valor. So I'm not making two identical quilts, I am swapping out my reds and blues between the two quilts. Sounds all good, right?

I was sewing along, keeping up nicely with the first two clues. I was feeling pretty good about staying on top of both quilts, while also keeping up with the multitude of other projects on which I'm working. 

Clue 3 was released January 31st and I quickly pulled and cut the required fabrics and got sewing. As usual, I am working on more than one project at a time, and all was going well. I was productive, got all my units sewn and then reality sunk in. 

It was time for a reality check and face some cold, hard truths...

1) I am still very happy that I decided to make two QOVs during this mystery. 

2) I enjoy making flying geese using the method in the mystery - making 4 at a time is very easy, efficient, and accurate.


Here's where the truth part comes in... 

3) I will admit that I am NOT going to enjoy trimming all 144 flying geese units (72 for each quilt). 


4) I am not sure that I love my fabric choices for the navy/blue combinations (red/dark red in my second quilt), but I'm going to stick with it. (FYI - the colors in these photos are not true representations of the actual colors.)

5) I am happy that I realized early in the process that my navy fabric is directional and has subtle lines running through it. 


6) I am NOT embarrassed to admit that I had to redraw my diagonal guide line on more than one small square in order to keep those subtle lines running in the same direction.  :-) 


7) It probably wasn't a wise decision to sew half square triangles for two other projects at the same time that I was sewing these flying geese blocks. I've already trimmed 96 HST in order to make 24 pinwheel blocks; but now I have to trim these 144 flying geese units AND 112 HST for one of the other projects. At the time, I had a desire to sew, not press or cut. Now I better find the desire to trim - and put in a new rotary cutter blade. ðŸ˜‚


My mantra for the next foreseeable future is, "Quit complaining and get trimming! These flying geese will NOTt trim themselves and they WILL make the quilts even more special for the recipients." lol

Everything is pressed and ready to be trimmed.


I have a couple of pinwheels already made, just to keep me motivated.  lol


If you don't hear from me by next week, call my husband and ask him to check on me, please. 😉

Saturday, February 1, 2020

February Color Challenge

It's the second month of the color challenge and I'm blogging again. Yay!


Wasn't it fun to see all those blocks last month?

For this month's pattern and instructions,

This month's bird and color are the Indigo Bunting - Teal


This is a beautiful bird and color!

Like so many birds, it is the male that has such a bright and wonderful color. The Indigo Bunting male is a small, sparrow-sized stocky bird with a short tail and conical bill. The males are a bright blue overall with a slightly richer blue on the head. 

Click HERE to listen to it's beautiful song. 

These wonderful birds sing from treetops, shrubs, and telephone lines all summer long. They are commonly found in weedy and brushy areas; and they really like hedgerows, overgrown patches, and brushy roadsides. They eat insects and berries, and can be attracted to backyards with thistle or nyjer seeds. 

Teal is one of those colors that has different "interpretations" for different people. I generally think that teal has more green to it, but when I look at the pictures of the Indigo Bunting, I see more blue. I generally think as that as more turquoise than teal. Nevertheless, I really like this color! While checking out my quilt pictures, I realize that I haven't used it very much and I think I need to change that. Here are a couple of projects in which I have used teal.

I wanted to try a cathedral window, but knew that I did NOT want to make a full quilt. This pillow was perfect.  


This quilt was made for a black and white plus one challenge. The pattern is Madd Hatter by Elaine Wick Poplin


*****************************************

Let's take a look at this month's color challenge block. 
Go to Jen's blog for the instructions. 
Here are my fabrics. 
(Remember that I am making two blocks - 
one with a black background and one with a white background; and I am using batiks for my colored prints.)


I really like the texture on this fabric I bought at Once Upon a Quilt in Ft. Lauderdale.  

I love their logo; and check out the colors!


The pieces are ready to be sewn together!


Time to use the rotary cutter.


I have no idea why this picture is so bad.  :-(


Just like that, all the pieces are ready to be sewn to make the block!


I like these fabrics and I really like HST units, so I played around a bit before making the block. What do you think of these block layouts?


I like this rectangular block!


Enough playing around. Here are my February blocks...


I like the teal diamond that is formed when I put these two blocks next to each other.  Hmmmm, I may have to play around with a new quilt option. :-)

 As a word of warning, be careful when sewing the HST units together. Be sure to have them in the correct orientation or you'll have to rip some seams like I did.  Yikes!  Can see see how perfect my point would have been? 😊


Check out the other bloggers who are making this block. I just love how the change of fabric makes that blocks look totally different. 

****************************

Don't forget to join the link up party to be entered into 
First Quarter Prize Drawing
 Oh, how we all love prizes!

Thanks to our sponsors!