Tuesday, March 29, 2016

Tip Tuesday! Batting

"Tip Tuesday!" - Batting

I love learning new things and then sharing that knowledge with my quilting friends. So, every Tuesday I'll provide some tips, hints, tricks, tutorials, shortcuts, etc. that I've learned over the years and share them here on the blog. 

"Tip Tuesday" will be a collection of information about a wide variety of subjects garnered from a large variety of sources.  I am not an expert by any means and do not take credit for being the great wizard behind all of these hints and tips. I will gladly give due credit whenever possible.

These tips will be archived and accessible to you just by clicking on the "Tip Tuesday" tab above. 

Read, enjoy, and be inspired!

*********************************************

Batting!

Do you ever wonder what kind of batting you should use for your projects? Should you use the same one all of the time or change based on what you are making?


I use a different batting for wall hangings than I do for quilts, and yet a different type for table runners.


Do you know what scrim is? What about bearding? Do you know the difference between bonded and needle punch?


Follow the link below to a Batting Basics Lesson from Fabric Depot.


Be sure to scroll down through the questions, as there are some good ones asked and answered.


Happy Quilting!


The Official Guide to Batting

by Fabric Depot

Guide to Getting To Know Batting

Sunday, March 27, 2016

Hands2Help Link Party

I almost forgot about today's link party for Hands2Help!

Following are a couple of links to tutorials for quilts I like to use for quick donation quilts.
 
Please feel free to ask questions if something doesn't make sense to you.

First up is the All Boxed In tutorial:
Although I used 3 1/2" strips to make this, it can easily be adapted to 2 1/2" strips and be made using a jelly roll and be very scrappy. All you need to do is to have contrast between the two fabrics of the blocks and rotate dark and light blocks. Easy Peasy!
 
 
Here a few of the quilts I've from this pattern. 


And then there's the Charming Stars tutorial:
This is a disappearing nine patch variation that I just LOVE!
It's easy to do, makes large blocks and the star points float so you won't chop them off and have a pointless star.
 

This quilt looks great in red, white and blue, but I also love it in other fabrics as well. Although I don't have a picture to show you, this is a great stash buster and the quilt looks great when you have the stars made from a variety of colors and fabrics.


And finally, when I am on sewing mission, the last thing I want to do is stop to cook a meal. Check out this link for a number of crock pot options for delicious meals that require very little time.
 
 
Check out other tips, tutorials, recipes, etc. over at

Monday, March 21, 2016

Design Wall Monday - Kaffe fabrics

I've been a busy girl the last few months and my time to sew/quilt has been significantly compromised. And, if you are a regular reader of my blog, you are also aware that my blog postings has been affected as well.

I'm not going to make any promises, but things are slowing down just a tad - my very-long term sub assignments are complete, and some major deadlines have been met so I hope to get back into a regular posting habit again, as well as have time to work on projects that are not for a class, for a customer, or have a deadline. That might be a bold statement that I'll regret making, but I sure hope it happens.  :-)

I find that when I work on a project  that requires a lot of thinking, has lots of small parts, has a looming deadline, or is just something on which I can't seem to wrap my brain around, I NEED a simple project to help ground me and give me that satisfaction and somewhat instant gratification I think we all know and feel. 

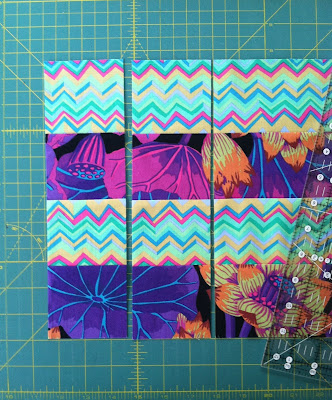
While working on a few of my latest projects, I decided to dive into my stash and use the following two bundles of 6" Kaffe Fassett strips to make a simple 16 patch quilt. Each bundle has 20 strips but since I cut them down to 3", I have 40 strips of light and 40 strips of dark fabric. WooHoo!

Kaffe Fassett, 16 Patch, Strip Piecing
 
 
One of the things I really like about these bundles is that they are slightly larger than 6", which allows me to trim off the rough edges and still end up with two 3" x WOF strips.

Kaffe Fassett, 16 Patch, Strip Piecing
 
I recognize that many of you may not like the fact that the strips are larger than 6", especially if the project on which you are working requires 6", but one of my "issues" with pre-cut strips is that there is often a lot of raveling that happens because of handling, etc. and the exactly cut 6" strip may end up being 5-7/8" instead of 6". I find that is often the case with 2-1/2" strips and that can cause a problem with piecing. (A few years back I had an issue with strips being too small so I now make it a habit to check the strip sizes before using them. I can usually make minor adjustments, but not always and I want to be aware of that BEFORE I start the project, not in the last step of piecing a block.)
 
The first thing I did a week or so ago was to pair up a light and dark strip. I pressed them and then trimmed them so I ended up with two 3" x WOF strips. 

Kaffe Fassett, 16 Patch, Strip Piecing
 
Just because I think I have more accuracy with sewing this way, I cut the strips in half. When I do this, I cut the folded edges every so slightly, so as to not waste much fabric. Can you see the tiny slivers of fabric to the right of the strips?

Kaffe Fassett, 16 Patch, Strip Piecing
 
I leave the selvedge edges alone. I don't trim them because I will need to make a clean up cut after I strip piece the units and I find it wasteful in terms of fabric and time to cut it twice. 

Kaffe Fassett, 16 Patch, Strip Piecing
 
Once I have my strips cut, I set them by my sewing machine and use these as leader/ender projects while working on the projects that NEED to be completed. I love the fact that when I am ready to work on this project exclusively, I have strip set and even some blocks already completed. :-)
 

Back to the sewing...I sew my strip sets and press them all in one direction. I chose to press these all down toward the outside dark strip. Notice that I have changed strip sets? I got busy sewing and forgot to take pictures using the same strip set. Oh well....

Kaffe Fassett, 16 Patch, Strip Piecing
 
Since I can get 7 - 3" cuts per strip set, I decided to sew two identical strip sets. (Remember I cut my WOF strips in half and am working with strips that measure 3" x approximately 22".) This will allow me to make 2 identical blocks plus have a little over 18" of the strip sets uncut.
 
Kaffe Fassett, 16 Patch, Strip Piecing

The second strip set only needs to have one 3" unit cut so I have that long remaining piece of the strip set already pieced, ready for something new and exciting.

Kaffe Fassett, 16 Patch, Strip Piecing

I'm not sure what I'm going to do with the remaining 18"+ of the strip set, but it's ready for me when I decide. My guess is that I will make more blocks to make the quilt larger, but I want to be able to pick and choose which blocks to make.

Kaffe Fassett, 16 Patch, Strip Piecing
 
 From the two identical strip sets, I end up with two blocks that will finish 10". 
 
Kaffe Fassett, 16 Patch, Strip Piecing
 
Based on the blocks I will have made (40), I'm leaning towards sewing either 2 or 8 more blocks. If I make a total of 42, the quilt will measure 60" x 70;" and if I make 8 more, it will measure 60" x 80". Of course all of this could change. Who knows? I may decide to make more blocks or add borders that use the strip sets cut up to make a piano key type border.
 
I already have 12 blocks constructed and threw them up on the design wall just to see how they look. I really did not stress at all about my strip pairing. I just put a light and dark together and tried to not put two striped or "dottie" fabrics together. I'm looking forward to playing around with this in the next few weeks.
 
Kaffe Fassett, 16 Patch, Strip Piecing
 
What's on your design wall today?
 
Check out the eye candy at
 
 
and


Sunday, March 13, 2016

Hands2Help Sign Up - Includes a Giveaway!

It's time to sign up!
Today starts the sign-up for the 6th Hands2Help Quilt Challenge.
 
To get all of the specifics (schedule of events, links, charity information, etc.), head over to Sarah's blog

 Confessions Of A Fabric Addict
 
If you sign up this week (3/13 - 3/19), you'll be entered into a drawing for a quilt kit giveaway.
Shannon over at Fabrics N Quilts has generously offered a kit for this quilt to one lucky early-bird sign up.  :-)


Gorgeous!!
 

Look at the numbers for the last five years
 
2011:  47 quilters made 60 quilts
2012:  55 quilters made 94 quilts
2013:  65 quilters made 127 quilts
2014:  70 quilters made 145 quilts
2015:  67 quilters made 147 quilts
2016:  ????????????????????????
 
I'd love to see us surpass last year!
To help reach that goal, I plan to make two quilts for each of the two US charities.
 
Can you help?
 
I am excited that I'll be a guest blogger again this year (a tutorial)  and providing one of the giveaway prizes. :-)
 
Hop on over to Sarah's blog to get more details and to sign up.


Monday, March 7, 2016

Design Wall Monday

I have a new version of Cut It Up on the wall today, but I don't think I'll get back to it for at least a week.


I'm nearing the end of my long-term sub job (my last day is Tuesday, March 15th) and I've got a bunch of stuff to do to finish up with that, as well as prep for my next umbrella workshop. my upcoming classes, and two scheduled trunk shows.

This is an easy quilt and I decided that I needed to make another version of it that didn't look so "Christmasy." I can't find a picture of the completed green quilt, so this partial one will have to do for now. Oops!

 
The new version is also a different size because I used a layer cake for this one rather than yardage like I did for the green quilt. I've adjusted this quilt to a bunch of different sizes. It's so simple to do and is perfect when I need a quick project.  
 
I'll try to get better pictures soon, because neither of these show the real colors. They are much prettier than shows here.
 
Another cool thing about this quilt is that there is no right or wrong way to lay out the blocks. I usually try to make it so I don't have to match up the inset strips, which makes sewing the rows simple. Easy Peasy!
 
What are you working on today?
 
Check out what other quilters are doing today by going to the following sites:
 
Judy L's Patchwork Times
 
and


Friday, March 4, 2016

Video - So God Made a Quilter

So God Made a Quilter...
 

My sister shared the following video with me and since it made me smile, I knew I wanted to share it with you! 


Wednesday, March 2, 2016

Free e-magazine info

There's a new free e-magazine that has a definite modern slant to it. It's got lots of ideas for using Benartex, Kanvas, and Contempo fabrics to create modern and contemporary quilts. I'm already wishing that I was done with this long-term sub assignment so I could spend more time quilting and having seen this, I am counting down the days! :-)

 
Click HERE to check it out.

Tuesday, March 1, 2016

Tip Tuesday! Machine Applique Help

"Tip Tuesday!" - Machine Applique

I love learning new things and then sharing that knowledge with my quilting friends. So, every Tuesday I'll provide some tips, hints, tricks, tutorials, shortcuts, etc. that I've learned over the years and share them here on the blog. 

"Tip Tuesday" will be a collection of information about a wide variety of subjects garnered from a large variety of sources.  I am not an expert by any means and do not take credit for being the great wizard behind all of these hints and tips. I will gladly give due credit whenever possible.

These tips will be archived and accessible to you just by clicking on the "Tip Tuesday" tab above. 

Read, enjoy, and be inspired!

*********************************************

 
Do you steer away from machine applique because you aren't quite sure how to handle the corners and turns? I used to, but not any more.

 
I have a really good friend who doesn't like to do machine applique so much so that she calls it "appli-pukey"! That always makes me laugh, but maybe I can get her to change her mind.
 
I will admit that applique is not my favorite thing to do, but I don't mind it nearly as much as I used to. There is a lot of help out there and I've done my fair share of reading books and watching tutorials.
 
I usually didn't have much problem with the curves, but oh those corners and points! I'll tell you, I am not embarrassed to admit that I've had some really ugly applique, but I am much better now.
 
 
Once you've mastered the inside and outside corners, it's time to work on those sharp points. I know from personal experience that if you don't do this properly, you'll "cut off" the tips and lose the entire effect of the point. Not good!  

 
I am a visual learner and the following link has a bunch of valuable information and LOTS of pictures. There are even videos to help guide you through the process. Yippee!!
 
Check it out and then challenge yourself to a bit of applique. I know you can do it!