Showing posts with label Tip Tuesday. Show all posts

Tuesday, October 11, 2016

Tip Tuesday! - Challenge

"Tip Tuesday!" - Challenge
I love learning new things and then sharing that knowledge with my quilting friends. So, every Tuesday (or most Tuesdays!) I'll provide some tips, hints, tricks, tutorials, shortcuts, etc. that I've learned over the years and share them here on the blog.

"Tip Tuesday" will be a collection of information about a wide variety of subjects garnered from a large variety of sources. I am not an expert by any means and do not take credit for being the great wizard behind all of these hints and tips. I will gladly give due credit whenever possible.

These tips will be archived and accessible to you just by clicking on the "Tip Tuesday!" tab above.

Read, enjoy, and be inspired!

***************************************** 

It's Tuesday, and I have a Tip Tuesday! post. I know that I've been very lax with my Tip Tuesday! posts, but I've simply been making the decision to prioritize things and not stress out about making sure I have something to post every week. I will continue to have Tip Tuesday! posts, but it probably won't be done weekly.

***************************************** 

I know that I've discussed challenging yourself in the past, but this time I want you to consider challenging yourself in a bit different way. Do some research and join a swap on line, with members of your sewing group, or with just a couple of friends. To make the swap easier, find a theme or cause and use that as your starting point.

For the past two years, I've participated in the Teal Mini Swap hosted by Beth Helfter of EvaPaige Quilt Designs. This swap is an annual event intended to raise awareness of ovarian cancer, raise funds for The Ovarian Cancer Research Fund, and give quilters a challenge to make something and send to another quilter. This swap costs $15 to join, but that's because it's a fundraiser. You can join or organize a swap that is free.

Each participant of the Teal Mini Swap received a small piece of a specially selected teal fabric. (This year it was this teal fabric from the Basic Mixology line from Moda.) This fabric must be used somewhere in the project.


When we registered at the end of August, we decided if we wanted to make a mini quilt  - 18" square maximum, or a mug rug - 10" square maximum. Beth received all of the registrations and paired up partners according to what they wanted to make and their fabric or quilt style preferences. We then had until October 2nd to make and send our quilts to our partners.  

This is what I made for my partner, Athena.


Athena really likes Tula Pink fabrics and she said that she's been a bit enamored with the color emerald lately. She also likes modern quilting, so I used an emerald background fabric and one complete charm pack to create her mini quilt.

There were duplicates in the charm pack, but that worked out well. After I decided which fabrics would be used in the quilt body, I chose two for the hanging pockets on the back and then pieced the rest of them for a scrappy binding.   


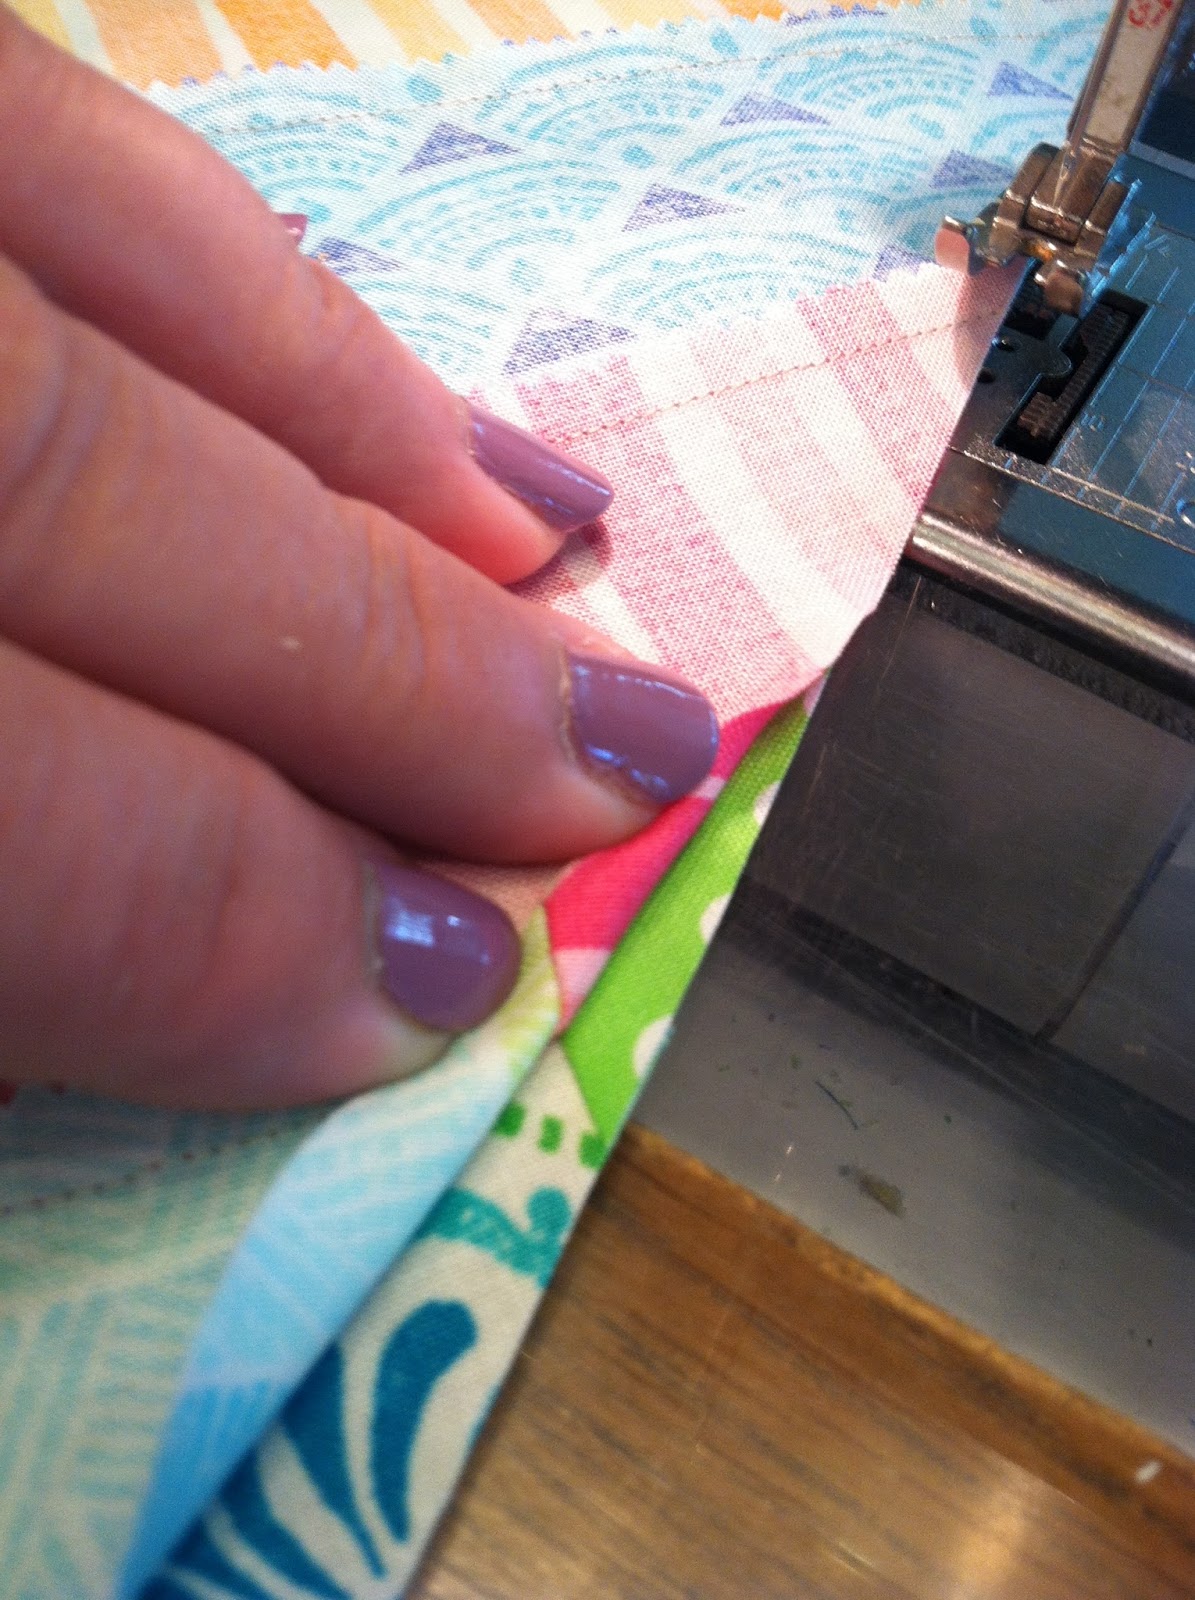
I usually diagonally piece my binding segments, but since these were only 5", I stitched them end to end, as you can see in the picture below. I like how this turned out! This was a bit challenging because I was working with 5" pieces, but I'm please that I decided to do this instead of pick a single fabric and just bind it with that. Challenge issued - challenge accepted - challenge completed!
  

Here's a picture that Athena took of everything I sent her. The emerald fabric shows up better in her picture than it does in mine. I included a few extras with her mini. I sent along a pack of 20 Tula Pink charm squares, a magnetic needle holder and pin (she does a lot of hand work), and a copy of the Quilt Sampler magazine that featured M & E Quilt Shoppe and the quilt I designed for them. I used a scrap of the Tula Pink fabric from the mini to make a card for her as well.


I had some yardage of the teal fabric in my stash so I decided to make a second mini quilt, in case someone's life got crazy and they weren't able to make one. I've told Beth that she is welcome to use this, if needed. This is very simple and to the point.


Here's the pieced backing. I used the teal fabric in the front, on the back, and in the bias binding. It kind of wraps around the quilt, like a barber poll.  :-)


If it ends up that Beth does not need this to be sent to someone, I think I'll just send it to her as a way to say, "Thanks for all you do!"

Here's the wonderful mini quilt AND mug rug that I received from Athena. She included a couple of extras as well - a coffee mug (with a lid!) and a journal that I have already been using.


I love the fabrics she used and the fun setting. When I signed up, I said that I really had no preference on the fabric choices or style of quilting. I really do like just about anything, and I wanted it to be easy for my partner. After some messaging back and forth, Athena asked if I liked modern and of course I said yes. She decided to go with that and I love what she did! The mug rug and coffee mug are in my sewing room and the mini is in the computer room.

So, back to the reason for this Tip Tuesday! post. Challenge yourself with a swap. Be honest with yourself and your partner about your skill level, and then do the best work you can. Don't stress over this, but take it seriously. When you are making something for someone else, you tend to be a little more careful about matching seams and pressing accurately.

Maybe start small and with a group of friends. Or, jump in head first and swap with complete strangers. Whatever you do, have fun! 

Tuesday, August 9, 2016

Tip Tuesday! Batting

"Tip Tuesday!" - Batting
I love learning new things and then sharing that knowledge with my quilting friends. So, every Tuesday (or most Tuesdays!) I'll provide some tips, hints, tricks, tutorials, shortcuts, etc. that I've learned over the years and share them here on the blog.

"Tip Tuesday" will be a collection of information about a wide variety of subjects garnered from a large variety of sources. I am not an expert by any means and do not take credit for being the great wizard behind all of these hints and tips. I will gladly give due credit whenever possible.

These tips will be archived and accessible to you just by clicking on the "Tip Tuesday!" tab above.

Read, enjoy, and be inspired!

***************************************** 
 
Are you a creature of habit when it comes to your quilting?
I am, although I am trying to break out of my comfort zone and try new things.

When I started quilting, I used nothing but Warm and Natural cotton batting. I was afraid to try anything with polyester because I had this misinformed notion that polyester meant that the final project would be about 3" thick!

I don't remember when or why I tried a blend (80% cotton, 20% poly), but I did and I like how it quilted up and how it looked after it was washed. I now had options and I was thrilled.

It took me a while longer to try a high loft batting; but again, when I did I was happy with the results. Eventually, I learned that depending on the look or feel I wanted in the final quilt, I could choose from a variety of batting types. I was in heaven!

I always find it interesting to read or hear what other quilters feel about batting. Rob Appell of Man Sewing, has just published a video tutorial on quilting with 9 different types of batting.


Take a look and see what you think!


Tuesday, June 28, 2016

Tip Tuesday! Needle Size and Other Valuable Information at Your Finger Tips

"Tip Tuesday!" - Needle Size and Other Valuable Information at Your Finger Tips
I love learning new things and then sharing that knowledge with my quilting friends. So, every Tuesday (or most Tuesdays!) I'll provide some tips, hints, tricks, tutorials, shortcuts, etc. that I've learned over the years and share them here on the blog.

"Tip Tuesday" will be a collection of information about a wide variety of subjects garnered from a large variety of sources. I am not an expert by any means and do not take credit for being the great wizard behind all of these hints and tips. I will gladly give due credit whenever possible.

These tips will be archived and accessible to you just by clicking on the "Tip Tuesday!" tab above.

Read, enjoy, and be inspired!

***************************************** 
Have you ever been sewing and had your thread shred for what appears to be no reason at all? What about having issues when you are using specialty thread like metallic or rayon? If that happens to me, it usually doesn't take long before I realize that I have to check my needle size and probably need to change it to accommodate the thread with which I'm working.
Do you know about thread and needle sizes? Many people do not, and I am not ashamed to admit that I did not. I am also not ashamed to admit that I still have to look at my cheat sheet when I'm changing thread to be sure that I have the correct needle size and type.
So how do you know what size needle to use anyway? I know many people who have never used a needle different than the one that came with their machine. They simply buy exactly what they've always had, and that is fine if it's the correct size for the thread with which you are using and if you aren't having any problems.
One of the resources I use is from Superior Threads. It's a wonderful site and even though it is geared toward their products, the information they provide is relevant to most products.
Check out this article on needle size. It's well worth your time. And at the bottom of the article, there is a link to follow about what causes thread to shred.
Here is a direct link to their Education page and from their you can find information about garment and apparel sewing, bobbins, thread, needles, tension, etc. It is really a wonderful site! 
Like I said, I know there are many resources out there about thread, needles, etc., but I really like that there is so much information in one spot here. There is even a video tutorial on how to sew a French seam. That is priceless to me because I don't do it enough to remember and I always have to review this video when I sit down to do it.


Tuesday, June 7, 2016

Tip Tuesday! - Find YOUR Quilting Passion

"Tip Tuesday!" - Find YOUR Quilting Passion
I love learning new things and then sharing that knowledge with my quilting friends. So, every Tuesday (or most Tuesdays!) I'll provide some tips, hints, tricks, tutorials, shortcuts, etc. that I've learned over the years and share them here on the blog.

"Tip Tuesday" will be a collection of information about a wide variety of subjects garnered from a large variety of sources. I am not an expert by any means and do not take credit for being the great wizard behind all of these hints and tips. I will gladly give due credit whenever possible.

These tips will be archived and accessible to you just by clicking on the "Tip Tuesday!" tab above.

Read, enjoy, and be inspired!

***************************************** 
If you have read many of my blog posts, you know that I LOVE just about all aspects of quilting.
 
I love fondling fabrics under the guise of searching for just the right shade of orange to match the project on which I'm working.
 
I love reading quilt books, magazines, and patterns and drooling over the beautiful quilts and trying to decide just what fabrics I could choose to make MY quilts just as stunning.
 
I actually like the cutting process, although it can be tedious. The rotary cutter signifies the beginning of a new quilt and many hours of blissfully sitting at my sewing machine excitedly watching the transformation from simple fabric to wonderful quilt.
 
To me, one of the most relaxing sounds in the entire world is the sound of a sewing machine. Seriously!
 
And then there is the teaching that I do. Oh my, my heart is fluttering, just thinking about it. I actually get to help someone else develop their love of quilting and that is an awesome feeling. (I have told people that sometimes I feel like a drug pusher because I get people hooked on quilting. Of course my drug of choice is fabric.)
 
I think you get the message.
 
I LOVE quilting!
 
One of the reasons that I love to quilt is the feeling I get when I give a quilt to someone or donate it, knowing that it will bring warmth, comfort, and happiness to the recipient.
It is an amazing feeling.
 
I've made A LOT of quilts in the sixteen years I've been quilting; and when I say a lot, I mean a hundreds of quilts. My husband has asked me many times to figure out how many quilts I've made and I just may try to figure that out for him. It should be pretty easy to do the math because I have information about all of the quilts I've donated for tax purposes and I have pictures I've posted on my blog.
 
Since no single person or family really needs hundreds of quilts, I found a couple of ways that I can justify my continuation to make quilts - I always need new class samples, and I donate a fair number every year. 
 
I am always trying to find a new charity, group, etc. that is in need of quilts. During my search, I make inquiries locally, read the newspaper, surf the web, etc.  After my research, I make my decisions and then quilts are made and sent away to their new homes. 
 
While reading Scott's blog over at
 
I became aware of a group called
 
 
Scott's post, and the story behind the America's Mighty Warriors has provided me with yet another outlet for my quilts. Although I won't actually be sending quilts to the group, I will be making a donation and I'll definitely be participating in the random acts of kindness program.
 
These words, written in a letter by Navy Seal Marc Lee who was killed in action August 2, 2006, have inspired me.
 
"Pass on the love, the kindness, the precious gift of human life."
   
I am going to make a difference!
 I will continue to make and donate quilts, but I will also find other ways to help. I will perform random acts of kindness and encourage others to do the same.


That is MY new quilting passion!


What is YOURS?
 

Check out Scotts blog HERE


Tuesday, May 24, 2016

Tip Tuesday! Off-Set Seams

"Tip Tuesday!" - Off-Set Seams

I love learning new things and then sharing that knowledge with my quilting friends. So, every Tuesday (or most Tuesdays!) I'll provide some tips, hints, tricks, tutorials, shortcuts, etc. that I've learned over the years and share them here on the blog.

"Tip Tuesday" will be a collection of information about a wide variety of subjects garnered from a large variety of sources. I am not an expert by any means and do not take credit for being the great wizard behind all of these hints and tips. I will gladly give due credit whenever possible.

These tips will be archived and accessible to you just by clicking on the "Tip Tuesday!" tab above.

Read, enjoy, and be inspired!

***************************************** 

While working on this quilt...


I found that when I was sewing the triangles together I was encountering some issues because the diagonal seams were off-set and not always accurate. I was having to take out stitches and re-sew them because I was not happy with how they looked. After a couple of seams, I decided that I really needed to figure out a way to be accurate and avoid ripping. 

Here is a picture of the two triangles laid out next to each other. Looks innocent and easy enough, right? 


Well, when you flip the right one over to sew the seam, the horizontal lines do not match up if you've matched up the top and bottom ends.


This is what I want it to look like. I have accounted for the 1/4" seam allowance here, but found that I was not always accurate in keeping that seam allowance when I pinned and sewed. Mmmmmm, what to do?


I noticed that then I was seam ripping, I could always see where the 1/4" seam allowance was because I had the needle holes left from the seam I just ripped out. I got to thinking and decided to "sew" the 1/4" seam without thread so I had the needle markings to make pinning and sewing more accurate. Notice that there is no thread in my needle in the picture below.


Can you see the pin holes in the picture below? They are very faint in the picture, but you can easily see them when you are working with the fabric.


The first thing I do is to stick a pin in the hole right at the intersection where I want the seam to match up with the piece underneath.


Again, it's challenging to see, but the holes are in the bottom piece also. 


I simply match up the pin in the first piece with the corresponding and correct hole in the second piece. When I do this, I know that is the point I need to sew in order to end up with perfect points. 

There is a trick here. I don't just line up and pin this intersection, call it a day and go sew.  (Of course not! That would be too easy.)


Instead, I keep the pin at the intersection and add a pin on both sides of that point. Notice how I keep the intersection pin horizontal through the to pieces of fabric? I do that so I can be certain that I don't move anything and lose that perfect placement.


Before sewing the seam, I remove the center pin because I know that intersection is now secure. I found that if I keep the pin at the intersecting point and simply secure it, I tend to have the fabrics slips a little and I lose accuracy. If it works you for, great! You don't have to add the two pins and you can be get to sewing faster than me.  :-) 


Here's the seam before pressing. Looks pretty good!


And it looks even better after pressing!


I'm a happy girl with a quilt that I really like!


Yes, I know this is an extra step and takes extra time, but I think it's a lot faster then me having to take time to rip out seams.

I know that I am not the only quilter who has encountered this issue; and I'd love to hear how you handle challenges like this. 

Tuesday, April 5, 2016

Tip Tuesday! Cone Thread Help

"Tip Tuesday!" - Cone Thread Help
 
I love learning new things and then sharing that knowledge with my quilting friends. So, every Tuesday I'll provide some tips, hints, tricks, tutorials, shortcuts, etc. that I've learned over the years and share them here on the blog. 
 
"Tip Tuesday" will be a collection of information about a wide variety of subjects garnered from a large variety of sources.  I am not an expert by any means and do not take credit for being the great wizard behind all of these hints and tips. I will gladly give due credit whenever possible.

These tips will be archived and accessible to you just by clicking on the "Tip Tuesday" tab above. 
 
Read, enjoy, and be inspired!

*********************************************

I'll admit it.
 
I love thread!
 
Since I use a lot of it, I prefer to buy my thread by the cone. I feel like I get a much better deal and it is such a great feeling when you empty a big cone of thread. It makes me feel like I've accomplished a lot. :-)
 
My favorite thread is So Fine #50 by Superior Threads. I use it for piecing and quilting and have always been happy with the results.
 
 
Even though I generally use a neutral color for piecing, I do have quite a variety of colors, and just seeing all those colors makes me smile.
 
If you've been a reader of my blog for a while, you may remember these pictures from a few years back. Quinn and Sadie were entertained for a very long time while playing with thread.


This is my version of "thread play" and it always makes me smile. All of the grandkids love to play with my thread; and yes,  I let them. They've been known to spend up to an hour organizing the thread by color, type, etc. They play "server" and ask us if we'd like a green and blue thread combo. They even try to create pictures with the spools. 
 
These pictures don't show it, but there are a few cones that I allow them to play with, but's usually just the smaller spools because they are easier for them to handle. (I really do need to get an updated picture. Ronan, Avery, and Peyton love to play with the thread and I'm sure Bailey will when she's a little older.)
 
I have a number of students who tell me that they cannot use cones because they won't fit on their machines. I have a couple of suggestions to help with that problem.
 
First, I love my thread stand!
 
 
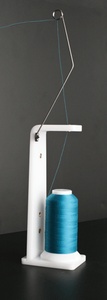
There are a bunch of thread stand out there but this is my favorite. It's from Superior Threads. This holder can be used for cones and spools up to 3.5" in diameter. It can be used vertically or horizontally, and it's portable. The "mast" fold down and the entire stand fits right in  my machine case.  
 
Before I got this stand, I had this one. (I still have it and use it when I have friends over to sew.) I bought this from Superior Threads and even though it looks like the ones you can get at the discount stores, this one has a metal base which provides stability and doesn't tip over easily. It can be dismantled for travel, which is great.  
 
 
So what do you do if you want to use cones but they don't fit on your machine and you don't have a stand?
 
How about making it work by putting the cone over a smaller spool that fits on your machine?
 
Spool in Spool (Large)
photo from Quilting Hack
 
The cone now fits on the machine!
 
Large cone on sewing machine spindle!
photo from Quilting Hack
  
Do you have another way to use cones of thread that don't fit on your machine? If so, please share your tip.
 
If you've never tried it, why don't you give cone thread a try and let me know what you think? 
 
I have a suspicion that you are going to love it. :-) 

Tuesday, March 29, 2016

Tip Tuesday! Batting

"Tip Tuesday!" - Batting

I love learning new things and then sharing that knowledge with my quilting friends. So, every Tuesday I'll provide some tips, hints, tricks, tutorials, shortcuts, etc. that I've learned over the years and share them here on the blog. 

"Tip Tuesday" will be a collection of information about a wide variety of subjects garnered from a large variety of sources.  I am not an expert by any means and do not take credit for being the great wizard behind all of these hints and tips. I will gladly give due credit whenever possible.

These tips will be archived and accessible to you just by clicking on the "Tip Tuesday" tab above. 

Read, enjoy, and be inspired!

*********************************************

Batting!

Do you ever wonder what kind of batting you should use for your projects? Should you use the same one all of the time or change based on what you are making?


I use a different batting for wall hangings than I do for quilts, and yet a different type for table runners.


Do you know what scrim is? What about bearding? Do you know the difference between bonded and needle punch?


Follow the link below to a Batting Basics Lesson from Fabric Depot.


Be sure to scroll down through the questions, as there are some good ones asked and answered.


Happy Quilting!


The Official Guide to Batting

by Fabric Depot

Guide to Getting To Know Batting