Showing posts with label Hoop Quilts. Show all posts

Monday, March 12, 2018

Design Wall Monday

I'm late posting this, but it's still Monday, so I'm calling it good. 😊

Here's what's on my design wall and a few other things that I've completed recently.

This OSU Champions Quilt is ready for binding. This is the fourth or fifth one of these that I've made because they are very popular with Ohio State Buckeye fans. There are four size options on the pattern from which to choose and it is made using squares and half square triangles. I like to make them scrappy, and I made this one as a leader/ender project. This is the small lap size and it measures 50" x 66".


This is a king size Breezy Quilt, minus the borders. I tested this pattern for Rachel Rossi and am very pleased with the results. I had a border sewn on to this but didn't like it, so out came the seam ripper. I've come up with alternate border options and in conversations with the other testers, we all like the new border idea. I hope to get those sewn on later this week and get this ready to quilt. Stay tuned for updates. 


Here are some close ups of the blocks and fabrics. Jack chose these fabrics because he wanted something a little more masculine than what I had picked. It took me a while, but they've grown on me and I now like them. Oh why do I doubt him when he picks fabric? He's right most of the time!

Rachel has some wonderful tips and hints on making these pinwheels, and I know you'll love them. I'll keep you updated on the pattern release date.


I finished this Jelly Roll Rug, made from Quill by 3 Sisters for Moda Fabrics. I think it's pretty and love the colors.


There are definitely some rough spots in this (mostly around the center when you have to make some sharp turns), but it's really not too challenging to make this. It's time consuming, but not challenging. Using one Jelly Roll yielded a rug that measures 30" x 44". Love it!


Here's a picture taken outside, to try to give you a better idea of the fabric colors.


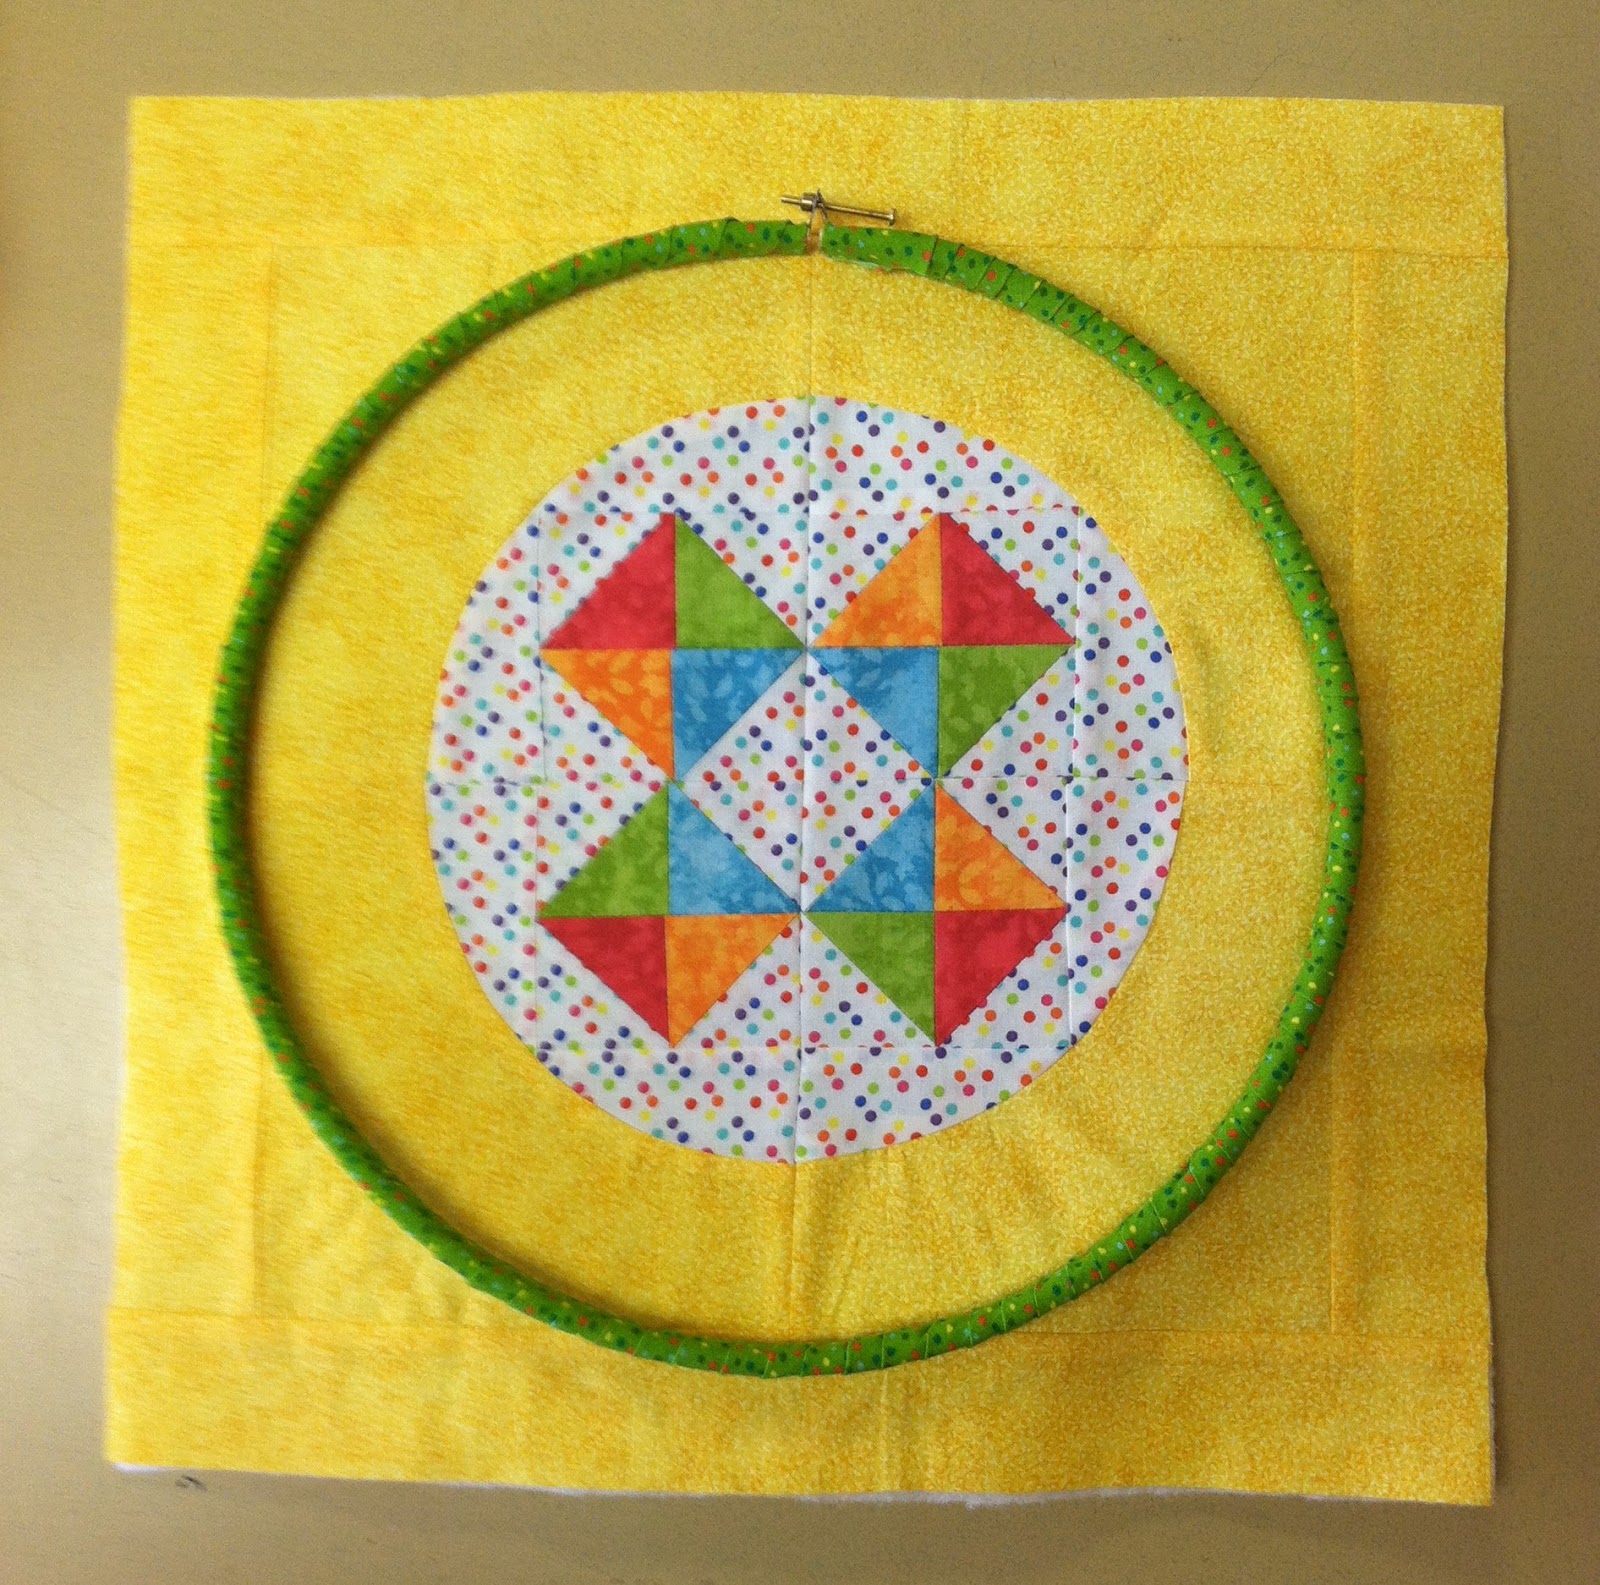
And finally, here's a 12" Hoop Quilt that I made, just because I wanted to do so.  😄  I love the colors in this and have enough fabric to make at least one more; but I'll use a different outside ring fabric. I have an idea of who I want to receive it and know she'd love these colors.  


What are you working on today?


and

Wednesday, February 21, 2018

Not So Wordy Wednesday

It's been a while since I posted and I don't have much time to write a long post today; so I decided to simply post some pictures of Hoop Quilts that I've made recently. I'll also add a few made by students in a class this past weekend.

Enjoy!

I made these for samples to hang at the Lake Farmpark Quilt Show to drum up students for the class. The show continues through March 11th, with the Vendor Days March 2, 3, and 4.  

I took some pictures at before sending them to Lake Farmpark, but I just could not get good pictures. It was rainy and I had to take them indoors.  


I tried taking the pictures with a piece of black fabric as the backdrop, but that didn't work great either. 


I have to admit that I enjoy seeing my projects hanging up for everyone to see. 


Here they are hanging outside the classroom. The purples in these first two projects just did not photograph well. Darn it!


I like this, even though I've been told that the center looks like a super hero logo. 


One of the best things about teaching classes is to see the variety of fabrics students choose. Here are a few from Sunday's class. 

I love these fabrics and know this is going to be spectacular when it's done. 


This is super bright and cheery and just makes me smile.


Once again, the purple background fabric did not photograph well, but this is just plain fun to me. I really like her HST layout choice.


This dark outer ring frames these HST perfectly. I really like this layout also. 


This directional outer ring fabric was a bit tricky to align properly, but it is going to look awesome when it's done. It'll have been so worth the extra time and effort it took to line up everything. 


I've got one more complete, but haven't gotten a picture yet. Because I used just two fabrics for the HST, it looks quite different and I like it!

Monday, January 29, 2018

Design Wall Monday

I have another wall with various projects layered on it.
Do you remember this post when I showed a variety of projects that I wanted to complete by the end of January?


All of the projects are done (quilted and bound!) with the exception of the blocks on the left side. But,  they are put together into a quilt top and I've started the quilting. Unless something comes up that means I can't sew, that should be done in a couple of days.

Here's the wall today.

 
You can see that quilt I mentioned earlier is the bottom layer. I can't show the entire quilt yet because it was being done to test a pattern, but I love it. I was thrilled to find what I consider to be the perfect backing too.


I don't think I could have found any better fabric for this! I'm making a table runner out of the "oops" blocks and these two tree blocks will be included. I'm a happy girl right now.  :-)

The quilt that is on the right side is made from 2 1/2" strips. It's actually not mine, but that of one of my students. I was going to quilt it for her, but she had some issues with it laying flat and I really wanted to see what happened so I offered to fix it. I found the problem and am now reassembling the quilt top. Yes, I know that is a lot of work and that I didn't have to do this, but I really was stumped as to what happened. Her 1/4" seam allowance was perfect and her pressing was good. I found the problem and it had to do with cutting the ends when it was time to add the next strip. The cuts were not always straight and when the next piece was added, the seam was not straight, even though it appeared to be because the ends lined up properly. 


This did not happen every time a new strip was added, but it was enough that it caused problems. I'm thrilled that it was a pretty easy fix. It was just a bit time consuming to rip apart all the seams, but even that was educational. I tried a couple of new methods of ripping and I like that. 

Working on this has helped me figure out a better way to teach this quilt and many others that use strips. It's also helped me determine the best way to fix the problem so it can be finished and not tossed in a bin and forgotten. So, I'm glad I offered and that my student let me do this. I only have ten more strips to add (nine, after I sew on the one that is pinned to the top), so this should not take long. Yippie!

The purple mini quilt on the left is the insides of what will be a 12" Hoop Quilt. The fabric below the quilt will be the binding on the outside of the hoop. 

I decided I wanted to make a Hoop Quilt that reminds me of Mardi Gras. This one will be 18", and here's the center of that. I could not get a good picture, but the blue fabric is actually purple. I'm going to love this!


These fabrics are all left over from making a bunch of new Stacking Pop Ups that I made this weekend. 


Aren't these fun? They make great gifts and are easy to make. The second one from the left  and the smallest one on the right provide a better picture of the purple fabric. You notice that I've collapsed the yellow pop up in the picture below. I did that so you can see how they work. 


These will eventually make their way upstairs into the guest rooms, which will be fun, because the black dot fabric is glow in the dark.  :-)  In the mean time, they will go to Chestnut Ridge Sewing Center for class samples.

What are you working on today?

Check out the quilters eye candy at


and

Beth's Monday Making