Showing posts with label Tammy Silvers. Show all posts

Tuesday, January 31, 2023

More Sample Sewing

The last few months I've been busy with sample making and pattern testing. I shared some pictures of quilts I recently made for Myra Barnes (Busy Hands Quilts) and today I'll share the last two quilts I made for Tammy Silvers (Tamarinis)

I'll tell you right off that these pictures are not good and they do not do these quilts justice.  Sorry Tammy! I actually had them packed and ready to send to her when I realized that I had not taken any pictures. I unpacked the box, threw them up on the design wall, took these two pictures, and got them packed up again just in time for the mail carrier. Whew! It was close, but I made it.

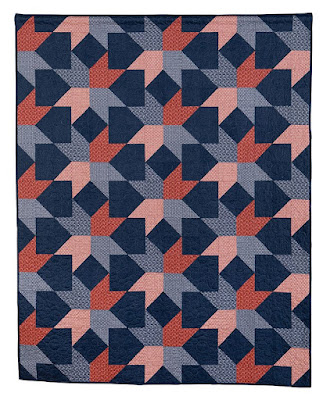
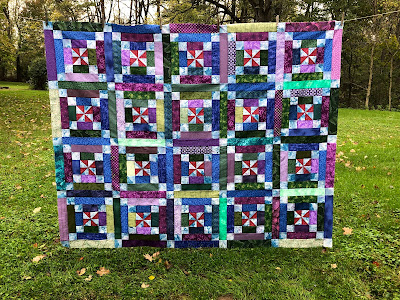
This is Fizz and it is much easier than it looks. Tammy used the Studio 180 Tucker Trimmer, but I did not. Either way, this is a pretty quick quilt to make and I love the modern vibe it gives. This quilt measures 51" x 68".


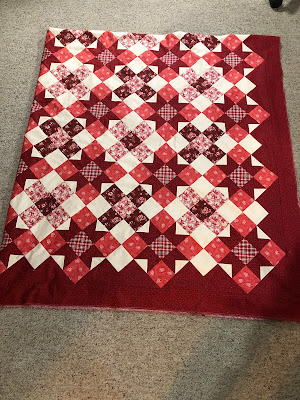
While trimming the triangle units, you will have what are normally "waste" units. But, in her infinite ability to "waste not, want not," Tammy created a bonus quilt that is just as fun as the "real" quilt. This measures 42" x 48". 


Not bad, huh? One pattern, one set of fabric, and two quilts. 

I'll be back tomorrow with my block for the Monthly Color Challenge hosted by Jen of Patterns by Jen

I'll share a secret... I followed Tammy's example and did a little more than the basics. Be sure to come check it out tomorrow. :-)

Sunday, July 10, 2022

A New Project To Share

So much for posting more frequently! :-( 

Honestly, I've not just been sitting around eating bon bons and twiddling my thumbs; but since I haven't been sharing anything here, it certainly feels like that's the case.

In the past two weeks, I have completed a couple of secret sewing project for Tammy Silvers that I can't show yet, but I can show snippets. The first quilt is a Christmas quilt, and it is adorable. 

Take a look at this block The quilt is fun and easy to put together and I think I am going to use the pattern to make a wall hanging and table runner. I may even make a few placemats to go along with it. It really is that adorable!


I completed another secret project for Tammy and it involves a lot (320!) flying geese units. 


Yikes! That was a lot of trimming! I used a Studio 180 Wing Clipper to trim everything, so that made it much easier and faster. 


I've made some samples for upcoming classes, but I haven't taken pictures yet. Maybe this week...

I recently taught a Granny Squares Quilt class that was fun. I made the original sample I use for class back in 2014 and it was made using very traditional/30's reproduction fabrics. (I made a second version of this quilt in late 2014 that is very different, but it was made using a specific fabric that is no longer available. Check that out HERE.) 


While I still like the original quilt (and second version), I decided I wanted an updated and larger version so I headed to my stash and pulled out an older Alison Glass Sun Prints 2.5" strip pack. I found a fabric that I liked for the background and made up some blocks and step-out samples. 


I needed to add a couple of fabrics to end up with the required number of blocks, so I pulled two from my stash that I felt blended well. I am happy with the choice. 


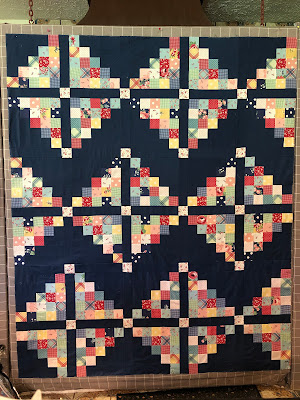
I sewed and trimmed 48 blocks and decided to put them up on the design wall right away, instead of putting them away and work on something "more pressing." That's just one of the many ways I end up with a bunch of UFOs and I was determined that would not happen with this quilt.

Here are the blocks, with no sashing added yet. I wanted to get an idea of the layout and be sure no two adjacent blocks had the same fabric. Until I put this on the wall, I didn't realize how many yellow fabrics I used in making the blocks.  hahaha


I have started to sew in the vertical sashing strips and then sew rows together. After that, I'll add the horizontal sashing and decide about a border. I have a fabric I am considering, but I'm not sure about it and won't be until that top is complete. 


I have projects on which I should be sewing, but I needed a break from "required" work and this is perfect! I am looking forward to seeing this updated version of a very traditional pattern. :-) 

Sunday, May 22, 2022

Whew! It's Been a Long Time

It sure has been a long time since I've posted. I thought about posting many times over the past two months or so, but I could just never find the time. Well, today's the day that I decided to make some time.

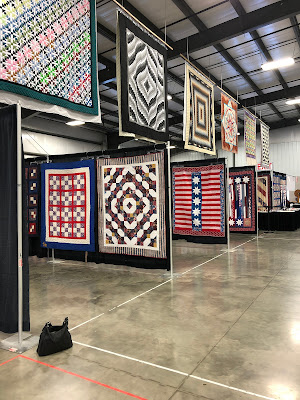
I've been busy creating beautiful quilts (some for myself, but more for designer samples), filling a long-term sub- teaching assignment, and just plain trying to play catch up. Jack and I had a wonderful time last month at the AQS show in Paducah. We traveled with six friends and had a magnificent time with them. This was our first time going to the show and I'm pretty sure that it won't be the last. The quilts were amazing!

As I said earlier, I've been sewing samples for a couple of designers. I'll share a few pictures today and try to share more over the next week or so.

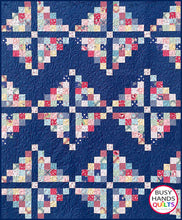
As you probably know, I sew quilt samples and test patterns from Myra Barnes of Busy Hands Quilts.  I enjoy creating with her patterns and was honored to sew to a couple of quilts for her recently. Myra sent these fabrics for Waterfall, which is quite easy to make. (This is the third one I've sewn for her.)  


The resulting quilt was spectacular, even though my picture is not!


While is looks the same, Waterfall II is made using just once color family. These are the fabrics Myra sent for that quilt.


These were all used in the Waterfall quilt shown above; but this time the fabrics are all blue. Again, a stunning quilt resulted.  


I just received fabric from Myra to create another Waterfall II quilt and I can't wait to share that with you. It is going to be gorgeous. 

Besides sewing for Myra, I've been sewing for Tammy Silvers of Tamarinis. Here is her Juxtaposition quilt made using Kaffe Fassett fabrics. 


This is one of my favorite patterns to use when I need a quick and easy-to-make quilt. I've made it twice before and it always looks great, no matter if you choose the three fabric version or the more scrappy one that is made using pre-cuts. Here are a couple of pictures of two quilts made using the three fabric method. These were taken before the quilts were trimmed, quilted, and bound. 


I'll update with more pictures soon. In the meantime, I hope you have the opportunity to take the advice that I found on a candy wrapper. :-)


Friday, December 31, 2021

Quilt Wrap Up - 2021

As has been pretty darn obvious, I have been away from the blog for a few months. Life just got crazy and I had to make decisions on how to spend my waking hours. Blogging was put on the back burner, and I'm ok with that. 

When I made that decision, I vowed to post some pictures near the end of the year to share some of my projects. I guess I can't get any nearer to the end of the year than this, can I?.  hahaha 

So here it goes... lots of pictures and some explanations and in no particular order. There were other projects, but I chose a handful to share. Here's to hoping 2022 is more blogger friendly for me.  :-) 

Isn't this beautiful?

These sets are just one side of a pattern I recently tested for Myra of Busy Hands QuiltsLet me introduce you to Belle!


I have to say that I fell in love with this quilt while making it. I love all the fabrics and how I was given free rein to place them as I wanted. I will admit that scrappy, even controlled scrappy, is not always easy for me. I am working on that and beginning to enjoy the process and results more each time I do it. 
I made a few other quilts for Myra and have enjoyed them all. Patterns are available for all of these. Here's the link to her website - Busy Hands Quilts

This is Forever Stars. This is a very easy quilt to construct and I love the results. I've made two of these for Myra and one that I gave away as a Quilt of Valor. Do I have pictures of those? Of course not. I guess my picture taking was put aside like my blogging. 
This is a queen size Brick Cottage Lane 2 and it is beautiful. There is a consistent white background fabric, but everything else is a variety of batiks. As with all of Myra's patterns, the pattern includes multiple size options. This pattern also provides instructions for two different construction methods - strip piecing, which I used, and cutting and sewing a zillion individual bricks.  

This next quilt is also queen size and since I didn't have a large enough space to take a picture, I folded it and am only showing one quarter of it. (My quilt holder/namer/helper - AKA Jack, wasn't available to help with this. 😊) This is Calliope. I love this color variation, but it is also stunning in other colorways. Be sure to check out the samples that Myra has on the website. I am kind of partial to the quilt that is dark blue, mint green, and red


This next picture really does not do the quilt justice; and for some reason, I didn't take any other pictures of it. Shoot! I'll share one of Myra's pictures so you can see it in all it's glory. 

This is My Farmhouse and it is beautiful! Do you recognize the fabrics? These are the same ones used in Belle that I shared above. The background looks like it's black, but it's really a beautiful navy solid. 


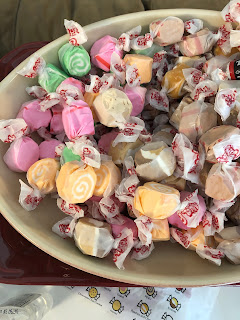
Who doesn't love taffy? There is a funny story that I have with my sisters that involves taffy and our mom. It's too long to share here, but let's just say that they often have taffy available when we are going to spend a lot of time together. 


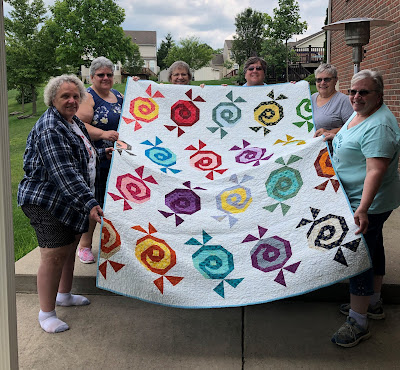
So what does taffy have to do with quilting? Well, ever since our oldest sister Kathie turned 60, the other sisters make a quilt for them to celebrate their 60th birthday. We have always tried to make the quilt relate to the sister, so this year my clever sisters made me a taffy quilt! 


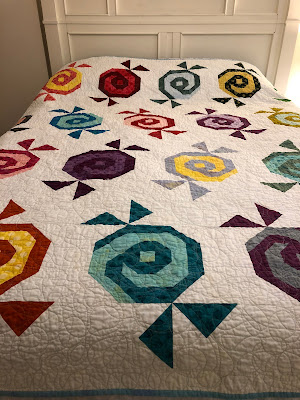
The pattern is called Taffy Twirl and I just love the quilt. Doesn't it look great on the bed? This has been used every night since I received it. 


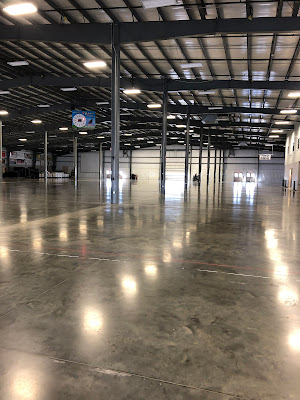
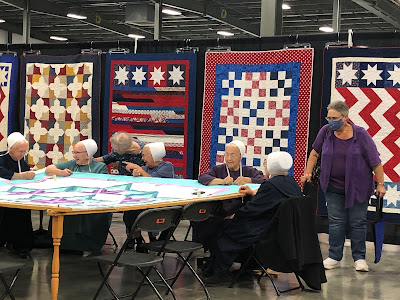
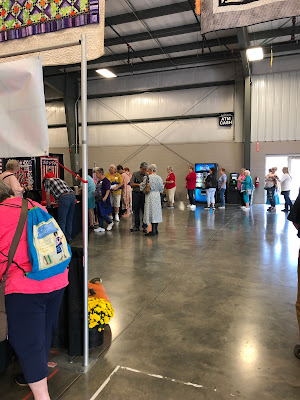
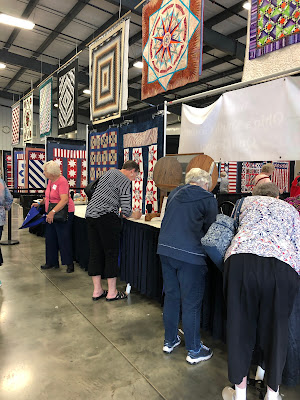
A little break from my quilts...As many of you know, I am one of the organizers of the Ohio's Amish Country Quilt Festival that is held in September each year. After a very revised event in 2020, we returned to the event center, made adjustments to the layout, number of vendors and attendees, and opened the doors for an event in 2021. The facility is HUGE, which was great to accommodate the new spacing we needed to have. It still amazes me how we can go from this empty building... 


to this, in just two days of setting up booth, hanging quilts, etc. 


I was very happy with the results and attendance and am looking forward to returning to a "normal" event in 2022. 

As you know, I love to test patterns for Tammy Silvers. I think her patterns are fun and well-written. She introduced a new pattern named Jester back in the Fall, along with a signature fabric line for Island Batiks. I loved the fabric and pattern. 


Tammy was coming to an event at Chestnut Ridge Sewing and we needed a one-day project for her to do, so I suggested that we make a table runner or placemat version of Jester. She was on board with that, wrote up the instructions, and I tested them for her. Here are my versions, using scraps that I had on hand. 


Like many of you, I have projects that have been set aside for a variety of reasons. This next quilt was one of them. I know why it was set aside many years ago, but I could never bring myself around to finishing it. It was one of my first quilts started and while I had big plans for it, I just fell out of love with the fabrics. Every time I pulled it out to work on, it would end up back in the bag and set aside for another day.


Fast forward to this past October when I pulled out the bag (again!) and told myself that I either had to finish the project, give it away as is, or throw it away. Well throwing it away was not really an option and I wasn't sure that I wanted to hand this off to someone else to fix my mess. As you can see from the next couple of pictures, I think my fabric choices were questionable (quality as well as colors) and I really didn't pay attention to the "rules" of quilting. I guess 1/4" seams, proper pressing, and lining up fabric correctly were just suggestion that I chose to ignore. :-) 


I bit the bullet and got to work. I had to throw in a couple of additional fabrics to make up for some really poor quality ones and this is the result. 


While finishing this, I decided that I needed to make another one of these quilts. I still liked the pattern and felt I needed to "do it right" this time. I made a three color version and used only four fabrics. I love the results! 


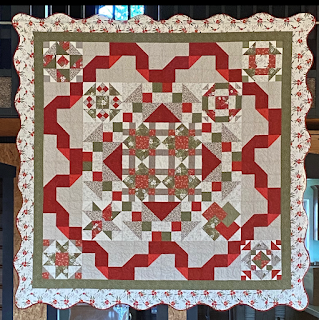
I designed and made the Amish Shop Hop quilt and like the results. As with so many other things, the fabric was delayed in arriving so the quilt had to be made in a very short period of time. I was very happy that the layout and construction was quite simple this year. The quilt is 91" x 91" and I love the scallop border. I used the Krista Moser scallop tool, which made it simple to do.  


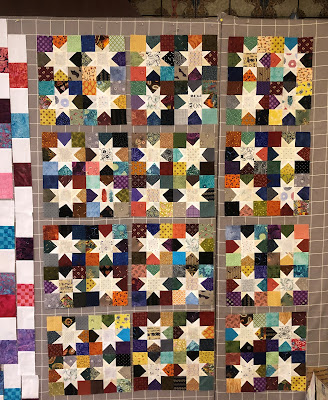
I told you earlier that I was embracing the scrap quilting process and to that end, I made a Wonky Wishes quilt. This is a Bonnie Hunter pattern and the construction is easy, but a bit time consuming. I don't have a picture of the finished quilt, but here it is prior to adding the sashing. To be honest, the quilt is still just a top because after putting it together at this size (my revision, not Bonnie's), I decided that I want to make it larger. I will be teaching this quilt at Country Fabrics in Feb. so the top is hanging there until then. I'm making additional blocks that will be used as step-out units for the class and then I'll add those to the top to make it larger.


Do you see my Brick Cottage Lane 2 strips on the left? I was working on both of these quilts at the same time.   

I know this was a lot of pictures, but I hope you enjoyed it. 

Happy New Year and here's to more blogging in 2022. 

Tuesday, October 20, 2020

A New Project

I love it when a leader/ender project becomes the focus/main project!

I've been doing a lot of secret sewing projects and as usual, I can't share them just yet. But, I can share the latest leader/ender project that has just moved to the main feature project.  

Rock'n Roller Coaster


This is a very special project for me. I was honored to meet and spend three days with both of these awesome ladies back in September during the much-revised Ohio's Amish Country Quilt Festival. I knew that I wanted to create something special from that time together and this is the result. 

As many of you know, I test patterns for Tammy and love doing that. (We've had lots of communication over the past couple of years, but we'd never met in person, so meeting her was really fun!) What you may not know is that Tammy designs fabric too. I've been eyeing her Kismet line and was thrilled when she gave me a set of 2 1/2" strips. WooHoo!

That made my fabric choice for my special project easy. Whew! Now I just needed to decide on a pattern. Low and behold, Krista's Rock'n Roller Coaster pattern uses 2 1/2" strips. Decision made!

I typically have a patriotic quilt as a leader/ender project, but I decided that I wanted to take a break from that and start this quilt. It's quite easy, and the hardest part was deciding which strips I wanted to use because the quilt only uses 15 print strips. I have lots left over and am looking forward to using them for another project too - one that I've designed.  :-)

Of course moving the leader/ender project to the main project means that I need to start a new leader/ender project. Truth be told, I have some that I could have and maybe should have started up again, but I decided to start work on my Ava's Garden quilt, which is designed by Myra Barnes of Busy Hands Quilts. I am honored to test and sew for her too, and I decided that it would be cool to include one of her projects in this mix of things. (Of course I am working on a secret sewing project for her right now, but I wanted something that will be mine to keep.) 

Ava's Garden quilt started

I have always liked the Churn Dash block and the fact that these are made from 10" squares is great because I just happened to have a Berry Sweet by Elyse DeNeige 10 Karat Crystals pack sitting around my sewing area. I even had the yellow background fabric. Sweet!

I love the picture above. I think it shows how I feel about myself as a quilter - a nice healthy mix of traditional and modern. :-)

Stayed tuned for updates of this and those secret sewing projects I mentioned earlier. :-) 

Monday, September 7, 2020

Design Wall Monday

I've been able to get a bit of sewing done and that always makes me feel good. Besides some secret sewing, I actually took something from the "To Be Quilted" tub (AKA - Tub of Shame) and made the time to quilt it.

This is To The Point, a Tamarinis pattern. 

I pieced this quite some time ago (back in Dec. or January) but wasn't sure how I wanted to quilt it. Actually, about half way through piecing the diamonds, I realized that I didn't give any thought to the shadowing that would happen with the darker print fabrics. I decided that it was too late to turn back, so I just went ahead and finished the top. The quilting dilemma was really a question of whether or not I could do anything to help hide the shadowing. I couldn't decide what to do, so this top got set aside for another day. 

That day happened last week when I finally decided that I was just going to quilt the heck out of it with smallish meandering in the background (it's not plain white, but rather a white multi-color confetti) and an outline stitch close to the diamonds. This did not solve the shadowing issue, but the quilt is quilted and I'm happy.

I have no yardage of any of the print fabrics, so the next question is what to do about binding. I posed that questions to a group of people and was kind of surprised that many suggested using the background fabric. Their logic is that by using that, it would not distract from the diamonds. I have to admit that I'm not a huge fan of light binding, but I get what they are saying. There were a variety of other ideas - bright red, black, or anything dark. My husband suggested a fabric close to one of the light diamond fabrics. I'm still mulling this over and will check my stash. That will most likely be what makes the decision for me. :-) I'll post pictures when I've made my choice. I want to get this bound before Thursday, as I'll be meeting Tammy Silvers and would like to show her this quilt.

I recently shared my fabric choices and the beginnings of my Perpetual quilt. I will not have it completed by this weekend as I had hoped, but I do like what I have so far. All of the block quadrants are made and I just have to sew those together to complete the blocks, and then sew the blocks together. 

The pattern includes instructions for a bed runner, lap quilt, and bed quilt. I'm making the bed quilt, but I played around with some of the blocks so I could see what the runner would look like. I love this! This is made from just one of the two blocks. I REALLY like this and think I may have to see if I have enough extra fabric to make one.


Here is a very small version of the bed quilt. I know that I am going to love this quilt so it will not be put aside. That secondary design is pretty cool. 


I have some finishes to share - personal and secret sewing, but I'll wait until later this week. 

What are you working on today?

Check out the eye candy at 


and