Wednesday, October 25, 2023

Tutorial - Scrappy Leaf Potholders

I completely forgot to share my Scrappy Leaf Potholder pictures and tutorial. Oh my...


I've recently been trying to use scraps and made bowl cozies. Those were fun and easy to make and l really liked how they turned out using scrappy strip sets. 


Since I made quite a few strips sets, some of which were kind of small, I decided to use the same concept for making potholders. These really are fun and easy to make. And...I love how they look!

Here's the process I used for making these fun and function potholders.


Supplies

Fabric Scraps - at least 8” in length and in widths ranging from                               1” – 2 ½”

Backing Fabric – at least 8” x 11 ½”

Bias Binding – approximately 2” x 30” per potholder

Cotton Batting – at least 8”x 11 ½”

Insul-Bright – at least 8” x 11 ½”

Leaf Template


Instructions

Download and print the leaf template

(I'm having trouble getting the download to work properly. If you want the leaf template, leave a comment and I'll send it as a pdf to you.)

Cut out the leaf and cut the leaf in half along the dotted center line.

Cut fabric strips in various widths ranging from 1” to 2 ½”. 

The strips need to be approximately 8” long.

Lay out strips and arrange them in an order that is pleasing to you. Using a ¼” seam allowance, sew the strips together. Continue sewing strips until you have a piece that measures at least 11” long. Press seams in one direction. 

Sew at least 2 strip sets, using different fabrics, or fabrics placed in different locations in the strip set.


Lay the right half of the leaf template on one strip set, tilting the tip to the right. 
Cut out the half leaf shape. 
Rotate the strip set and cut a second right half of the leaf template. 


With the other strip set, lay the left half of the leaf template, tilting the top to the left. Cut out the half leaf shape. Rotate the strip set and cut a second left half of the leaf template.


Sew the left and right leaf halves together and press seam open to reduce bulk. You will have 2 potholders ready to be quilted. The more strip sets you make, the more you can mix and match the sides and have a nice variety of “looks.” 

One benefit of cutting strips a variety of widths is that you don’t need to worry about matching seams. Sometimes they will match up perfectly, while others will be more whimsical and will be playfully mismatched.

Layering the Potholder

*In my house, the side of the potholder that will touch hot dishes is always the backing. It is usually not pieced and the side that I don’t mind getting dirty or even burned. The shiny side of the Insul-Bright faces the heat source so it can reflect the energy back to its source. The cotton batting is next to the top/pieced part of the potholder and provides a barrier to protect your hands.

Layer the potholder as described below:

Backing – right side DOWN

Insul-Bright – shiny side down toward the Backing

Cotton Batting

Leaf Potholder – right side up.


Quilt as desired.  


Binding

The leaf is curved, so bias binding will make binding this much easier. I like to hand stitch binding, but you can sew it down by machine, if desired. 

Trim the potholder around the leaf edges. I used 2" bias binding and used my favorite binding method of sewing to the front and then hand stitching it to the back. 

Enjoy!!

Wednesday, September 20, 2023

Scrap Sewing Continued

I am happy to say that I worked with the pile of scrappy strips that I shared yesterday. 

Last night I sewed a few strip sets.  


As you can see from the picture taken after they were pressed, the edges do not need to be even. The length of the sets needed to be approximately 12" for the long ones and 8" for the short ones.


The 12" strip sets also needed to measure at least 11" tall.


The 8" strip sets also needed to measure at least 11" tall. 


I decided to work with the long sets first. I am presenting some demos at an upcoming event at Chestnut Ridge Sewing, so I decided to "practice" one of my demos using scraps, rather than yardage. I'll have a sample of how I used these strip sets with me. If you are in that area Thursday or Friday, stop in and see me. I'll be in the classroom. :-)

I am sure many of you have made bowl cozies, but I will admit that I made my first ones this past summer and really enjoyed making them. Here are a couple of pictures of one that I made. 


I used the Creative Grids Bowl Cozy Template Set and love the fact that I can make two sizes with it. I like the scallop edges, and think it makes picking up the cozy really easy. Plus, I just like the way it looks. :-)


I decided to make a small cozy using scraps and I really like how it looks. (There is a a template available from The Gypsy Quilter for use with 2.5" strips, but I really wanted to mix and match strips widths.) I also used the pre-cut 100% cotton batting, which made this cozy go together very fast. (Taking pictures of this is NOT easy.  LOL)


Just because I can, I am going to share a few pictures showing my process and a few of the adjustments I've made from the original pattern. One of the reasons I had not made any of these prior to this summer was that quite honestly, I was never much impressed with them. I always felt that they kind of looked sloppy and I didn't like the "fullness" or "not fully quilted" look of the ones I've seen. I am a quilter and while I don't like overly dense quilting, I really don't like quilting that is spaced too far apart. (Yep! I'm picky.)

Ok...back to the process. As you can see from the strip sets below, there is no real rhyme or reason to my strip sets, other than that they should measure at least 11" high by 12" long. I do prefer to have a wider strip on the ends and not a really narrow one, like 1". I think that makes any needed trimming easier. 


I squared up the strip sets to 11" x 11", as per the instructions on the template set. (I've seen instructions that say to start with 10" - 10.5" squares, but that is too close for comfort for me.) 


Using the instructions on the template set, I folded and cut the strip set to end up with this odd looking piece. The cut out V sections are for the darts that will be sewn after the pieces is quilted. This, and the curved sections create the scallop look that I like so well. (I'm not going to show how to cut the template. It's pretty straight forward if you follow the instructions on the package. That, and the fact that I forgot to take pictures. LOL) 

Using a chalk marker, I drew the lines I wanted to quilt. This is more than usual, but as I said earlier, I like these cozies to be more heavily quilted. 


For this scrappy cozy, I also stitched in the ditch of all the seams. Here is a picture from the back, showing all of the lines of quilting that I added. It looks like a hot mess, doesn't it?  


Here is a picture of the back of the original cozies that I made. This shows that I sewed a few "extra" lines on those from what is suggested on the instructions. I really like adding the stitching that creates a square along what will be the bottom of the cozy. I feel like it helps them stand more upright. Honestly, you can quilt as much or as little as you like. It doesn't matter. You can even use decorative stitches, if you want. You are the decision maker here. :-)


So...here is my scrappy bowl cozy. I like it and have enough strip sets sewn to make at least two more. I am also going to make a couple of the large cozies. That strip set will measure approximately 17" x 17" and be trimmed to 16" square. I'll follow the same procedure, including using the large pre-cut batting.  


Now...off to work with the small strip sets. That project is a little different, but along the same lines. It will also be used in the kitchen. :-) 

Tuesday, September 19, 2023

Working with Scraps

As I've recently posted, I have been very busy with "work" type quilting and I really want to sew something that is "just because." I know that the project needs to be quick and mindless, yet fun. 

So...while trying to clean up and organize my sewing area, I started playing around with an idea on a way to use some of my "smallish" pieces of fabric. You know what fabrics I mean, right? Those pieces that are too big to throw away, but too small to put in the tub with yardage. I know that I could (and I have) cut them into small segments to have on hand for scrap piecing, etc. Bonnie Hunter calls it her Scrap User's System, and I've used that on occasion. But honestly, I want to sew something and not cut and organize my overwhelming pile. (Yep, I'm kind of being a baby right now!) 

I needed to simplify things and just do a little bit; so I pulled out a bunch of small pieces of fabric that remind me of Fall colors. I pressed what needed pressed and reviewed my project idea. I made some notes, decided what I needed and felt pretty good, knowing that I will soon be creating/sewing something.

I will be working on two projects at the same time (of course!) and decided that for one of the projects, my strips need to be 12" long and for the other project the strips need to be 8" long. (Those lengths may be adjusted after I figure out what I'm doing.  hahaha)

I cut what I could lengthwise and then cut a variety of widths of fabric ranging from 1" up to 2 1/2". I put the strips in a pile, based on the length size. 

Here's what I have. 


I'm not going to lie. It feels pretty darn good to have cut up a bunch of fabric! You might recognize some of these fabrics. There are Kim Diehl fabrics, pieces from recent projects, and even some very old Thimbleberries fabric. I have no more of these fabrics in any yardage or even large pieces, and that feels really good. I am feeling better already and I haven't even sewn a stitch yet. LOL

Next, I'll review my the notes I made for the projects and start sewing. I'm still finalizing my project details and process, but I'll sew a test later today and go from there. I may try to sketch out something in EQ, but I don't think I want to do that right now. I just want to sew...

I'll take pictures and share my progress over the next few days. 

Monday, August 28, 2023

More Quilts

As I said in my last post, I've been doing some sewing, but of course not as much as I'd like to.  Isn't that true for all of us?

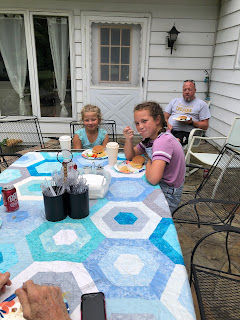
I love that my grandchildren like to use my quilts. They like sleeping with them, making tents and forts, and they especially like using them for picnics. 


Avery and Peyton chose this quilt that I would say looks pretty darn much like winter because the fabrics are frosted and the quilting is a bunch of snowflakes. They said that is EXACTLY why they chose it. It was very hot that day (upper 80's) and they said that just thinking about snow would help keep us cool. I like how they think! 

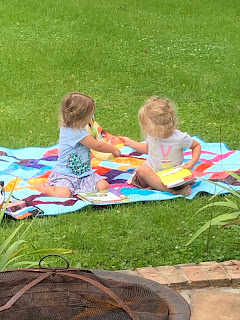
I know that these next pictures will drive some of you crazy, but I really don't mind that my quilts get taken outside and put on the ground. If I don't want a particular quilt used, it is kept in a "safe" place and the kids all know that they are not allowed to make their choices from those quilts. I have never had a problem. 


The kids all like using colorful quilts and if food gets spilled, I just gather up the quilt and put it in the washer. These two quilts have been washed dozens of times and I think they have many, many more picnics in their future. 


It made my heart sing watching the twins "reading" while sitting on the quilts. 


These two love to be read to and to "read" to other people. After this last picture was taken, I joined them on the quilt and relaxed while they "read" the most amazing story ever. That's what they called it and I have to admit, it was a pretty good story. 😊


I think I'll take a break and read tonight. I hope you get to do something that gives you pleasure! :-)

Thursday, August 24, 2023

I'm Baaaaack!

Whew! It's been a long minute since I've posted. I've been busy doing all kinds of things, but obviously blogging wasn't one of them. I'm breathing again, and I'm feeling the desire to blog. Yay!!

I'll be sharing quite a few things that have been happening over the past few months (ok - almost five months, but who's counting?), but I won't be sharing them in any particular order. 

I was happy to do some applique work for my daughter Lynn to include in a raffle for school. While I love the look of it, I don't love to applique. Honestly, I don't have the patience for it. I admire those of you who applique, but I can only seem to do it in small amounts of time. This project was very simple and it turned out ok. It's a simple applique on fleece, which was pretty darn easy and done on the machine. 


It's football season and I've offered to make at least one more of these for Lynn, if they have another raffle. I've also offered to make more for those chilly Friday nights when the family heads to the stadium to watch a school game. 

Speaking of taking a quilt with you when you go out...
Jack had a couple of outdoor singing gigs with the Symphony Chorale this summer and they were all wonderful. Since he always has to arrive early for practice, I took binding with me.


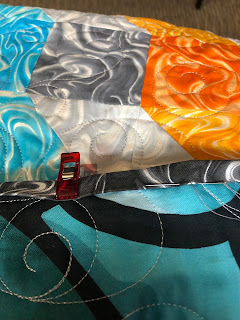
The quilt is called Ombre Ripple and the pattern is by Pine Tree Country Quilts.


For some reason I don't have a picture of the full and completed quilt. I'll have to try and rectify that as soon as I can. Right now, the quilt is hanging up at Chestnut Ridge Sewing because I'll be teaching a class in October. I used a variety of Pearlized Marble fabrics by Kanvas Studio for Benartex. They are perfect for this quilt and there are so many colors from which to choose! 

I'll be back soon with more eye candy. Even though school has started and I have been assigned some sub-teaching days (including today), I'll be spending time sewing and getting ready for a variety of upcoming classes.  :-)

I hope you get a chance to do what makes you happy. 💗